


iOS Penetration Testing Part 3
This post is part 3 of a series giving an overview of the most useful iOS app pentesting tools, research by Allyson.
‘Frida’ is a dynamic instrumentation tool that is primarily useful for runtime manipulation and dynamic analysis. ‘Objection’, created by Sensepost, is another useful tool built on top of Frida that makes analysis much faster and easier.
Also Read:
- iOS Penetration Testing- App Decryption And Jailbreaking- Part 1
- iOS Penetration Testing- Cycript A Runtime Manipulation- Part 2
The series will be assuming that the user is using Electra jailbreak. I am specifically using iOS 11.1.2, but most of the tools in the series should work on any version of iOS 11.
1: Installing Frida and Objection
First we will want to install Frida on our device. You’ll want to go to ‘Cydia’, then to ‘Manage’ > ‘Sources’ > ‘Add’ > ‘New’ and then enter the following:
https://build.frida.re
Go ahead and install the package.
Now, we will setup Frida on our computer by installing Objection (which includes Frida!).
Objection’s source code can be found here:
https://github.com/sensepost/objection
Installation is easy – you will need to have python3 and pip3 installed, then simply open up a new terminal window and type:
pip3 install objection
Now you should be ready to go.
2: Running Objection
Now we are going to attach Objection to our chosen target app. Make sure your phone is connected to your computer by USB. In a terminal window on your computer, type:
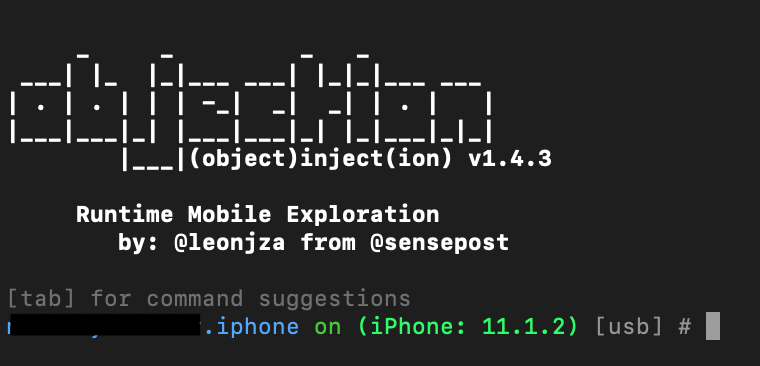
objection --gadget AppName explore
Now you should see this output:
Note: Occasionally you might see an error that Objection was unable to connect to the Frida server – in that case, you simply need to ssh into the device and run this command here:
frida-server &Copy
3: Exploring With Objection
Now we will look at some of the most useful commands that Objection has to offer.
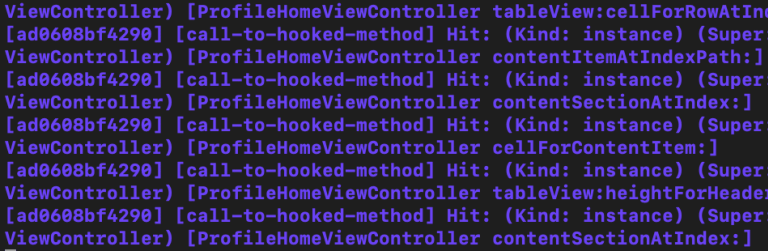
Often, you will want to begin your dynamic analysis by monitoring the method calls made by the application on certain user actions. At this point you should have a list of functions/classes of interest from runtime header analysis covered in Part 1. Say we’ve identified an interesting class called ‘ProfileHomeViewController’. We can tell Objection to monitor any method calls made by this class with the following:
ios hooking watch class ProfileHomeViewController
Now as you interact with the app’s login screen you should see output like this:
You can also go more in depth and hook into specific methods. Take a method -[ProfileHomeViewController loginOrRegisterButtonTap]
ios hooking watch method "-[ProfileHomeViewController loginOrRegisterButtonTap]"
You’ll see output each time the method is invoked. You can also add useful flags: –dump-args or –dump-return to view the arguments passed to the method and the method’s return value respectively.
You can also easily override return values for functions that return a simple boolean (Objection only allows this feature to work with BOOL values – for more complex return types you will have to use Frida, which we’ll get into later).
ios hooking set return_value "-[ProfileHomeViewController isPasswordValid:]" true
Other useful built in commands:
ios sslpinning disableCopy
Will attempt to disable any SSL pinning functionality – this will not always work depending on the app’s implementation.
ios keychain dump
Will dump the contents of the keychain. This can sometimes reveal sensitive information stored by the app.
ios jailbreak disable
Will attempt to evade jailbreak detection.
There are many more features to Objection that aren’t covered in this quick summary – to view all the available commands and how to use them, you can look here:
https://github.com/sensepost/objection/tree/master/objection/console/helpfiles
4: Using Frida
Frida is not as simple to use, but allows more in depth control of your manipulation. You can write custom javascript or python scripts to perform many of the same functions as Objection and more.
For example, here is a basic .js script to intercept and replace a function’s return value:
if (ObjC.available)
{
try
{
var className = "ProfileHomeViewController";
var function = "- username";
var hook = eval('ObjC.classes.' + className + '["' + function + '"]');
Interceptor.attach(hook.implementation, {
onEnter: function(args) {
},
onLeave: function(retval) {
var newRetval="fakeUserName";
retval.replace(ObjC.classes.NSString.stringWithString_(newRetval))
}
});
}
catch(err)
{
console.log("[!] Exception: " + err.message);
}
}
else
{
console.log("Objective-C Runtime is not available!");
}


With Frida, we can perform more complex manipulation like this (replacing a string return value) that we can’t do with just Objection.
You can attach this script to the process by running this command from your computer:
frida -U -l fileName.js AppName
Frida has a lot to offer, and there’s no way I could cover it all in a single post — for further reading, check out their official documentation:
https://www.frida.re/docs/ios/
This concludes Part 3 of the series. Part 4 will cover binary disassembly and analysis.
Part 4 will go over debugging/binary patching with Hopper and lldb.
Security Research by Allyson O’Malley, she is an iOS Software Engineer at Salesforce, with an interest in cyber security and a focus on iOS app security.