


Ad-honeypot-autodeploy- Deploy a small, intentionally insecure, vulnerable Windows Domain for RDP Honeypot fully automatically.
Runs on self-hosted virtualization using libvirt with QEMU/KVM (but it can be customized easily for cloud-based solutions).
Used for painlessly set up a small Windows Domain from scratch automatically (without user interaction) for the purpose of RDP Honeypot testing.
Features a Domain Controller, a Desktop Computer and a configured Graylog server for logging the actions of the bad guys.
Automatic deployment phases
- Packer: download the necessary install media and setup the automated base virtual machine images unattended.
- Terraform: provision the libvirt virtualization infrastructure (network + virtual machines) using the packer-prepared virtual machine images.
- Ansible: Configure the infrastructure (DC, Desktop, Graylog) automatically, without user interaction.
After going through the Packer+Terraform+Ansible pipeline, the configured Windows Domain should be up and running, you could attach the RDP service of the Desktop to the public internet, and let’s monitor the events through the Graylog.
Features
Features of the running system are:
- a Windows Server 2016 as a Domain Controller
- a Windows 10 Desktop (version 2004) as a Domain Computer
- a Graylog 3.3 (Open Source edition) running as a Log Collector on Ubuntu 18.04 LTS
- Using VirtIO drivers for best performance
- Enabled RDP and WinRM Services
- Populated Windows Active Directory with random users
- Sysmon (from Windows Sysinternals) installed and running on Domain Computers
- NXLog Collector running a Domain Computers and forwarding logs to Graylog
- Configured Graylog GeoIP lookup table and pipeline for IP addresses (useful for showing a map of invalid RDP login attempts)
- Graylog World Map of RDP attacks
Host System Requirements
Virtualization needs some power of your host system:
- ~80 GB disk space for the base images and the sparse images of the guest computers.
- at least 3 x 4 GB memory for the guest machines (may run with less than 12 GB because of overcommitment)
- installed up-to-date libvirt with QEMU/KVM (official current packages in Ubuntu 18.04 LTS should work)
- Python 3 (preferably with venv) for Ansible
Tested on Ubuntu 18.04 LTS host.
Installation and Usage
First, clone the repo:
git clone https://github.com/tothi/ad-honeypot-autodeploy

cd ad-honeypot-autodeploy
Before starting with Packer, set up the intial passwords:
./init_passwords.sh
Packer
Now build the initial images.
cd packer
Windows Server 2016 and Ubuntu installation media should be downloaded by the Packer script. VirtIO needs to be downloaded by the attached get-virtio.sh script:
./get-virtio.sh
Windows 10 should be downloaded manually by getting a temporary download link and save it to the ISO folder. The download link could be obtained from here. Select the English (International), 64-bit version and save the ISO to ISO/Win10_2004_EnglishInternational_x64.iso.
For mapping IP locations on a World Map in Graylog, the MaxMind GeoIP database is needed. Unfortunately due to licensing terms it cannot be redistributed, so you have to download it manually (after registering) from the MaxMind site. The free GeoLite2 version should work, get the “GeoLite2 City” Database in MMDB format (download the GZIP and untar) and put it at resources/GeoLite2-City.mmdb.
If you do not have Packer, get the latest version from the packer.io site (download the pre-compiled binary) or try to add the Hashicorp repository to your packaging system (useful for Terrafrom also).
If you are rebuilding the images, do not forget to clean up previous builds:
rm -fr output_*
If you want to re-download the images, remove packer_cache:
rm -fr packer_cache
After these preparing steps, run the Packer builds in parallel:
./packer-build-all.sh
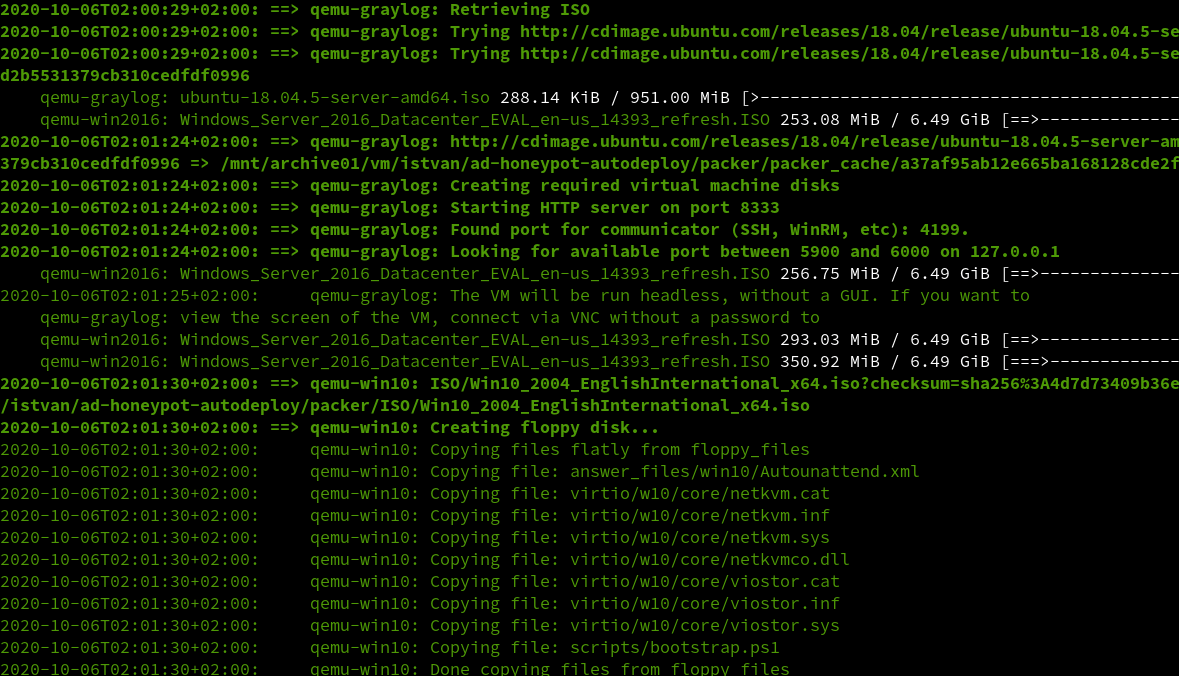
The images should be ready in a reasonable time (~20-30 mins depending on your host hardware power).
Terraform
Now the infrastructure can be deployed using Terraform.
Get Terraform (>=0.13) if you do not have it (look at the install methods at Packer, above).
Terraform provider for libvirt is also needed, get the appropriate binary from the github releases page, and also look for Terraform v13 migration notes for proper installation.
Enter Terraform folder:
cd ../terraform
Initialize the working directory (only needed for first time use):
terraform init
Build and launch the infrastructure (“apply the changes”):
terraform apply
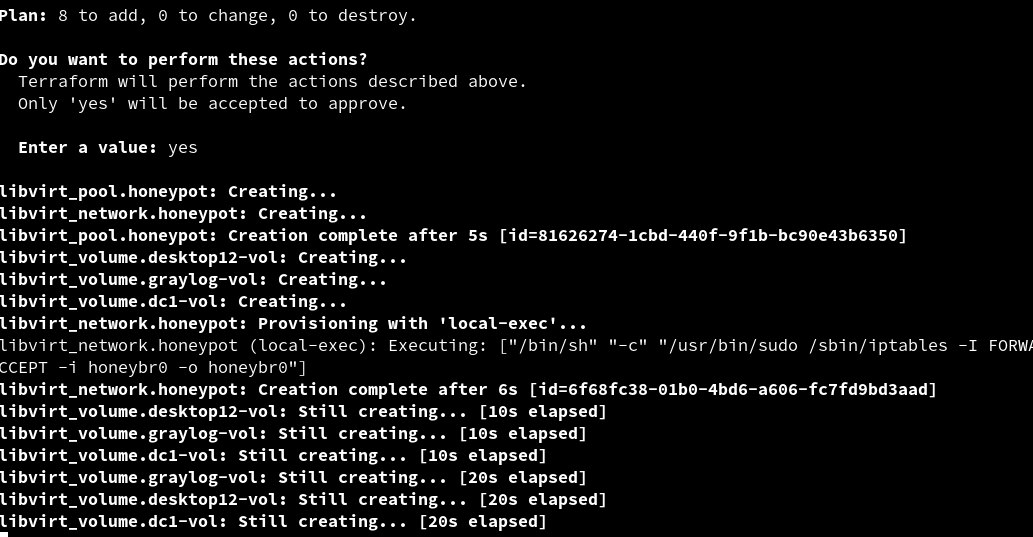
After a short time (~2-3 mins), the network and virtual machines are up and running.
WARNING: You should take care of protecting your private network. The terraform config (main.tf) provided here just contains a custom firewall rule for my own testing environment (blocking 192.168.0.0/16 destination traffic from the 192.168.3.0/24 honeypot network).
Next is the configuration phase.
Ansible
Get into the ansible folder:
cd ../ansible
Recommended installation method is installing the latest Ansible with some required additional dependencies in a Python venv virtualized environment:
python3 -m venv venv

. ./venv/bin/activate

pip install ansible pywinrm faker
For later use just activate the venv by
. ./venv/bin/activate
And just deactivate if it is not needed anymore in your current session.
You should put an SSH public key with filename id.pub into the ansible folder for accessing the Ubuntu Graylog machine with the ubuntu user (ansible will add it to ~ubuntu/.ssh/authorized_keys).
The wordlist.txt file contains some (intentionally weak) passwords for the populated domain users which can be customized.
Run the configuration phase:
ansible-playbook -i hosts setup-domain.yml -v
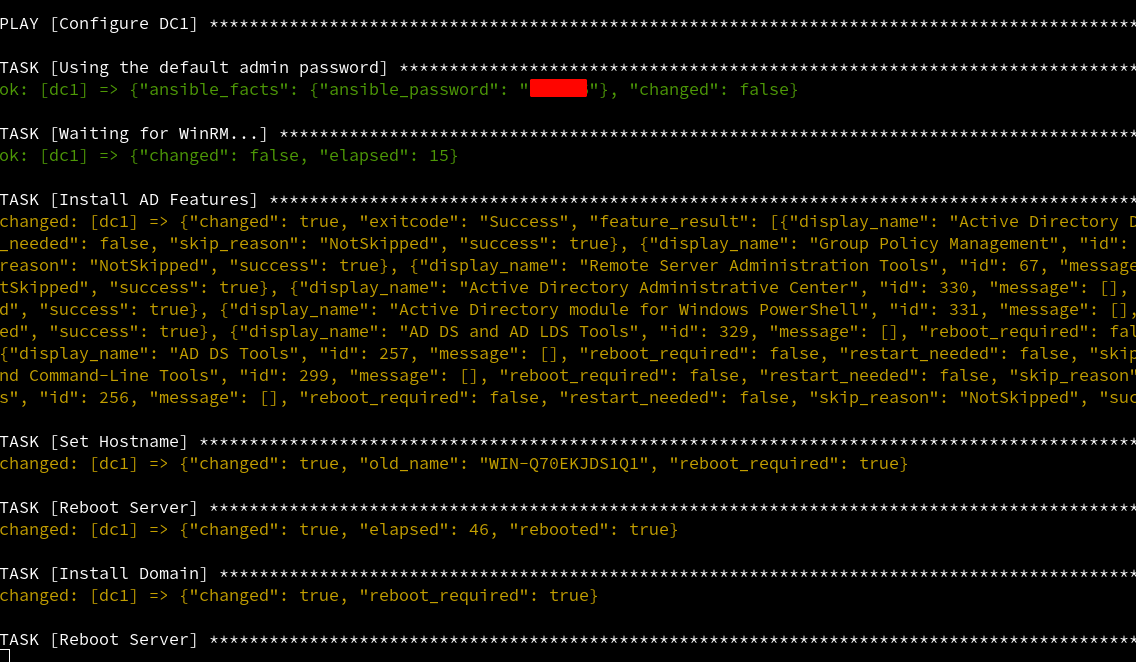
After 20-25 mins everything is ready.
The deployed system
hostname ip address operating system role
dc1 192.168.3.100 Windows Server 2016 Domain Controller
desktop12 192.168.3.112 Windows 10 (version 2004) Domain Member Workstation
graylog 192.168.3.191 Ubuntu 18.04 LTS Graylog Server
According to the libvirt network configuration (NAT), the hosts can access the public internet (if your host system allows it).
Accessing the hosts is possible through the host system. Practically using an SSH socks tunnel and proxychains for RDP or WinRM access is very comfortable.
For example, if your libvirt host IP is 192.168.0.10, create a socks tunnel listening on localhost:5000 by
ssh 192.168.0.10 -D5000 -NTv
And access the Windows 10 desktop (using an appropriate /etc/proxychains.conf configured for the :5000 tunnel):
proxychains xfreerdp /v:192.168.3.112 /u:administrator
Or, access the Graylog web interface listening on :9000 locally on the Graylog Ubuntu server by SSH ProxyJump and custom forward tunnel:
ssh -J 192.168.0.10 ubuntu@192.168.3.191 -NTv -L9000:127.0.0.1:9000
Then open URL http://localhost:9000 and you reach the Graylog web interface.
For activating the RDP honeypot, just allow public access to 192.168.3.112:3389 (for example with some port forwarding configuration on your router and iptables rules on the host machine; my helper script is rdp_public.sh) and keep watching the Graylog.