Wireshark Tutorial: Capture and Analyse Network Traffic (2026)

Wireshark Tutorial - Capture and Analysis
Wireshark Tutorial – Capture and Analysis
By HOC Team  |  Last updated: July 2026  |  |  Read time: ~20 min

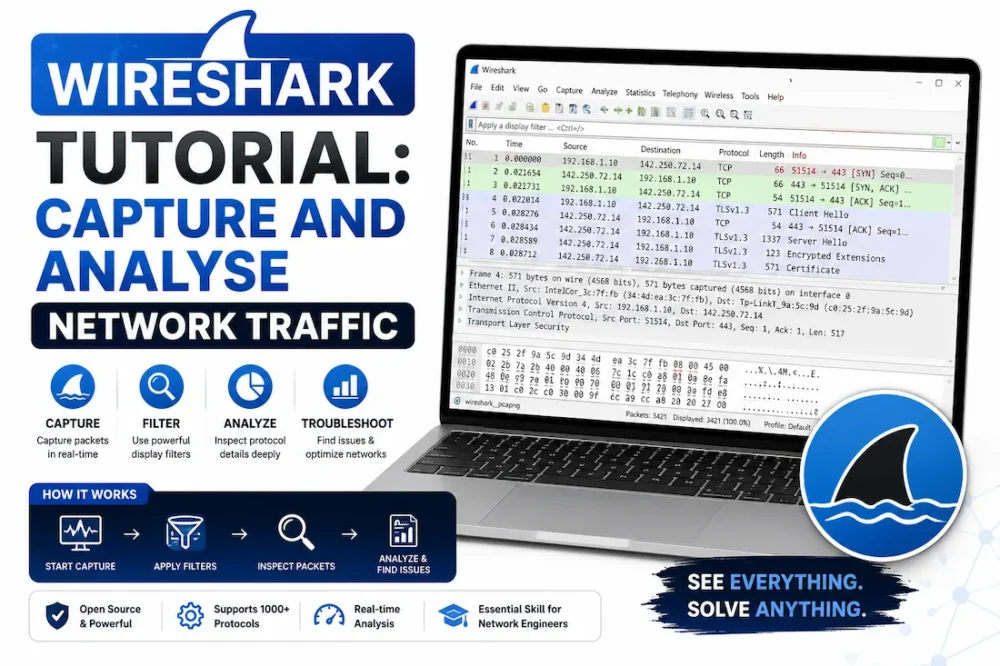
If Nmap tells you what ports are open and Burp Suite lets you attack web applications, Wireshark shows you everything happening on the network in real time — every packet, every protocol, every credential sent in cleartext, every sign of an ongoing attack. It is the most powerful free network analysis tool ever built, and it is indispensable for penetration testers, SOC analysts, forensic investigators, and network engineers alike.

This tutorial starts from zero — downloading and installing Wireshark — and takes you through capturing your first packets, mastering display filters (the skill that turns Wireshark from overwhelming to surgical), analysing every major protocol, finding credentials in captures, and detecting real attack patterns in network traffic. A complete filter cheatsheet is at the end. Jump to cheatsheet →

1. What is Wireshark and what can it do?

Wireshark is a free, open-source packet analyser that captures all network traffic passing through a network interface and lets you inspect every packet in deep detail. It decodes over 3,000 protocols — from basic TCP/IP to HTTP, DNS, TLS, SMB, FTP, and hundreds more — displaying the data in a readable, colour-coded interface.

Every time any device on a monitored network sends or receives data, Wireshark captures the raw bytes, decodes which protocol they belong to, and displays the fields — source IP, destination IP, port numbers, payload content, sequence numbers, timing — in a structured tree you can expand and explore.

🦈
What security professionals use Wireshark for
Core use cases
  • SOC analysts — investigate security alerts by examining the actual network traffic that triggered them; find lateral movement, C2 beaconing, data exfiltration, and anomalous traffic patterns
  • Penetration testers — capture credentials from unencrypted protocols (FTP, Telnet, HTTP Basic Auth, SNMP), identify network topology, analyse post-exploitation traffic
  • Incident responders — analyse PCAP files from IDS/IPS systems to reconstruct attack timelines and identify compromised hosts
  • CTF players — PCAP analysis challenges are one of the most common categories in CTF competitions; Wireshark is always the primary tool
  • Network engineers — troubleshoot connectivity issues, diagnose slow applications, verify firewall rules, analyse VoIP quality
  • Security students — learn exactly how protocols work by watching them in action at the packet level — more educational than any textbook
💡 Why Wireshark is essential for the Security+ and SOC Analyst exams CompTIA Security+ and CySA+ both test your understanding of network protocols and traffic analysis. Wireshark is the tool that makes those abstract concepts real — you can see a TCP three-way handshake, watch a DNS query resolve, and observe what an ARP poisoning attack looks like in actual packet data. Time spent in Wireshark directly translates to exam and interview performance.
2. Installing Wireshark
Install on your platform
5 minutes

Wireshark is pre-installed on Kali Linux. On other systems:

Kali Linux — already installed
# Verify Wireshark is installed wireshark --version Wireshark 4.4.2 (Git v4.4.2-0-g6dfbe92b53ed)# Update to latest sudo apt-get update && sudo apt-get install wireshark -y# Add your user to the wireshark group (to capture without sudo) sudo usermod -aG wireshark $USER # Log out and back in for this to take effect
Ubuntu / Debian
sudo apt-get install wireshark -y # During install: "Should non-superusers be able to capture packets?" → select Yes sudo usermod -aG wireshark $USER
Windows
# Download from https://www.wireshark.org/download.html # Run the installer — include WinPcap or Npcap (required for packet capture) # Npcap is the modern replacement — select it during installation # After install, launch Wireshark from the Start Menu
macOS
# Option 1 — Homebrew brew install --cask wireshark# Option 2 — Download .dmg from wireshark.org # macOS requires granting Wireshark permission to access network interfaces # System Settings → Privacy & Security → allow Wireshark
Linux capture permissions: On Linux, Wireshark needs special privileges to put a network interface into promiscuous mode. The sudo usermod -aG wireshark $USER command adds you to the wireshark group which grants this. Always log out and back in after running it — the change only takes effect in a new login session.
3. The Wireshark interface — understanding every panel

Before you can use Wireshark effectively you need to understand what each part of the interface shows you. Wireshark has three main panels plus a toolbar and filter bar.

Wireshark main interface — three-panel layout: Packet List (top), Packet Details (middle), Packet Bytes (bottom)
Wireshark — eth0 [Wireshark 4.4.2] Capture Analyse Statistics Telephony Wireless Tools Help http Apply Clear No. Time Source Destination Protocol Length Info 1 0.000000 192.168.1.5 93.184.216.34 HTTP 478 GET /index.html HTTP/1.1 2 0.001234 192.168.1.5 8.8.8.8 DNS 74 Standard query A example.com 3 0.002100 192.168.1.5 93.184.216.34 TCP 66 49152 → 80 [SYN] Seq=0 Win=65535 4 0.098432 93.184.216.34 192.168.1.5 HTTP 1514 HTTP/1.1 200 OK (text/html) 5 0.210000 192.168.1.1 Broadcast ARP 42 Who has 192.168.1.5? Tell 192.168.1.1 ▲ Packet List Panel ▼ Packet Details ▶ Frame 4: 1514 bytes on wire, 1514 bytes captured ▶ Ethernet II, Src: HewlettP_xx:xx:xx, Dst: Intel_xx:xx:xx ▶ Internet Protocol Version 4, Src: 93.184.216.34, Dst: 192.168.1.5 ▶ Transmission Control Protocol, Src Port: 80, Dst Port: 49152 ▼ Hypertext Transfer Protocol HTTP/1.1 200 OK\r\n Content-Type: text/html; charset=UTF-8\r\n Content-Length: 1256\r\n Server: ECS (dcb/7F83)\r\n ▲ Packet Bytes (Hex + ASCII) 0000 48 54 54 50 2f 31 2e 31 20 32 30 30 20 4f 4b 0d HTTP/1.1 200 OK. 0010 0a 43 6f 6e 74 65 6e 74 2d 54 79 70 65 3a 20 74 .Content-Type: t 0020 65 78 74 2f 68 74 6d 6c 3b 20 63 68 61 72 73 65 ext/html; charse 0030 74 3d 55 54 46 2d 38 0d 0a 0d 0a 3c 21 44 4f 43 t=UTF-8.... ① Packet List ② Packet Details ③ Hex Bytes
🖥
The three panels explained
  • ① Packet List (top) — one row per captured packet, colour-coded by protocol. Shows number, timestamp, source/destination IPs, protocol, length, and a summary. Click any row to select it and see its details below. Colour coding: green = HTTP, blue/grey = TCP, light blue = DNS, yellow = ARP, dark red = errors.
  • ② Packet Details (middle) — the selected packet decoded into a tree of protocol layers. Click the arrow next to each layer to expand it and see every field. This is where you find specific header values, flags, payload content, and protocol fields that filters target.
  • ③ Packet Bytes (bottom) — the raw bytes of the selected packet in hexadecimal on the left and ASCII on the right. When you click a field in the Packet Details tree, Wireshark highlights the corresponding bytes here. Useful for CTF challenges where you need to extract raw data.
Pro tip — resize the panels: Drag the dividers between panels to allocate more space where you need it. For most analysis work, give the Packet Details panel the most height. You rarely need the Hex panel unless you are doing deep forensics or CTF work.
4. Capturing your first packets
📡
Start your first capture in 60 seconds
Beginner
Step 1 — Select an interface

When Wireshark opens you see the welcome screen listing all available network interfaces with a live activity graph for each one. Select the interface that has traffic flowing — usually:

  • eth0 or ens33 — wired Ethernet on Linux
  • wlan0 or wlp2s0 — Wi-Fi on Linux
  • Ethernet — wired on Windows
  • Wi-Fi — wireless on Windows
  • en0 — primary interface on macOS

Double-click the interface to start capturing immediately, or single-click and press the blue shark-fin button.

Wireshark welcome screen — select the interface with traffic (highest activity graph) and double-click to start
Wireshark — The World's Foremost Network Protocol Analyser Capture ...using this filter: Enter a capture filter... Interface Traffic eth0 192.168.1.5 (wired) ← Select wlan0 No IP assigned lo 127.0.0.1 (loopback) any Pseudo-device to capture on all interfaces ℹ Double-click any interface to start capturing immediately. Select eth0 (or the interface with the most traffic activity).
Step 2 — Watch packets flow

Once capturing starts, packets stream into the Packet List in real time. The counter in the status bar shows packets captured. Open a browser and visit any website — you'll see DNS queries, TCP handshakes, and HTTP requests appear immediately.

Step 3 — Stop the capture

Click the red Stop button (■) in the toolbar, or press Ctrl + E. The capture freezes and you can analyse what was collected.

Step 4 — Save your capture
# File → Save As → save as .pcapng (preferred) or .pcap # .pcapng is the modern format with more metadata # .pcap is the legacy format — use it when sharing with older tools# From terminal — capture directly to file (useful in headless environments) sudo tcpdump -i eth0 -w capture.pcap # Then open the .pcap file in Wireshark: File → Open
Capture filters vs display filters

This is one of Wireshark's most important distinctions — beginners confuse them constantly:

  • Capture filters — set before you start capturing. Only matching packets are recorded. Uses BPF (Berkeley Packet Filter) syntax. Example: port 80. Less flexible but reduces storage.
  • Display filters — applied after capture to show/hide packets from an existing capture. Uses Wireshark's own filter syntax. Example: http. Far more powerful and the ones you will use 95% of the time.
Best practice: For most learning and analysis work, capture everything (no capture filter) and then use display filters to focus on what you need. Only use capture filters when you have a specific reason to limit disk usage or are capturing on a very high-traffic link.
5. Display filters — the most important Wireshark skill

A raw packet capture of any busy network produces thousands of packets in minutes. Without filters, Wireshark is a flood of data. Display filters are how you cut through the noise and find exactly what you are looking for. Mastering filters is the single skill that most improves your Wireshark effectiveness.

Wireshark display filter bar — green background confirms a valid filter; type a filter and press Enter to apply
Empty filter — shows all packets: Enter a display filter ... Apply Valid filter — green background confirms correct syntax: http.request.method == "GET" Apply Invalid syntax — red background means Wireshark doesn't understand it:
🔍
Essential display filter syntax — how it works
Must know
Basic protocol filters
http # Show only HTTP packets dns # Show only DNS packets tcp # Show only TCP packets udp # Show only UDP packets ftp # Show only FTP packets icmp # Show only ICMP (ping) packets arp # Show only ARP packets ssl # Show only SSL/TLS packets smb # Show only SMB packets (Windows file sharing) ssh # Show only SSH packets
IP address filters
# Filter by source IP ip.src == 192.168.1.5# Filter by destination IP ip.dst == 8.8.8.8# Filter by either source OR destination IP (traffic to/from a host) ip.addr == 192.168.1.5# Filter an entire subnet ip.addr == 192.168.1.0/24# Exclude an IP address !(ip.addr == 192.168.1.1)
Port filters
# Filter by destination port tcp.dstport == 80# Filter by source port tcp.srcport == 443# Filter traffic on either port 80 or 443 tcp.port == 80 || tcp.port == 443# Filter for any port above 1024 (ephemeral/user ports) tcp.dstport > 1024
Combining filters with AND, OR, NOT
# AND — both conditions must be true (use && or "and") http && ip.src == 192.168.1.5# OR — either condition (use || or "or") http || dns# NOT — exclude matching packets (use ! or "not") !arp && !icmp# Complex: HTTP traffic from a specific IP, excluding a port http && ip.src == 192.168.1.5 && !(tcp.dstport == 8080)
Content search filters
# Find packets containing a specific string anywhere in the payload frame contains "password"# Case-insensitive match frame matches "(?i)password"# Find HTTP requests containing a specific URI http.request.uri contains "/login"# Find DNS queries for a specific domain dns.qry.name contains "example.com"
Filter bar colour coding: Green background = valid filter syntax. Red background = invalid syntax — Wireshark won't apply it. Yellow background = valid syntax but Wireshark warns the result might not be what you expect. The filter autocomplete (Ctrl+Space) is invaluable when you cannot remember an exact field name.
6. Analysing common protocols

Each protocol reveals different information. Here is what to look for in the protocols you will encounter most frequently in security work.

HTTP
HTTP — reading web requests and responses
High value

HTTP traffic is unencrypted and reveals exactly what a user is browsing, what credentials they submit, and what data the server returns. In security testing this is critical for finding credentials, session tokens, and sensitive data.

# Show all HTTP traffic http# Show only HTTP GET requests http.request.method == "GET"# Show only HTTP POST requests (login forms, data submission) http.request.method == "POST"# Show only HTTP responses with status 200 OK http.response.code == 200# Find HTTP 401 Unauthorized responses (authentication required) http.response.code == 401# Find HTTP 500 Internal Server Error (potential injection points) http.response.code == 500# Show traffic to/from a specific host header http.host contains "target-site.com"# Find requests with User-Agent (useful for identifying tools/scanners) http.user_agent contains "sqlmap"
Extracting HTTP objects from a capture

Wireshark can reconstruct and export files transferred over HTTP — images, documents, executables. Go to File → Export Objects → HTTP and you will see every file that was transferred. This is used in CTF challenges and incident response to recover malware samples, stolen documents, and uploaded files.

Pentest use case: Capture traffic from a web application while a colleague uses it normally. Apply http.request.method == "POST" and look at the HTTP body of each POST request. Login credentials, API keys, session tokens, and form data are all visible in plain text over HTTP.
DNS
DNS — domain name resolution and tunnelling detection
Essential

DNS traffic reveals which domains a host is querying — effectively a log of every website visited and every service contacted. It is also one of the most abused protocols for data exfiltration and C2 communication (DNS tunnelling).

# Show all DNS traffic dns# Show only DNS queries (not responses) dns.flags.response == 0# Show only DNS responses dns.flags.response == 1# Find DNS queries for a specific domain dns.qry.name contains "google.com"# Find DNS NXDOMAIN responses (domain not found — could be C2 beaconing) dns.flags.rcode == 3# Detect DNS tunnelling — unusually long DNS query names dns.qry.name.len > 50# Find TXT record queries (often used in DNS tunnelling tools like dnscat2) dns.qry.type == 16
SOC analyst use case: DNS tunnelling tools like dnscat2 encode data inside DNS query names — they look like: aGVsbG8gd29ybGQ.evil-c2.com. The giveaways in Wireshark are: queries with unusually long subdomain labels (over 50 chars), high volume of queries to the same domain, and TXT record queries to unfamiliar domains. Filter dns.qry.name.len > 50 to find these instantly.
TCP
TCP — handshakes, flags, and connection analysis
Foundation

Understanding TCP flags in Wireshark is essential for recognising normal connections, detecting port scans, identifying failed connections, and spotting attacks like SYN floods.

# TCP flags — filter by specific flags tcp.flags.syn == 1 # SYN packets (connection initiations) tcp.flags.syn == 1 && tcp.flags.ack == 0 # Pure SYN (first step of handshake) tcp.flags.rst == 1 # RST packets (connection resets — closed ports) tcp.flags.fin == 1 # FIN packets (connection close) tcp.flags.push == 1 # PSH flag (data being pushed to application)# Find SYN scan signatures (many SYN packets to different ports) tcp.flags.syn == 1 && tcp.flags.ack == 0 && ip.src == 192.168.1.10# Find retransmissions (connection problems, network issues) tcp.analysis.retransmission# Find zero-window conditions (receiver buffer full — slow target) tcp.window_size_value == 0
FTP
FTP — cleartext credentials and file transfers
Credential risk

FTP sends usernames, passwords, and file contents in completely unencrypted plaintext. Any attacker on the same network segment can capture FTP credentials trivially. This is why FTP is banned in most security policies and why demonstrating this in a pentest always gets attention.

# Show all FTP control channel traffic ftp# Show FTP data transfers ftp-data# Find FTP credentials — USER and PASS commands are plaintext ftp.request.command == "USER" ftp.request.command == "PASS"# Find successful FTP logins (230 response = login successful) ftp.response.code == 230# Find failed FTP logins (530 response = not logged in) ftp.response.code == 530
To extract FTP credentials in one step: Apply filter ftp → right-click any FTP packet → Follow → TCP Stream. You see the entire FTP session as a conversation — the USER and PASS commands appear in plaintext, followed by the file transfer content. This is the most common credential-extraction technique demonstrated in penetration testing reports.
7. Finding credentials in cleartext traffic

One of the most impactful findings in any internal network penetration test is capturing credentials from unencrypted protocols. These filters and techniques are what professional pentesters use to find them quickly.

🔑
Filters for finding credentials across all protocols
Pentest essential
--- HTTP Basic Authentication (Base64 encoded in the header) --- http.authorization # Look for "Basic [base64string]" in the Authorization header # Decode in Wireshark: right-click → Copy → Value → paste into Decoder--- HTTP POST forms (login pages) --- http.request.method == "POST" && http.request.uri contains "login"--- FTP credentials (plaintext) --- ftp.request.command == "USER" || ftp.request.command == "PASS"--- Telnet (everything is cleartext including shell commands) --- telnet--- SMTP email credentials --- smtp.auth.username smtp.auth.password--- SNMP community strings (v1/v2c — cleartext passwords) --- snmp # Community strings like "public" and "private" visible in Packet Details--- Generic credential search across all protocols --- frame contains "password" frame contains "passwd" frame contains "username" frame contains "Authorization"
⚠️ For authorised testing only Capturing credentials from a network without written authorisation is illegal regardless of the protocol used. These techniques are demonstrated as part of authorised penetration testing engagements to show clients the risk of running unencrypted protocols on their network.
8. Following TCP streams — reading full conversations

Individual packets are fragments of conversations. "Follow TCP Stream" reconstructs the full back-and-forth exchange between two hosts into a readable format — you see exactly what was sent and received, in order, as text.

💬
How to follow a TCP stream
Most used technique
  1. Find any packet from the conversation you want to read (e.g., an HTTP request)
  2. Right-click the packet → Follow → TCP Stream
  3. A new window opens showing the full conversation — client data in red, server data in blue
  4. Use the Stream dropdown at the bottom to switch between different conversations
Follow TCP Stream window — red text is client data (sent), blue text is server response (received)
Follow TCP Stream — Stream 4 POST /login HTTP/1.1 Host: internal-app.company.com Content-Type: application/x-www-form-urlencoded Content-Length: 35 Cookie: PHPSESSID=old123 username=admin&password=Winter2026! HTTP/1.1 302 Found Location: /dashboard Set-Cookie: PHPSESSID=newSession789; HttpOnly Content-Length: 0 ■ Client → Server ■ Server → Client ← Cleartext credentials! Stream: 4 Save as plain text Close
Follow stream for other protocols
  • Follow → UDP Stream — for DNS, SNMP, DHCP conversations
  • Follow → HTTP Stream — specifically for HTTP, shows the stream in a more readable format with request/response separation
  • Follow → TLS Stream — for encrypted traffic (shows encrypted data — you need the server's private key to decrypt)
CTF tip: In PCAP analysis CTF challenges, the flag is almost always hidden in a TCP stream. Apply tcp filter, right-click the first packet → Follow TCP Stream, then use the Stream dropdown to cycle through every conversation in the capture. One of them will contain the flag in the payload.
9. Detecting attacks in packet captures

Wireshark is a primary tool for identifying attack traffic — whether you are analysing a PCAP from an IDS alert, investigating a suspected breach, or doing a CTF challenge. Here are the key signatures of the most common attacks.

🔎
Detecting Nmap port scans
Common attack pattern

An Nmap SYN scan sends SYN packets to many ports in rapid succession. In Wireshark this appears as one source IP sending SYN packets to the same destination IP on sequential or semi-random ports, with RST responses coming back for closed ports.

# Detect SYN scan signature — many SYN packets from one source tcp.flags.syn == 1 && tcp.flags.ack == 0# Add source IP to narrow down to a specific scanner tcp.flags.syn == 1 && tcp.flags.ack == 0 && ip.src == 192.168.1.10# Use Statistics → Conversations to see which hosts are talking the most # A scanner generating 1000+ connections in seconds is immediately obvious
Statistics trick: Go to Statistics → Conversations → TCP tab. Sort by "Packets". An Nmap scan shows one source IP with hundreds or thousands of conversations to the same destination — each to a different port. The scan takes seconds, making the timestamps all very close together.
Detecting ARP poisoning (man-in-the-middle)
Network attack

ARP poisoning works by flooding the network with fake ARP replies, associating the attacker's MAC address with a legitimate IP (typically the gateway). In Wireshark, ARP poisoning is visible as duplicate IP-to-MAC mappings and unusual ARP reply rates.

# Show all ARP traffic arp# Show only ARP replies (not requests) — gratuitous ARPs are suspicious arp.opcode == 2# Wireshark automatically flags duplicate IP-MAC associations # Look for the warning: "Duplicate IP address detected" # in the Info column — this is the definitive ARP poisoning signature# See which MAC addresses are claiming to own the gateway IP arp.src.proto_ipv4 == 192.168.1.1
Quick detection: In Wireshark, go to View → Coloring Rules — ARP requests from unknown sources are already highlighted in yellow/orange by default. If you see two different MAC addresses for the same IP address in consecutive ARP replies, ARP poisoning is in progress.
💥
Detecting SYN flood (DoS attack)
DoS pattern
# A SYN flood is thousands of SYN packets to one port from many source IPs tcp.flags.syn == 1 && tcp.flags.ack == 0 && ip.dst == 192.168.1.100# Key difference from a port scan: # Port scan → one source IP, many destination PORTS # SYN flood → many source IPs, one destination IP and PORT # Use Statistics → Conversations to confirm the pattern
📤
Detecting DNS data exfiltration
Advanced threat
# Suspicious DNS: high volume to same domain, long subdomains dns.qry.name.len > 50# Look for Base64-like subdomains — data exfil encoded in DNS queries # Example of suspicious DNS query for exfiltration: # aGVsbG8gd29ybGQ.secret-data.c2domain.com # The long random-looking subdomain is the encoded data# Find unusually high DNS query rate from one host # Statistics → Conversations → UDP → sort by Packets descending # A host making 100+ DNS queries per minute is anomalous
10. TShark — command-line Wireshark for automation

TShark is the terminal version of Wireshark. It shares all of Wireshark's protocol decoders and filters but runs entirely from the command line — making it perfect for headless servers, automated scripts, and processing large PCAP files efficiently.

Essential TShark commands
CLI power user
# List all available network interfaces tshark -D# Capture on eth0 for 30 seconds, save to file sudo tshark -i eth0 -a duration:30 -w capture.pcap# Read a PCAP file and display all packets tshark -r capture.pcap# Apply a display filter to a PCAP file (same syntax as Wireshark) tshark -r capture.pcap -Y "http.request.method == POST"# Extract specific fields — very powerful for scripting tshark -r capture.pcap -T fields -e ip.src -e ip.dst -e http.host# Extract HTTP POST bodies (find form submissions) tshark -r capture.pcap -Y "http.request.method == POST" -T fields -e http.file_data# Extract all DNS queries from a PCAP tshark -r capture.pcap -Y "dns.flags.response == 0" -T fields -e dns.qry.name# Count packets by protocol tshark -r capture.pcap -q -z io,phs# Show all conversations (like Statistics → Conversations in GUI) tshark -r capture.pcap -q -z conv,tcp# Extract credentials — find frames containing "password" tshark -r capture.pcap -Y 'frame contains "password"' -T fields -e frame.number -e ip.src -e ip.dst# Follow a specific TCP stream (stream index from Wireshark) tshark -r capture.pcap -q -z follow,tcp,ascii,0# Live capture and filter simultaneously — pipe into grep sudo tshark -i eth0 -Y "http.request.method == GET" -T fields -e http.request.uri | grep "login"
SOC analyst workflow: TShark is invaluable when you receive a large PCAP file (sometimes several GB) that would take minutes to load in Wireshark's GUI. Use TShark to quickly extract the specific fields you need — tshark -r huge-capture.pcap -Y "dns" -T fields -e dns.qry.name | sort | uniq -c | sort -rn | head -20 — to instantly show the top 20 most queried domains without loading the full file into the GUI.
11. Complete Wireshark filter cheatsheet
🌐 Protocol filters
http
All HTTP traffic
dns
All DNS traffic
ftp || ftp-data
FTP control and data channels
ssh
SSH traffic
smb || smb2
Windows file sharing (SMB/CIFS)
telnet
Telnet (all cleartext)
icmp
Ping and ICMP messages
arp
ARP requests and replies
ssl || tls
TLS/SSL encrypted traffic
snmp
SNMP (community strings visible in v1/v2c)
dhcp
DHCP leases and renewals
rdp
Remote Desktop Protocol
📍 IP address and host filters
ip.addr == 192.168.1.5
Traffic to or from this IP
ip.src == 192.168.1.5
Traffic sent from this IP only
ip.dst == 8.8.8.8
Traffic sent to this IP only
ip.addr == 10.0.0.0/8
All traffic within a subnet
!(ip.addr == 192.168.1.1)
Exclude a specific IP
eth.addr == aa:bb:cc:dd:ee:ff
Filter by MAC address
🔌 Port and TCP filters
tcp.port == 80
TCP port 80 (either direction)
tcp.dstport == 443
Traffic going TO port 443
tcp.srcport == 22
Traffic coming FROM port 22
tcp.flags.syn == 1 && tcp.flags.ack == 0
Pure SYN (scan detection, new connections)
tcp.flags.rst == 1
RST packets (closed ports, connection resets)
tcp.analysis.retransmission
Retransmitted packets (network issues)
tcp.window_size_value == 0
Zero window (receiver buffer full)
🌍 HTTP filters
http.request.method == "GET"
HTTP GET requests only
http.request.method == "POST"
HTTP POST requests (form submissions, logins)
http.response.code == 200
Successful HTTP responses
http.response.code == 401
Unauthorised responses (auth required)
http.response.code == 500
Server errors (potential injection points)
http.host contains "target.com"
Requests to a specific host
http.request.uri contains "/admin"
Requests to admin paths
http.authorization
HTTP Basic Auth headers (Base64 encoded credentials)
http.cookie
HTTP cookie values
🧬 DNS filters
dns.flags.response == 0
DNS queries only (no responses)
dns.flags.response == 1
DNS responses only
dns.flags.rcode == 3
NXDOMAIN — domain not found
dns.qry.name contains "evil.com"
Queries for a specific domain
dns.qry.name.len > 50
Long query names (DNS tunnelling indicator)
dns.qry.type == 16
TXT record queries (DNS tunnelling tools)
🔐 Security and credential filters
frame contains "password"
Any packet containing the string "password"
frame contains "Authorization"
Packets with Authorization headers
ftp.request.command == "PASS"
FTP password commands (cleartext)
arp.opcode == 2
ARP replies (watch for duplicates — ARP poisoning)
tcp.flags.syn==1 && tcp.flags.ack==0
Port scan detection (SYN flood / Nmap scan)
icmp.type == 8
ICMP Echo Request (ping) — network discovery
⌨ Keyboard shortcuts
Ctrl + E
Start / stop capture
Ctrl + F
Find a packet (by string, hex, or display filter)
Ctrl + G
Go to a specific packet number
Ctrl + R
Reload the current capture file
Ctrl + Shift + O
Collapse all protocol tree branches
Ctrl + Space
Autocomplete in display filter bar
Right-click → Follow → TCP Stream
Reconstruct full TCP conversation
Right-click → Apply as Filter
Create filter from selected field value in one click
Statistics → Conversations
See all hosts communicating, sorted by traffic volume
Statistics → Protocol Hierarchy
See breakdown of all protocols in the capture
12. Practice PCAP files — where to download real captures
📥
Legal PCAP files for practice
Free · Legal
  • Wireshark Sample Captureswiki.wireshark.org/SampleCaptures — the official collection. Hundreds of PCAP files covering every protocol Wireshark supports. A goldmine for learning how specific protocols look in a capture.
  • malware-traffic-analysis.netmalware-traffic-analysis.net — real malware PCAP files with write-ups explaining what happened. This is how SOC analysts and incident responders learn to identify C2 traffic, malware download patterns, and post-infection behaviour. Password to extract archives: infected.
  • CyberDefenderscyberdefenders.org — free Blue Team CTF challenges where PCAP analysis is the primary task. Each challenge includes a PCAP file, questions to answer, and a full write-up once you solve it.
  • PicoCTF — past competition archives contain dozens of PCAP analysis challenges at beginner to intermediate level. All legally downloadable from picoctf.org.
  • PacketLife.net Captures — well-organised sample captures categorised by protocol. Good for targeted protocol study.
  • Your own network — capture traffic on your home lab (Kali VM + Metasploitable 2) and analyse it. Running an Nmap scan against Metasploitable while capturing in Wireshark is the single most educational exercise for connecting tool usage to packet-level understanding.
💡 Recommended practice flow 1. Download a PCAP from malware-traffic-analysis.net → 2. Open in Wireshark → 3. Apply Statistics → Protocol Hierarchy to see what's in it → 4. Apply http filter and follow HTTP streams → 5. Apply dns filter and look for suspicious domains → 6. Check Statistics → Conversations for anomalous traffic volumes → 7. Read the site's write-up and compare your findings. This workflow covers 90% of real-world SOC PCAP analysis tasks.

⚡ Next steps — build on your Wireshark skills

  1. Download your first malware PCAP — go to malware-traffic-analysis.net, pick any exercise from 2024 or 2025, open in Wireshark and try to find the C2 domain before reading the answer. Training exercises →
  2. Pair Wireshark with Nmap — run a port scan against Metasploitable while capturing in Wireshark. Watch exactly what Nmap sends and receives at the packet level — every scan type looks different. Nmap tutorial →
  3. Add Burp Suite for web traffic — Wireshark sees all network traffic; Burp Suite focuses specifically on HTTP/HTTPS. Use them together: Wireshark for network-level visibility, Burp for deep HTTP manipulation. Burp Suite tutorial →
  4. Practise SOC analyst PCAP challenges — CyberDefenders has free browser-based labs where PCAP analysis is the core task. Completing 10 of these is better interview preparation than any certification alone. SOC Analyst career guide →
  5. Learn your Kali Linux toolkit — Wireshark, Nmap, and Burp Suite are three of the essential 20 Kali tools. Top 20 Kali Linux commands →
Frequently asked questions
What is Wireshark used for?

Wireshark is a packet analyser used for capturing and inspecting network traffic. Security professionals use it to investigate incidents, find credentials in cleartext protocols, detect attack patterns, analyse malware traffic, and troubleshoot network problems. It decodes over 3,000 protocols and is the industry-standard tool for network traffic analysis.

Is Wireshark legal to use?

Wireshark is completely legal software. Using it on networks you own or have explicit written permission to monitor is legal. Capturing traffic on someone else's network without permission is illegal under wiretapping and computer fraud laws. All practice should be done on your own home network, a local lab environment, or pre-existing PCAP files from public repositories.

What is the difference between a capture filter and a display filter?

A capture filter is set before you start capturing and only records matching packets — uses BPF syntax (e.g., port 80). A display filter is applied after capture to show or hide packets from an existing capture — uses Wireshark's more powerful filter syntax (e.g., http.request.method == "GET"). For most learning and analysis work, capture everything without a capture filter and use display filters to find what you need.

Can Wireshark decrypt HTTPS traffic?

Wireshark can decrypt TLS/HTTPS traffic if you have the server's private key or if you configure a pre-master secret log file. In modern TLS with Perfect Forward Secrecy, even the server's private key cannot decrypt captured sessions — but you can configure Firefox and Chrome to export session keys to a file that Wireshark can use to decrypt traffic in real time. This is useful for testing and debugging your own applications.

What is a PCAP file?

PCAP (Packet CAPture) is a file format for storing captured network packets. Wireshark saves captures as .pcap or .pcapng files. PCAP files can be shared and re-opened in Wireshark, TShark, or other tools like tcpdump and NetworkMiner. In incident response, IDS/IPS systems often produce PCAP files of suspicious traffic for analysts to examine. In CTF competitions, PCAP files are a standard challenge format.

What is the most useful Wireshark filter for beginners?

The most useful single filter for beginners is http — it instantly reduces thousands of packets to just the web traffic. From there, http.request.method == "POST" narrows it down to form submissions and logins. For SOC work, dns combined with sorting by the query name column quickly reveals anomalous DNS activity. For credential hunting, frame contains "password" searches the entire capture in one go.

How is Wireshark different from Nmap?

Nmap actively sends packets to probe a target and tells you what ports are open and what services are running — it is an active scanner. Wireshark passively captures and analyses all traffic passing through your network interface — it is a passive listener. They are complementary tools: Nmap discovers the attack surface, Wireshark shows you exactly what communication looks like at the packet level. Running Nmap while Wireshark is capturing is one of the best exercises for understanding how scanning actually works.

Is Wireshark in the CompTIA Security+ exam?

Yes — the Security+ SY0-701 exam includes performance-based questions that may involve reading and interpreting packet captures. Understanding TCP handshakes, reading HTTP and DNS traffic, identifying protocol anomalies, and knowing what port numbers correspond to which services are all tested. Time spent actually using Wireshark on real traffic prepares you better for these questions than reading about it in a textbook.