


How to Use BloodHound for Active Directory (AD) Attack Setup for Path Analysis
You’ve breached the perimeter. You have a low-privileged domain user shell. You run net group "Domain Admins" /domain and see 15 names. You check your user's local admin rights—nothing. You check your password spray options—locked out. You are stuck.
Also read: What is Active Directory Security?
In a engagement, this is where you might spend days manually hunting for misconfigurations. But in Active Directory pentesting, this is exactly where you deploy BloodHound.
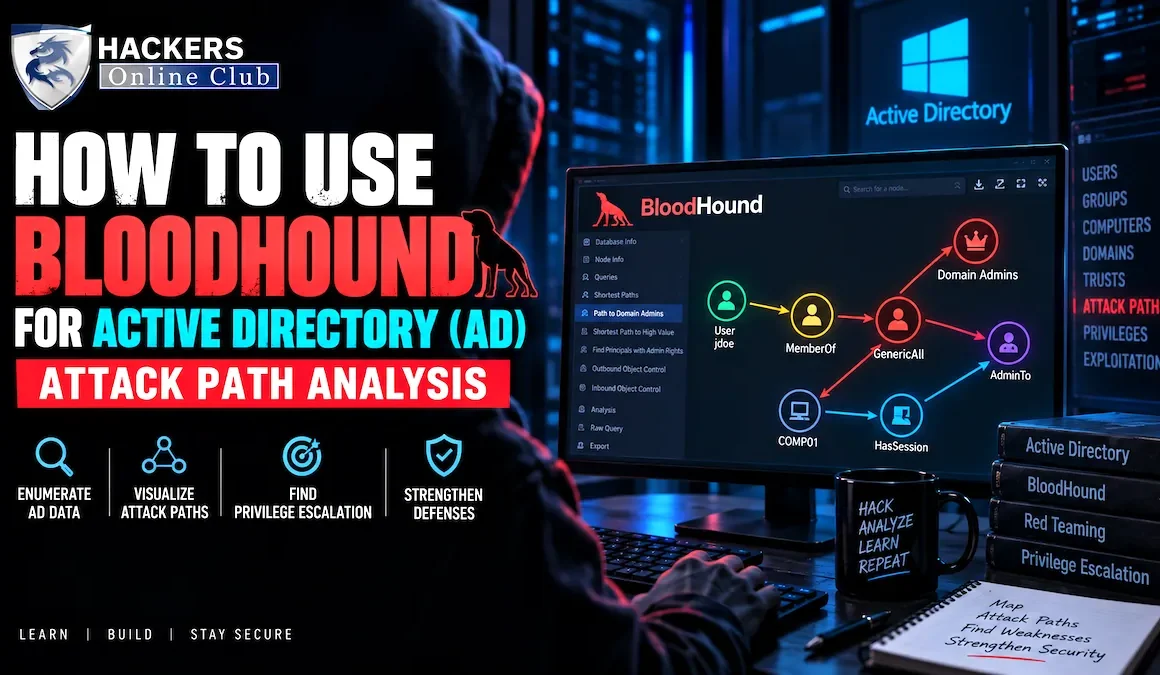
BloodHound doesn't just list AD objects; it uses graph theory to map the hidden relationships between users, groups, computers, and permissions. It will silently reveal that your low-privileged user is a member of a nested group that has WriteDacl over a service account, which has an SPN, which can be Kerberoasted to get a hash, which cracks to a password that grants local admin on a server, which has an active session from a Domain Admin.
That is the shortest path to Domain Admin. And BloodHound will draw it for you in seconds.
This guide is the definitive, tutor-led masterclass on BloodHound. We will cover the exact bloodhound active directory setup, how to collect data stealthily with SharpHound, how to read the graph like a pro, and the Cypher queries that will make you the most dangerous person in the room.
Time to Map a 10,000 User Domain: ~3-5 minutes (using 'Default' collection).
Underlying Database: Neo4j (Graph Database, not relational).
Primary Attack Vector Found: ACL Abuse & Nested Group Privilege Escalation.
OPSEC Risk Level: High (if using 'Session' or 'All' collection methods).
Must-Have Tool For: Red Teamers, Pentesters, and Blue Team Threat Hunters.
- What is BloodHound? (Graph Theory Meets AD)
- The Complete BloodHound Active Directory Setup
- Data Collection: SharpHound & OPSEC
- Navigating the BloodHound UI
- Top 5 Most Dangerous AD Attack Paths
- Writing Custom Cypher Queries
- Real-World Mistakes That Create False Positives
- First Actions for Your Next Engagement
- Frequently Asked Questions
1. What is BloodHound? (Graph Theory Meets AD)
Traditional AD tools (like PowerView or ADExplorer) query Active Directory and return flat lists: "Here are all the users. Here are all the groups." But AD is not a flat list. It is a web of nested memberships, delegated permissions, and active sessions.
BloodHound solves this by treating AD as a Graph Database.
- Nodes: The objects in AD. Users, Groups, Computers, Domains, and GPOs.
- Edges: The relationships between them.
MemberOf,AdminTo,HasSession,WriteDacl,CanRDP.
An "Attack Path" is simply a chain of edges connecting a starting Node (your compromised user) to a high-value target Node (Domain Admin). BloodHound calculates these paths using the shortestPath algorithm in Neo4j.
2. The Complete BloodHound Active Directory Setup
Setting up BloodHound correctly is critical. A broken setup means corrupted JSON imports and hours of wasted time. Here is the exact, battle-tested bloodhound active directory setup used by professionals.
🛠️ The Three Components You Need
- Neo4j Database: The engine that stores and queries the graph data.
- BloodHound UI: The visual interface used to explore the graph.
- SharpHound (or RustHound/BloodHound.py): The collector that queries AD and generates the JSON data.
Step 1: Install and Configure Neo4j
On your Kali Linux or Parrot OS attack machine, Neo4j is usually pre-installed. If not, or if you are on a custom VM:
Step 2: Launch BloodHound and Reset the Password
Launch the BloodHound GUI from your terminal. Do not run it as root, or it will create permission issues with the database files.
When the login screen appears:
- Database URL:
bolt://localhost:7687 - Username:
neo4j - Password:
neo4j(The default)
~/.config/bloodhound/neo4j) and start over.
3. Data Collection: SharpHound & OPSEC
BloodHound is only as good as the data you feed it. The collector (SharpHound) queries Domain Controllers and target machines via LDAP, RPC, and WMI.
📋 Understanding Collection Methods
| Collection Method | What It Collects | OPSEC Risk |
|---|---|---|
Default |
Groups, ACLs, Local Admins, Trusts, OUs, Sessions (via NetSessionEnum). | Medium. Standard LDAP/RPC traffic. |
Session |
Actively logged-on users (via NetWkstaUserEnum / WMI). | High. Generates heavy WMI/RPC noise on every endpoint. |
LoggedOn |
Requires registry reads (Admin rights needed). Very noisy. | Critical. Will trigger EDR alerts. |
DCOnly |
Only queries Domain Controllers. No endpoint noise. | Low. Misses local admin and session data, but very stealthy. |
All |
Everything. The kitchen sink. | Critical. Guaranteed to wake up the Blue Team. |
⚡ Running SharpHound (The Right Way)
If you are on a Windows jump box with domain credentials:
SharpHound.exe is heavily signatured by AV/EDR. If you need to run it on a Windows host, use an obfuscated version, compile it from source with modified variable names, or use RustHound / BloodHound.py from your Linux attack box, which bypasses .NET AMSI hooks entirely.
4. Navigating the BloodHound UI
Once you have your .zip file, drag and drop it into the BloodHound UI (or use the "Upload" button in the newer Community Edition). Watch the progress bar as it ingests the JSON into Neo4j.
🔍 The Search Bar is Your Best Friend
Type any object name (e.g., jsmith@CORP.LOCAL or DOMAIN ADMINS@CORP.LOCAL). Click the node. Look at the Node Info panel on the left.
- Info Tab: Shows basic properties (OS version, when the password was last set, enabled/disabled status).
- Reachability Tab: Shows if the object is reachable from your current domain (crucial for multi-forest environments).
- Admin Rights / Execution Privileges: Shows what this user can do, or who can execute code as this user.
🎯 Finding the Path
To find how to get from User A to Group B:
- Search for User A. Click the node.
- Right-click the node and select "Find Shortest Path to Domain Admins" (or select a specific target node and choose "Find Shortest Path").
- BloodHound will draw a line. Follow the edges.
5. Top 5 Most Dangerous AD Attack Paths
When you look at a BloodHound graph, you are looking for specific chains of edges. Here are the top 5 attack paths you must know how to exploit.
1. The Classic: Local Admin to Domain Admin
The Path: User → AdminTo → Computer → HasSession → Domain Admin
The Exploit: You have local admin on a server. BloodHound shows a Domain Admin is currently logged in. You dump LSASS memory using Mimikatz or Dumpert, steal the DA's NTLM hash, and pass-the-hash to the Domain Controller.
2. The ACL Abuse: WriteDacl / GenericAll
The Path: User → WriteDacl → High-Value Group
The Exploit: You don't have admin rights, but you have the WriteDacl permission over a group that is nested inside Domain Admins. You use PowerView (Add-DomainGroupMember) to add yourself to the group, and boom—you are now a Domain Admin.
3. The Delegation Trap: Unconstrained Delegation
The Path: Server A → Unconstrained Delegation → Domain
The Exploit: You have local admin on Server A, which has Unconstrained Delegation enabled. You force the Domain Controller to authenticate to Server A (via the Printer Bug or DFSRM), capture the DC's TGT, and inject it into your session.
4. The GPO Takeover
The Path: User → WriteProperty → GPO → Applies to → All Computers
The Exploit: You have permission to edit a Group Policy Object. You modify the GPO to create a new local admin account or deploy a malicious scheduled task via GPP. The next time the computers update their policies (usually every 90 minutes), you get SYSTEM access on every machine in the domain.
5. The Kerberoast Chain
The Path: User → Read → Service Account (with SPN)
The Exploit: You find a service account with an SPN. You request a TGS ticket, crack the hash offline (using Hashcat), and use the cracked password to log in as that service account, which often has elevated privileges.
6. Writing Custom Cypher Queries
The BloodHound UI is great, but the real power lies in Cypher, the query language of Neo4j. You can type custom queries into the search bar to find exactly what you need.
LIMIT 50 at the end of your queries while exploring, and only remove it when you are ready to export the final path.
7. Real-World Mistakes That Create False Positives
BloodHound is not magic. If you feed it garbage, it will draw garbage. Here are the most common mistakes that lead to false positives.
| The Mistake | Why It Happens | The Fix |
|---|---|---|
| "Ghost" Sessions | SharpHound reports a DA has a session on a server, but it's actually a stale Kerberos ticket or a service account running as the DA. | Always verify sessions manually using net session or qwinsta before attempting to dump LSASS. |
| Missing Local Admin Data | You ran SharpHound as a standard user. It cannot query the local Administrators group on remote machines via WinNT/WMI. | Run SharpHound with Domain Admin credentials, or use the DCOnly method and accept that you will miss local admin edges. |
| Ignoring Disabled Objects | BloodHound draws a path to Domain Admin through a user account that was disabled three years ago. | Filter out disabled objects in your Cypher queries: WHERE u.enabled = true. |
| Trusting "AdminTo" Blindly | BloodHound says you are a local admin on a server, but LAPS is enabled and you don't know the local password. | Check if LAPS (Local Administrator Password Solution) is in use. If it is, you need to find a way to read the LAPS password from AD first. |
⚡ First Actions for Your Next Engagement
- Build a Dedicated BloodHound VM. Don't run it on your daily driver. Create a dedicated Kali or Ubuntu VM, install Neo4j and BloodHound, and snapshot it. This ensures your database is clean for every engagement.
- Master SharpHound.py. Stop relying on the .NET SharpHound.exe. Install bloodhound via pip (pipx install bloodhound) and learn to run it from your Linux attack box. It’s stealthier, faster, and doesn't require dropping binaries on Windows targets.
- Learn 3 Custom Cypher Queries. Don't just rely on the "Find Shortest Path" button. Memorize how to query for "Users with passwords older than 1 year," "Computers without LAPS," and "Users who can read LAPS passwords." These are instant privilege escalation vectors.
- Practice on GOAD (Game of Active Directory). Download the GOAD project on GitHub. It spins up a fully vulnerable, multi-forest AD lab in VirtualBox or AWS. Run BloodHound against it until you can find every path to Domain Admin blindfolded.
8. Frequently Asked Questions
What is the best bloodhound active directory setup for pentesters?
The standard bloodhound active directory setup involves running the Neo4j graph database locally or on a dedicated attack VM, using the BloodHound UI to visualize the data, and utilizing SharpHound (or RustHound/BloodHound Python) from a Linux attack box or Windows host to collect AD data. For stealthy engagements, BloodHound Python is preferred to avoid dropping .NET executables on Windows targets.
What SharpHound collection methods should I use?
For a stealthy initial assessment, use 'Default' or 'Group,LocalAdmin,Session,Trusts'. Avoid using 'All' or 'DCOnly' with 'Session' on live production environments unless explicitly authorized, as querying active sessions via NetSessionEnum generates significant LDAP and RPC noise that EDR/SIEM tools will flag.
How do I find the shortest path to Domain Admin in BloodHound?
In the BloodHound UI, search for your compromised user (e.g., 'jsmith@CORP.LOCAL'), right-click the node, and select 'Find Shortest Path to Domain Admins'. BloodHound will use Cypher queries to calculate and draw the shortest sequence of edges (like AdminTo, MemberOf, or HasSession) connecting your user to the Domain Admins group.
What is the difference between Nodes and Edges in BloodHound?
In BloodHound's graph database, Nodes represent AD objects (Users, Computers, Groups, Domains, GPOs). Edges represent the relationships or permissions between them (e.g., 'MemberOf', 'AdminTo', 'HasSession', 'WriteDacl'). Attack paths are simply a chain of edges connecting a starting Node to a high-value target Node.
Why is SharpHound failing to collect session data?
SharpHound fails to collect session data (HasSession edges) primarily due to lack of permissions or network blocks. Reading active sessions requires Local Admin rights on the target machines or the use of DCOM/WMI/RPC. If you are running SharpHound as a standard domain user, or if firewalls block RPC (port 135) and SMB (port 445), session collection will silently fail.
Is BloodHound detectable by EDR or Antivirus?
The official SharpHound.exe is heavily signatured and will be blocked by almost all modern EDRs and AV solutions. To bypass this, pentesters use obfuscated versions, compile SharpHound from source with modified variable names, or use alternative collectors like RustHound or BloodHound.py, which do not rely on .NET and are much harder for EDRs to detect.
Written by the HOC Team at Hackers Online Club — a cybersecurity community trusted by red teamers, penetration testers, and Active Directory architects since 2010. 15+ years of practical cybersecurity guides, AD exploitation tutorials, and enterprise security resources. Learn more about HOC →